
The Ultimate S’mores Pizookie: A Delectable Deep-Dish Cookie Dream
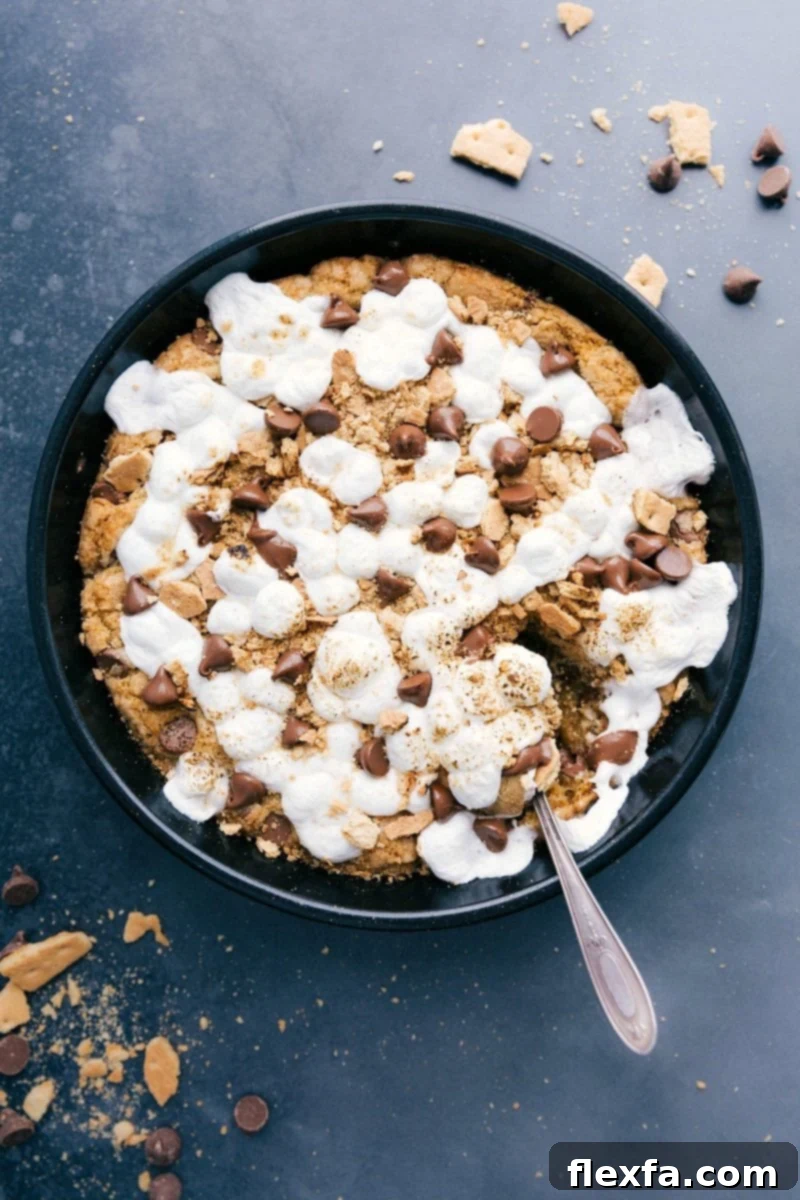
Prepare yourself for an extraordinary dessert experience with this rich, gooey, and utterly irresistible S’mores Pizookie. Imagine a warm, deep-dish cookie loaded with soft, buttery dough, crunchy crushed graham crackers, perfectly melted mini marshmallows, and pockets of luscious milk chocolate. This isn’t just a cookie; it’s a celebration of all the classic S’mores flavors transformed into an epic, shareable treat that promises to delight every palate.
What is a S’mores Pizookie?
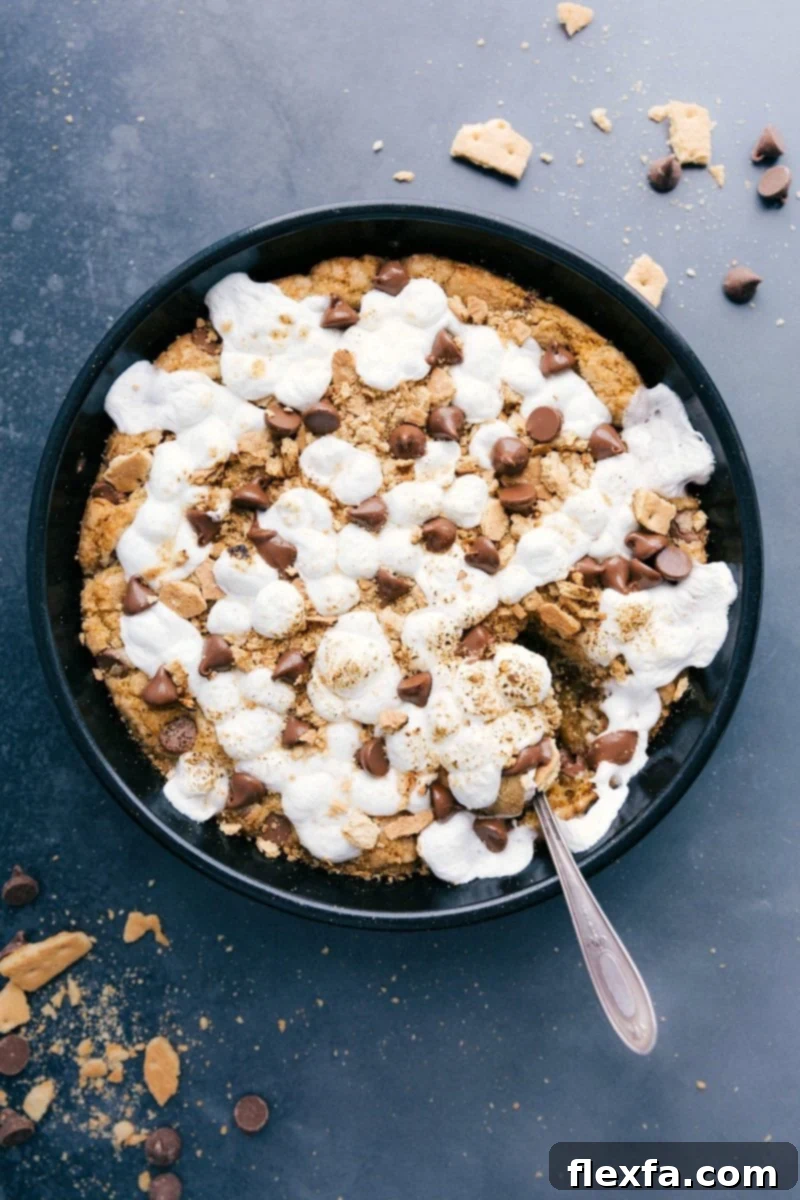
The term Pizookie® is a fun, portmanteau word combining “pizza” and “cookie” – and for good reason! It refers to a giant, oven-baked cookie that’s typically served warm, often in a skillet or pie pan, and traditionally topped with ice cream. Our original Pizookie recipe has been a tremendous success, inspiring us to explore new, exciting flavor combinations. Naturally, S’mores was at the top of our list for the next iteration. Who could resist the magical trio of soft, melting marshmallows, rich melted chocolate, and crisp, crunchy graham crackers, all nestled into a warm, buttery cookie base?
This S’mores Pizookie takes everything you adore about the campfire classic and reimagines it as a luxurious, deep-dish cookie treat. It’s perfect for gatherings, a cozy night in, or anytime you crave a dessert that’s both nostalgic and incredibly satisfying. Each bite offers a harmonious blend of chewy cookie, sweet chocolate, toasty marshmallow, and the unmistakable crunch of graham crackers, creating a symphony of textures and flavors that will transport you straight to a bonfire under the stars.
Why You’ll Love This S’mores Pizookie Recipe
- Irresistibly Gooey & Melty: This recipe delivers the perfect warm, soft, and melty experience that S’mores are famous for. The marshmallows turn golden and slightly caramelized, while the chocolate becomes wonderfully molten.
- Authentic S’mores Flavor: Every essential component of a classic S’more is present and accounted for: a rich cookie base acting as the “graham cracker,” extra crushed graham crackers for texture, abundance of chocolate, and perfectly toasted marshmallows.
- Easy to Make: Despite its impressive appearance, this pizookie is surprisingly simple to prepare, requiring minimal effort for maximum deliciousness. It’s a fantastic recipe for bakers of all skill levels.
- Perfect for Sharing: Baked in a single pan, this deep-dish cookie is ideal for serving a crowd. Just grab a spoon (or a fork!) and dig in!
- Customizable: With various chocolate options and serving suggestions, you can easily tailor this pizookie to your specific taste preferences.
S’mores Pizookie Recipe Variations to Inspire Your Creativity
While the classic S’mores Pizookie is undeniably divine, don’t hesitate to experiment with these exciting variations to put your unique spin on this incredible dessert:
- Chocolate Choices Galore: Feel free to swap out the milk chocolate chips for semi-sweet, dark chocolate, or even white chocolate chips to match your preference. For an extra decadent experience, use a combination of a few different types of chocolate chips. To achieve a truly classic S’mores dessert flavor and texture, break up traditional Hershey’s® chocolate bars into pieces and sprinkle them over the cookie for that authentic campfire taste.
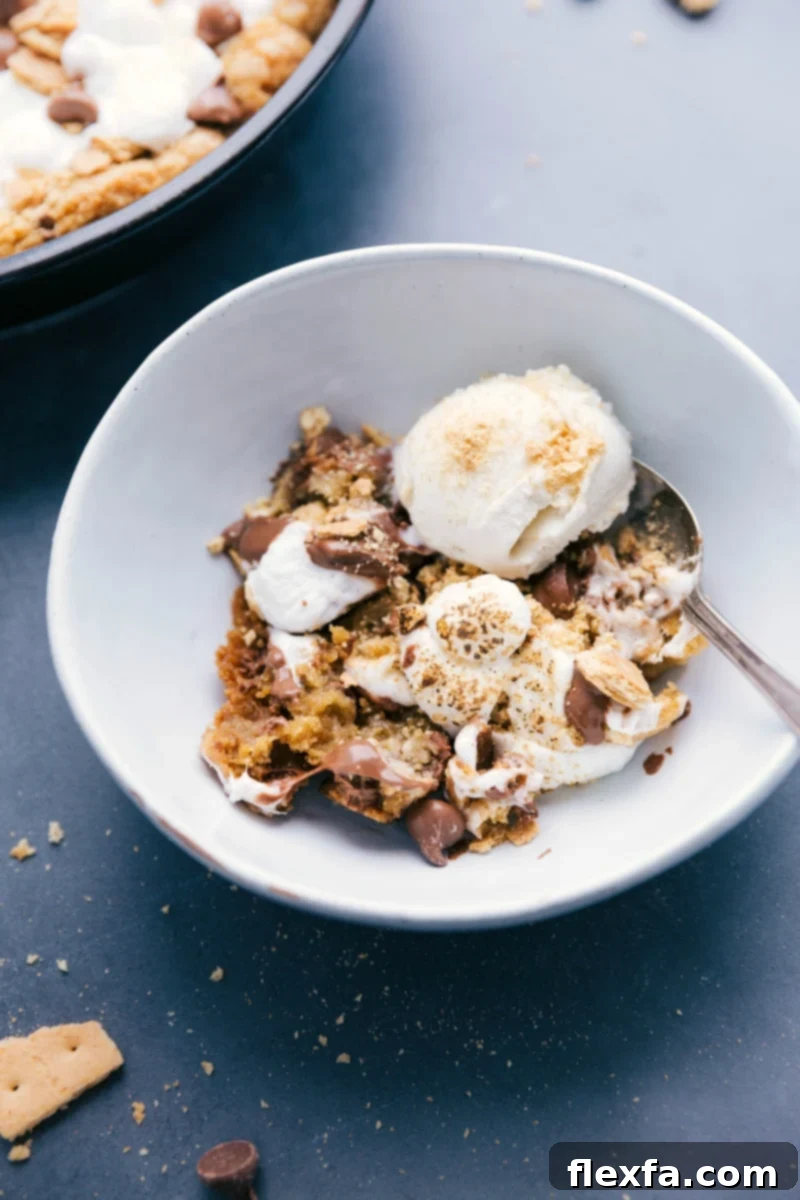
- Elevate with Toppings: Enhance the warm, fresh-from-the-oven S’mores Pizookie with a generous drizzle of warm hot fudge sauce or a scoop (or three!) of creamy vanilla bean ice cream. The combination of a hot, slightly gooey cookie with cold, melting ice cream creates a sensational contrast that is truly hard to beat. Other delicious ice cream flavors like chocolate, coffee, or even a caramel swirl would also be fantastic.
- Choose Your Baking Vessel: Instead of a standard cake or pie pan, consider baking this amazing creation in an 8-to-9-inch cast iron skillet. A cast iron skillet not only distributes heat beautifully for an evenly baked cookie but also makes for a charming, rustic presentation straight from the oven to the table.
- Achieve Golden Marshmallows: If you desire beautifully toasty, golden-brown marshmallows reminiscent of those roasted over a campfire, broil the S’mores Pizookie for about 30 seconds to 1 minute after its initial baking time. Keep a close eye on it, as marshmallows can burn quickly under the broiler. Alternatively, for precise toasting and a professional finish, you could use a kitchen torch to caramelize the top of the marshmallows right out of the oven. (You’d be surprised how often a kitchen torch comes in handy, especially if you’re a Creme Brûlée fan or enjoy adding a professional touch to desserts!)
- Add Nuts for Crunch: For an extra layer of texture and flavor, sprinkle a handful of chopped pecans or walnuts along with the graham crackers and marshmallows.
- Spiced S’mores: A pinch of cinnamon or a tiny bit of chili powder in the cookie dough can add an unexpected and delightful warmth.
Expert Tips for the Perfect S’mores Pizookie Every Time
Follow these essential tips to ensure your S’mores Pizookie turns out perfectly gooey, rich, and utterly delicious:
- Crucial Butter Cooling: After melting the butter, it is absolutely vital to let it cool down to room temperature before incorporating it into the sugars. If the butter is still warm, it will melt the sugar crystals, leading to a greasy cookie with a flat, undesirable texture. Patience here truly pays off for a perfectly chewy and rich cookie base.
- Measure Flour Accurately: Precision in measuring flour is key for optimal cookie texture. Never simply shove your measuring cup directly into the bag of flour; this compacts the flour, resulting in an excess amount. Instead, lightly spoon the flour into your measuring cup until it’s overflowing, then use a straight edge (like the back of a knife) to level off the top. This method ensures you get the exact amount needed for a perfectly moist and tender cookie, preventing a dry or dense outcome. If you’re a visual learner, watch this quick video for a demonstration on how to spoon and level flour correctly.
- Don’t Overmix the Dough: Once you add the dry ingredients to the wet, mix until they are *just* combined. Overmixing develops the gluten in the flour, which can lead to a tough and chewy cookie, rather than the desired soft and tender texture. A few streaks of flour are fine; they will disappear during baking.
- High Center for Even Baking: When spreading the dough into your baking pan, make sure the center is slightly higher than the edges. The edges tend to cook and rise more quickly, so building up the center helps ensure a more even bake throughout the entire pizookie.
- The “Underbaked” Sweet Spot: For the ultimate gooey pizookie, it’s best to remove it from the oven when the edges are golden and set, but the center still looks slightly soft and underbaked. It will continue to cook slightly from residual heat (carryover cooking) once removed, resulting in that wonderfully warm, soft, and melt-in-your-mouth texture that is characteristic of a perfect pizookie.
- Best Served Warm: These S’mores Pizookies are unequivocally at their peak when enjoyed straight from the oven, while the chocolate is molten and the marshmallows are soft and sticky. If you have leftovers, don’t fret! Simply wrap them up tightly and warm individual pieces in the microwave for 10–20 seconds until soft and gooey again.
- Proper Storage: Store any leftover S’mores Pizookie wrapped tightly with plastic wrap at room temperature for up to 2-3 days. However, a crucial note: if you’ve topped the pizookie with ice cream, it will not store well. Even if you try to scrape off the melted ice cream, the moisture will seep into the cookie, making it soggy. It’s always best to add ice cream to individual servings as you enjoy them.
Quick Baking Tip: The Butter Temperature Rule
Hot, then not! Melted butter mixes into cookie batter more evenly than cold, solid butter, providing a smoother consistency. However, if the melted butter is too hot when combined with sugar, it can melt the sugar crystals, causing your cookies to spread excessively, become thin, and turn out greasy. Always allow melted butter to cool to room temperature before using it for the best results: perfectly chewy and delicious cookies.
Craving More S’mores Treats? Explore These Delights!
If this S’mores Pizookie has ignited your passion for all things S’mores, you’ll love these other incredible recipes:
- S’mores Bars: Easy no-bake bars featuring cereal, chocolate, and marshmallows for a quick S’mores fix.
- Soft and chewy S’mores Cookies: All the flavors of S’mores packed into individual, delightful cookies.
- S’mores Cookie Bars: Gooey marshmallow, rich chocolate, and hearty oatmeal bars for a comforting treat.
- S’mores Cake: A no-bake icebox cake that layers creamy goodness with S’mores deliciousness.
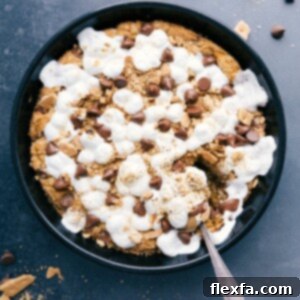
S’mores Pizookie
Chelsea Lords
15
30
45
6
servings
Video Overview
Equipment
-
9-inch round cake pan (or a cast iron skillet)
Ingredients
- Cooking spray
- 1/2 cup unsalted butter melted and cooled
- 1/2 cup granulated sugar
- 1/2 cup light brown sugar lightly packed
- 1/2 tablespoon vanilla extract
- 1 large egg
- 1-1/2 cups all-purpose flour see note 1 for proper measurement
- 1/2 teaspoon baking soda
- 1/2 teaspoon salt
- 1-1/4 cups milk chocolate chips or dark or semi-sweet chocolate for variation
- 2 full sheets graham crackers coarsely chopped
- 1 cup miniature marshmallows
Instructions
-
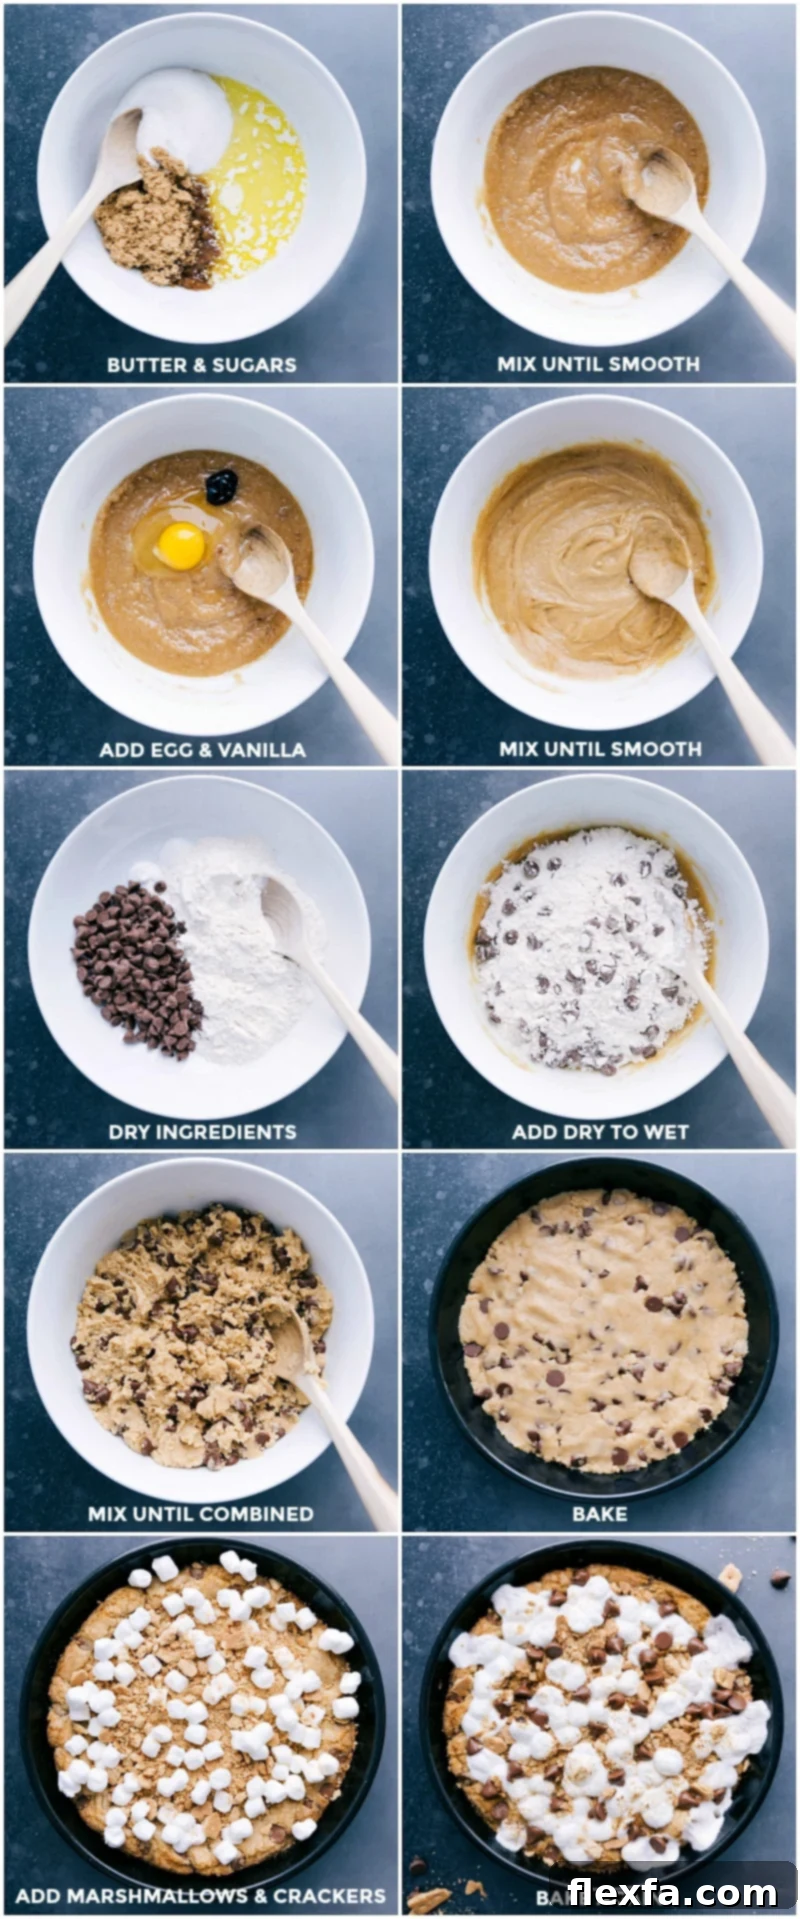
Preheat your oven to 350°F (175°C). Lightly grease or generously spray a 9-inch round cake or pie pan (or cast iron skillet) with cooking spray. Melt the butter in the microwave or a small saucepan, then set it aside to cool completely to room temperature. This crucial step prevents the butter from melting the sugars prematurely, which can lead to greasy, flat cookies.
-
In a medium-sized mixing bowl, combine the cooled melted butter, granulated sugar, and light brown sugar. Use a sturdy wooden spoon or a spatula to mix these ingredients together until they are well combined and form a cohesive mixture. Next, add the large egg and vanilla extract, mixing thoroughly until everything is fully incorporated and smooth.
-
In a separate, smaller bowl, whisk together the all-purpose flour, baking soda, and salt. Once the dry ingredients are combined, gradually add them to the wet ingredients. Stir until the dough is just combined; be careful not to overmix. The dough might initially appear dry or crumbly, but continue mixing gently, and it will come together into a soft, workable cookie dough. Finally, fold in the milk chocolate chips.
-
Transfer the prepared cookie dough into your greased cake pan. Using your hands or the back of a spoon, gently spread the dough evenly across the bottom of the pan. It’s helpful to make the center of the dough slightly higher than the edges, as the edges tend to rise more during baking, ensuring a more uniform thickness. Bake for 20 minutes in the preheated oven.
-
After 20 minutes, carefully remove the pan from the oven. Evenly sprinkle the coarsely chopped graham crackers and miniature marshmallows over the partially baked cookie. Return the pizookie to the oven and bake for another 4–7 minutes, or until the edges are beautifully golden brown and the cookie is cooked through. The center should still be wonderfully soft and look slightly underbaked (for me, this usually takes about 5 minutes), ensuring that signature gooey texture.
-
Once baked to perfection, remove the S’mores Pizookie from the oven and allow it to cool for a few minutes before serving. It is best enjoyed immediately while still warm and gooey. We highly recommend adding a few generous scoops of cold vanilla bean ice cream right in the center for the ultimate hot-and-cold dessert experience. If you anticipate not finishing the entire pizookie in one sitting, cut it into wedges (like a pie) and serve individual slices with ice cream, allowing for easier storage of the remaining portions.
Recipe Notes
Storage Best Practices. For any S’mores Pizookie leftovers, allow them to cool completely before wrapping tightly with plastic wrap or placing them in an airtight container. Store at room temperature for up to 2-3 days. Reheat individual slices in the microwave for 10-20 seconds for a fresh-baked gooey experience. However, it’s very important to note that pizookies that have been topped with ice cream will not store well at all. The moisture from melted ice cream will make the cookie soggy and unpleasant, even if you try to scrape the ice cream off. For optimal enjoyment and storage, always add ice cream to individual servings right before eating.
Nutrition Facts
Serving:
8
servings
|
Calories:
777
kcal
|
Carbohydrates:
133
g
|
Protein:
8
g
|
Fat:
25
g
|
Saturated Fat:
15
g
|
Polyunsaturated Fat:
1
g
|
Monounsaturated Fat:
5
g
|
Trans Fat:
1
g
|
Cholesterol:
80
mg
|
Sodium:
357
mg
|
Potassium:
113
mg
|
Fiber:
2
g
|
Sugar:
76
g
|
Vitamin A:
538
IU
|
Calcium:
38
mg
|
Iron:
3
mg
Nutrition information is automatically calculated and is an approximation only. It may vary depending on specific ingredients and brands used.
Love this recipe? Leave a comment below!
Your feedback and ratings help others discover delicious recipes.