
Delightful Easter Snack Mix: Your Ultimate S’mores Inspired Holiday Treat
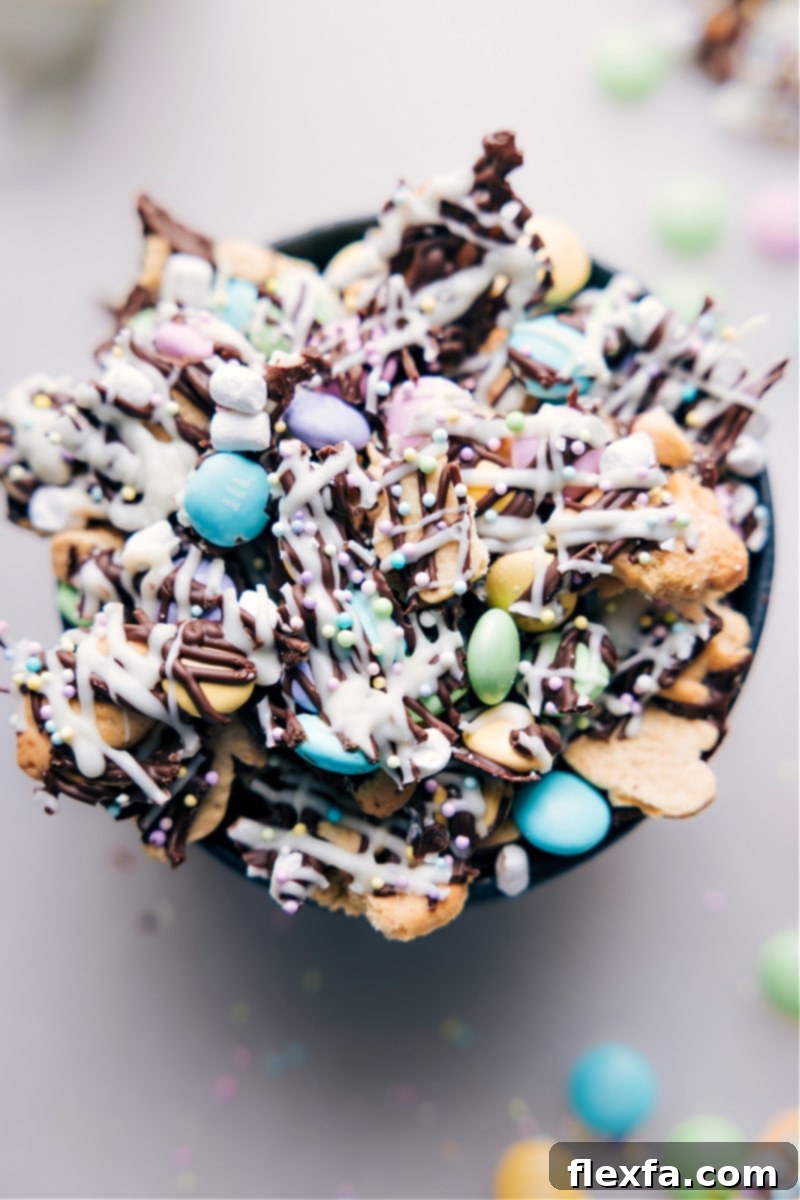
Welcome the vibrant spirit of spring and the joy of Easter with a treat that’s as delightful to look at as it is to eat! Our **Easter Snack Mix** is a wonderfully quick, S’mores-inspired confection, featuring an irresistible blend of crunchy bunny grahams, colorful M&M’s, soft marshmallows, and a luxurious white chocolate and sprinkle topping. This recipe isn’t just a snack; it’s a celebration, perfect for bringing smiles to any Easter gathering or simply indulging in a sweet moment at home.
As the days grow longer and the flowers bloom, our kitchens often fill with the aroma of festive baking. But what if you could whip up an incredibly delicious and eye-catching Easter treat without even turning on your oven? This simple snack mix is your answer, offering all the beloved flavors of a classic campfire S’mores, reimagined with a springtime twist. It’s an ideal choice for busy holiday preparations, appealing to both children and adults with its playful textures and rich, sweet taste.
Looking for more enchanting spring and Easter dessert ideas? Be sure to explore some other family favorites like Easter Popcorn, the beautifully colored Robin Egg Fudge, or the irresistibly playful Bunny Bait. Each recipe offers a unique way to add sweetness to your holiday celebrations!
A S’mores-Inspired Treat with a Springtime Twist
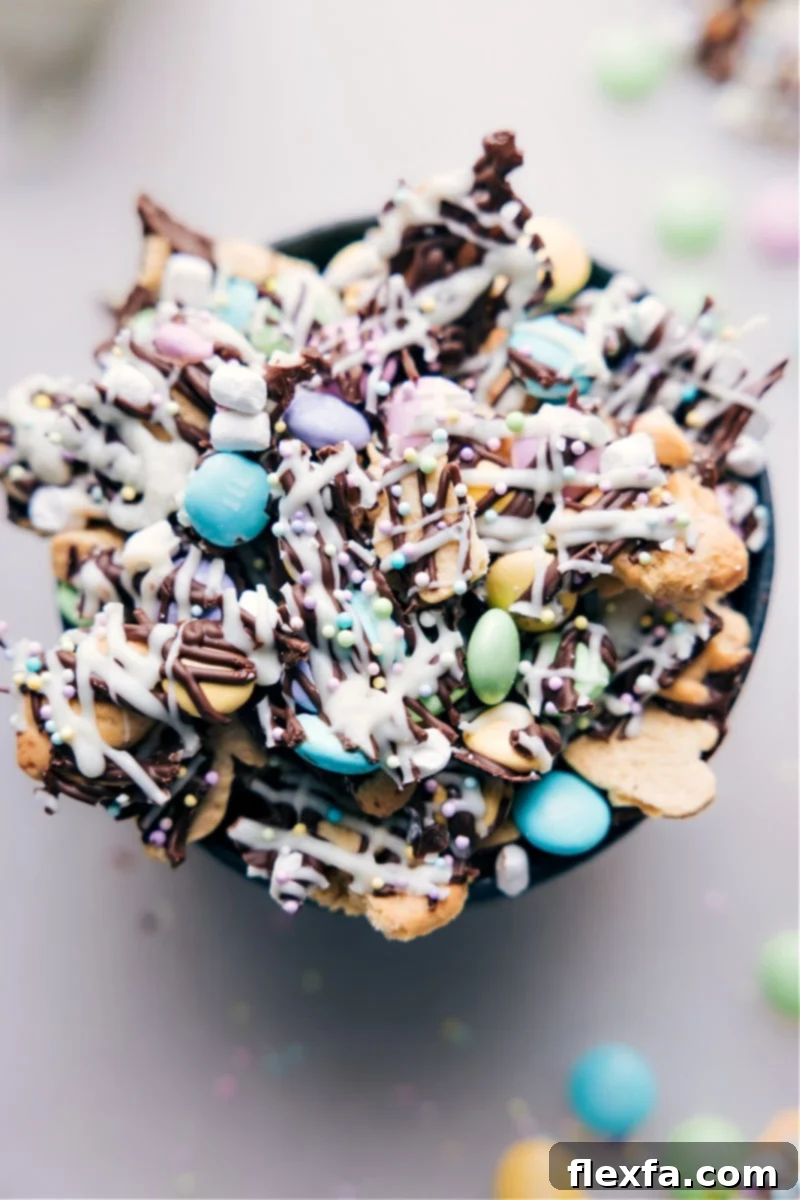
What makes S’mores so universally loved? It’s that magical combination of gooey marshmallow, melting chocolate, and crisp graham cracker. This Easter Snack Mix captures that enchanting essence and elevates it with a festive flair. It’s designed to be incredibly easy to assemble, making it a stress-free option for your holiday entertaining needs. With bunny-shaped graham crackers providing that satisfying crunch, pastel spring M&M’s adding bursts of color and chocolatey goodness, and miniature dehydrated marshmallows delivering a unique chewy texture, every bite is a delightful journey.
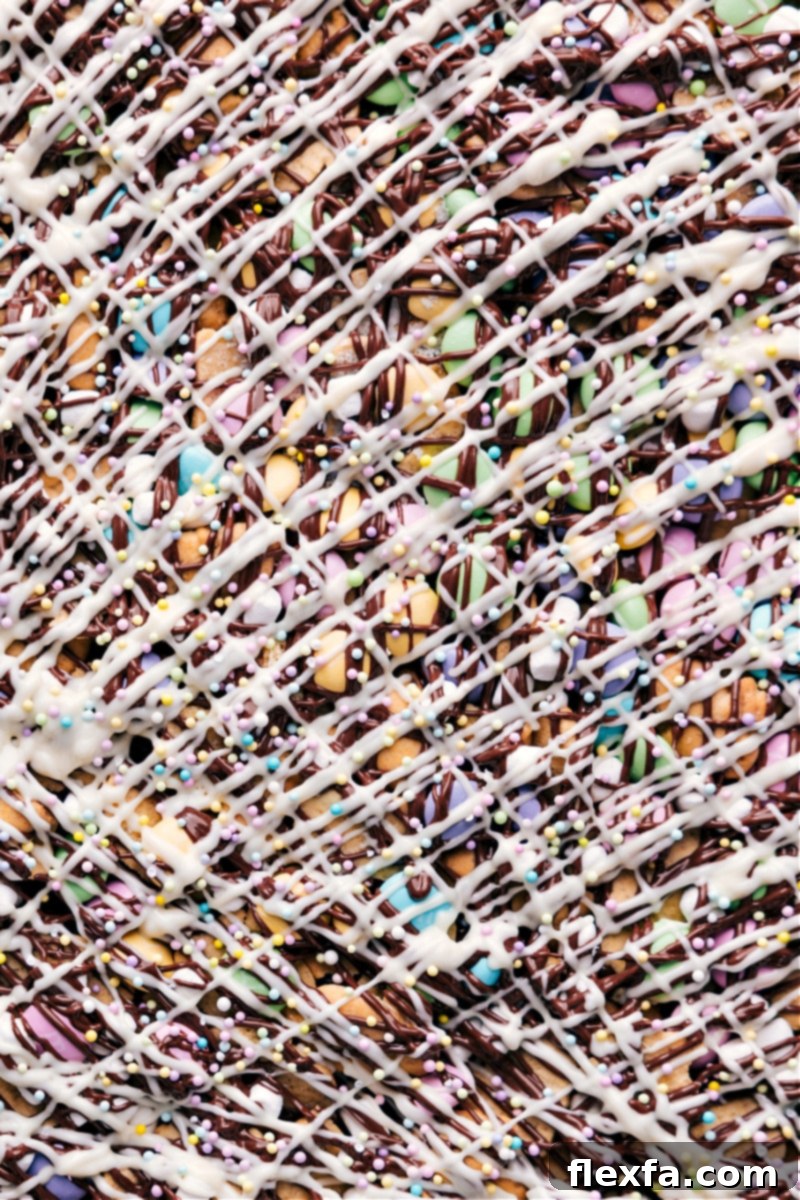
The base layer of rich milk chocolate sets the stage, bringing that familiar, comforting S’mores flavor. But the real magic happens with the final touches: a delicate drizzle of smooth white chocolate and a generous scattering of festive Easter sprinkles. These not only enhance the flavor profile but also transform the snack into a visually stunning centerpiece, bursting with the cheerful colors of spring.
This delightful confection is truly perfect for any occasion – whether you’re hosting a lively Easter brunch, preparing treats for a school party, or simply looking for a fun and easy snack to enjoy with your family at home. Its charm lies in its simplicity and irresistible taste. Plus, a major advantage of this Easter Snack Mix is its impressive shelf life; properly stored, it remains fresh and delicious for up to a week, allowing you to enjoy the taste of spring well beyond the holiday weekend.
Easter Snack Mix: Essential Ingredients for a Perfect Batch
Creating this irresistible Easter Snack Mix requires just a handful of readily available ingredients. Each component plays a crucial role in delivering that quintessential S’mores flavor with a fun, festive twist. Here’s a detailed look at what you’ll need and why each ingredient is chosen, along with potential substitutions to customize your mix:
- Milk Chocolate Chips: These are the heart of our S’mores inspiration, providing a classic, creamy sweetness that everyone loves. For those who prefer a less sweet profile, feel free to substitute with semi-sweet or dark chocolate chips. A high-quality brand like Ghirardelli or Guittard will make a noticeable difference in flavor and melt consistency.
- Bunny Grahams: These adorable, crunchy graham cracker bunnies add a playful touch and that essential graham cracker flavor and texture. If bunny grahams are hard to find, or if you want to make this treat year-round, classic teddy grahams or even broken pieces of regular graham crackers work wonderfully as a substitute.
- Spring M&M’s: The pastel hues of spring-themed M&M’s are what truly make this snack mix pop with Easter spirit. Their crisp candy shell and chocolate center add a delightful texture and extra chocolatey goodness. For other seasons or themes, simply swap them out for M&M’s in appropriate colors.
- Dehydrated Marshmallows: These tiny, crunchy marshmallows are a secret weapon in this recipe! Unlike regular marshmallows, which can become sticky or stale in a mix like this, dehydrated marshmallows maintain their crisp texture and intense marshmallow flavor, ensuring your snack mix stays delightful. Look for them in the baking aisle near hot chocolate mixes, or you can easily order them online. If you can’t source them, the mix will still be delicious without them.
- White Chocolate Chips: The white chocolate drizzle isn’t just for aesthetics; it adds another layer of creamy sweetness and creates a beautiful contrast. Using a good quality white chocolate will ensure a smooth melt and superior flavor.
- Vegetable Oil: A small amount of vegetable oil is key to achieving a perfectly smooth, drizzle-able consistency for both the milk and white chocolates. It helps thin out the melted chocolate without compromising its flavor or setting ability.
- Easter Sprinkles: While optional, a generous scattering of festive Easter sprinkles adds an undeniable burst of color and a fun, celebratory feel. Choose pastel mixes, bunny shapes, or any spring-themed sprinkles to make your snack mix truly shine. They’re the perfect finishing touch!
How To Make Easter Snack Mix: A Simple Guide
Get ready to create this visually appealing and utterly delicious Easter Snack Mix with these straightforward steps. The process is quick, easy, and yields impressive results, making it an ideal activity for any home chef, even with kids!
- Prepare Your Pan: This crucial first step ensures a smooth, mess-free experience. Line a large sheet pan (ideally 15″ x 21″) with parchment paper, a silicone baking mat, or even wax paper. This non-stick barrier is essential for easily removing the hardened snack mix and makes cleanup a breeze. Do not skip this step, as chocolate has a notorious way of adhering to bare pans!
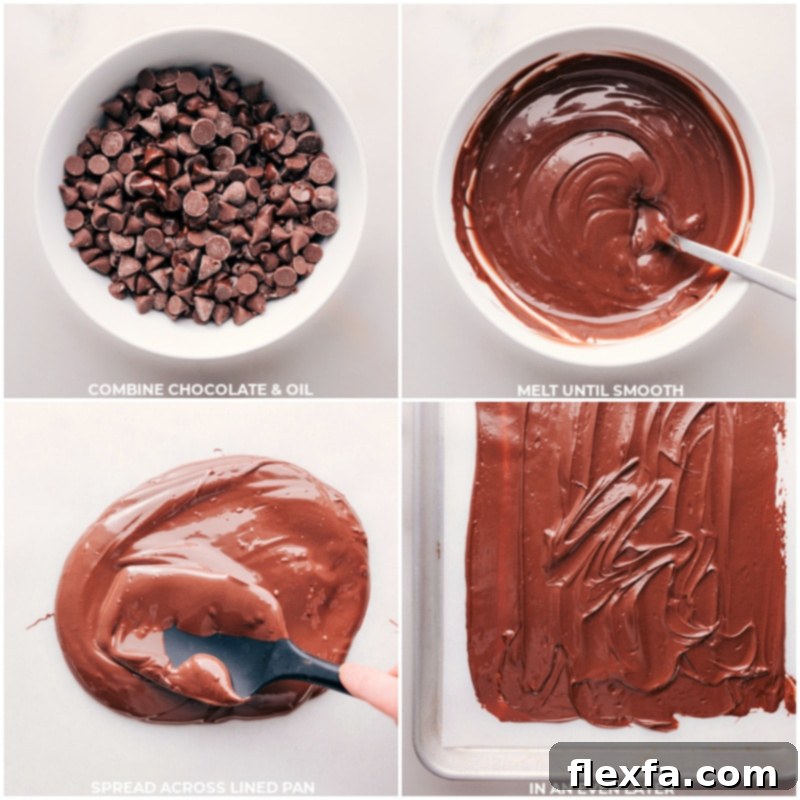
- Melt the Milk Chocolate: Combine your milk chocolate chips with 1 teaspoon of vegetable oil in a microwave-safe bowl. Begin by microwaving on high for 30 seconds, then remove and stir thoroughly. Continue microwaving in shorter 10-second bursts, stirring diligently after each interval, until the chocolate is just melted and completely smooth. The key here is not to overheat the chocolate, as this can cause it to seize or burn, leading to a grainy texture. Patience and frequent stirring are your best friends.
- Spread the Chocolate Base: Once your milk chocolate is perfectly melted, pour about three-quarters of it (a simple eyeball estimation is fine) onto your prepared sheet pan, directly onto the parchment paper. Using a silicone spatula, spread the chocolate evenly and smoothly across the parchment, aiming for a rectangle roughly 8×12 inches. A helpful tip is to hold the parchment down firmly with one hand while using your other hand to spread the chocolate away from it, creating a taut surface for an even layer.
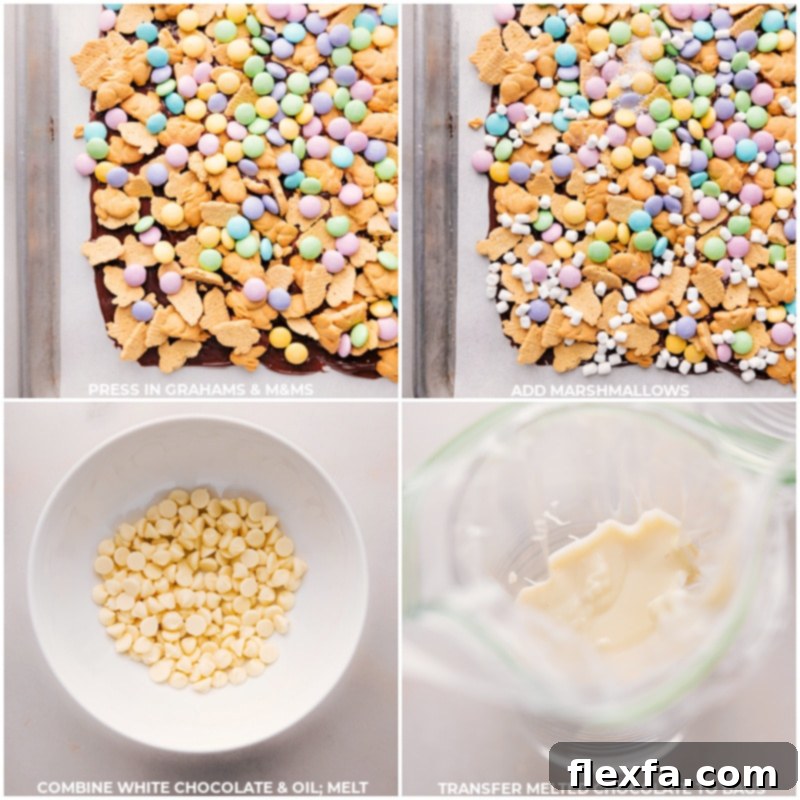
- Add the Delicious Toppings: This is where the mix truly comes alive! Work quickly before the chocolate sets. Generously scatter the bunny grahams, colorful M&M’s, and dehydrated marshmallows over the melted chocolate. Ensure that all the toppings make good contact with the chocolate base. Gently press everything down into a single, cohesive layer. This light pressure is vital to help the toppings adhere to the chocolate, preventing them from falling off once the mix hardens.
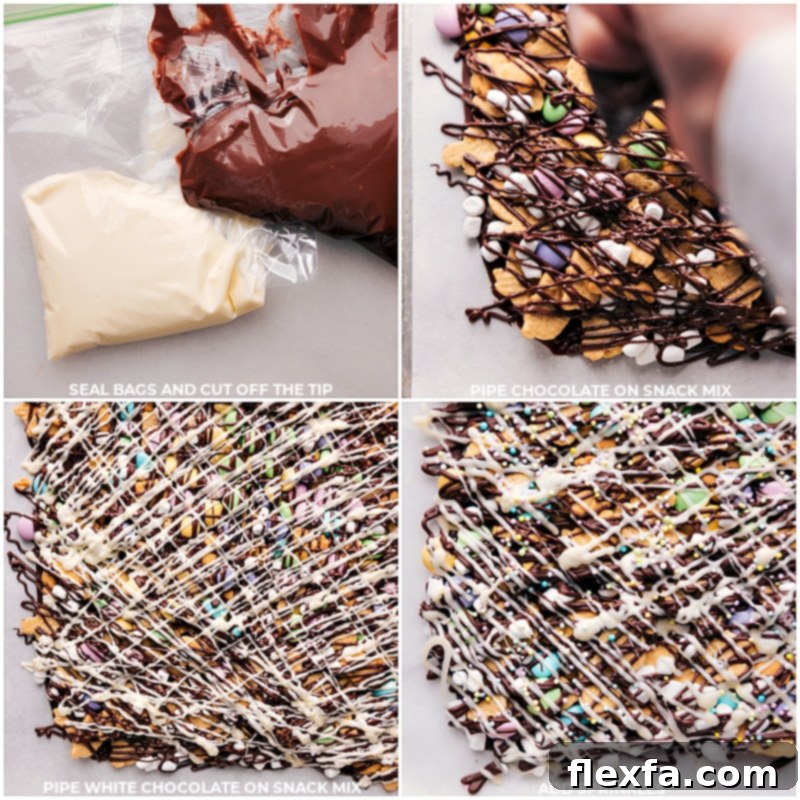
- Drizzle with Remaining Milk Chocolate: If your leftover milk chocolate in the bowl has cooled and thickened slightly, microwave it again for another 10-20 seconds until it’s perfectly fluid. Transfer this melted chocolate into a piping bag or a simple sandwich bag. Snip off a tiny corner of the bag to create a small opening, then drizzle the chocolate generously over the entire snack mix, creating an appealing visual pattern and an extra layer of chocolatey goodness.
- Add White Chocolate and Sprinkles: In a separate microwave-safe bowl, melt the white chocolate chips with the remaining 1/2 teaspoon of vegetable oil, following the same careful microwave and stirring method as before. Once smooth, transfer this white chocolate into another piping bag or sandwich bag and snip a tiny corner. Drizzle it lavishly over the snack mix. Immediately after drizzling the white chocolate, generously sprinkle your chosen Easter sprinkles over the entire surface. Applying the sprinkles while the white chocolate is still wet ensures they adhere beautifully and don’t fall off.
- Chill and Break Apart: Place the entire sheet pan into the refrigerator and chill until the snack mix has completely hardened, typically about 30 minutes to an hour. Once firm, remove from the fridge and break it into irregular clusters of varying sizes. This makes for easy snacking and a rustic, appealing presentation.
Recipe Tips for a Picture-Perfect Easter Snack Mix
Achieving a flawless and delicious Easter Snack Mix is simple when you keep a few key tips in mind. These insights will help you navigate the process like a pro and ensure your treat is a resounding success:
- Prioritize Quality Chocolate: The flavor of your snack mix is heavily dependent on the chocolate you use. Opt for good quality chocolate chips or baking bars (like Ghirardelli, Guittard, or a reputable European brand) for both the milk and white chocolate. Better chocolate melts more smoothly and offers a superior, richer flavor profile that truly elevates the entire treat.
- Master the Chocolate Melting Technique: Melting chocolate requires a gentle touch. Always heat in short bursts, typically 30 seconds initially, then 10-15 second intervals. Stir thoroughly between each burst to distribute heat and prevent scorching. Chocolate retains its shape even when melted, so stirring is essential to reveal its true consistency. If using a double boiler, ensure the water barely simmers and never touches the bottom of the chocolate bowl.
- Never Skip Lining the Pan: This cannot be stressed enough! Lining your sheet pan with parchment paper or a silicone baking mat is fundamental for easy removal and minimal cleanup. Without it, the chocolate will stick, making it difficult to break into neat clusters and potentially leaving a sticky mess.
- Work Efficiently and Quickly: Once the chocolate is melted and spread, time is of the essence. The chocolate will begin to set as it cools, so have all your toppings ready and within reach. Apply them immediately after spreading the chocolate to ensure maximum adhesion.
- Gently Press Toppings for Adhesion: After scattering your bunny grahams, M&M’s, and marshmallows, lightly but firmly press them into the still-wet chocolate. This ensures they are properly embedded and won’t detach when you break the bark into pieces. A delicate touch is all that’s needed to secure them without crushing the grahams.
- Chill Until Fully Firm: For the best results and a clean break, refrigerate the snack mix until it is completely firm. This typically takes 30-60 minutes, depending on the thickness of your chocolate layer and the temperature of your fridge. A fully chilled bark will snap cleanly, whereas a partially set one will be soft and crumble.
- Consider Creative Variations: While the S’mores theme is delightful, feel free to experiment! You could add crushed pretzels for a salty crunch, chopped nuts for extra texture, or even a sprinkle of sea salt to enhance the sweetness. Vary the M&M colors for different holidays, or use different shapes of graham crackers for year-round fun.
Easter Snack Mix Storage
Proper storage is essential to maintain the freshness, texture, and deliciousness of your Easter Snack Mix. Once you’ve broken the hardened chocolate bark into delightful clusters, follow these guidelines to keep it in peak condition:
Transfer the snack mix into an airtight container. Options include a sturdy plastic container with a secure lid or a heavy-duty resealable plastic bag. The key is to minimize air exposure, which can lead to stale ingredients or the chocolate absorbing odors from your fridge. Ensure the container is sealed tightly to lock in freshness.
It is crucial to **store the Easter Snack Mix in the refrigerator**. Due to the chocolate base, this snack mix has a tendency to soften, become sticky, or even melt if left at room temperature, especially in warmer environments. Chilling ensures the chocolate remains firm and prevents the clusters from falling apart. When stored correctly in an airtight container in the fridge, your festive Easter Snack Mix will remain wonderfully fresh and enjoyable for up to one week, allowing you to savor its delightful flavors throughout your spring celebrations.
More Fun Easter Ideas & Treats for Your Celebration:
- Four Simple Easter Treat Ideas – delightful recipes including adorable bunny bum cookies and charming bunny cinnamon rolls.
- Easter Treats with Free Printables – discover delicious treats accompanied by printable bag toppers, perfect for gifting.
- Easy Easter Cupcakes – creative cupcakes designed to resemble a cozy bird’s nest, a springtime delight.
- FREE Spring Bucket List – a fantastic resource filled with engaging and fun Easter-themed activities and ideas.
- M&M Flower Pretzels – an incredibly simple 3-ingredient treat that’s both colorful and delicious.
Easter Snack Mix Recipe
By Chelsea Lords
Celebrate spring and Easter with this fun, S’mores-inspired snack mix! It’s packed with crunchy bunny grahams, rich milk chocolate, vibrant pastel M&M’s, and mini dehydrated marshmallows, all elegantly drizzled with white chocolate and festive sprinkles.
Prep Time: 25 minutes
Chilling Time: 30 minutes
Total Time: 55 minutes
Servings: 8 servings
Equipment
- Large sheet pan (15″ x 21″)
- Parchment paper (or a silicone baking mat or wax paper)
- Microwave-safe bowls
- Silicone spatula
- Piping bags or large resealable plastic bags
Ingredients
- 2 cups milk chocolate chips (12 ounces, see Note 1 below for quality and substitutions)
- 2-1/2 cups Bunny grahams (or Teddy grahams, approximately most of a 7-ounce package)
- 1 cup pastel M&M’s
- 1/2 cup dehydrated marshmallows (optional, see Note 2 below for details)
- 1/2 cup white chocolate chips
- 1-1/2 teaspoons vegetable oil (divided)
- Easter sprinkles (optional, for festive decoration)
Instructions
- Line a large sheet pan (15″ x 21″) with parchment paper, a silicone baking mat, or wax paper. This step is crucial for preventing sticking and ensuring easy cleanup.
- In a microwave-safe bowl, combine the milk chocolate chips and 1 teaspoon of vegetable oil. Microwave on high for 30 seconds, then stir well. Continue microwaving in 10-second increments, stirring after each, until the chocolate is just melted and smooth. Be careful not to overheat.
- Pour approximately three-quarters of the melted milk chocolate onto the prepared sheet pan. Using a silicone spatula, spread it evenly into a thin, smooth layer, aiming for a rectangle roughly 8×12 inches. Hold the parchment paper down with one hand while spreading to keep it steady.
- Working quickly before the chocolate sets, evenly scatter the bunny grahams, pastel M&M’s, and dehydrated marshmallows over the melted chocolate. Gently press all the toppings into the chocolate layer to ensure they adhere well and don’t fall off later.
- If the remaining milk chocolate in your bowl has cooled and thickened, microwave it for another 10-20 seconds until it’s fluid again. Transfer this chocolate into a piping bag or a small resealable sandwich bag, then snip a tiny corner off the bag. Drizzle the chocolate generously over the snack mix.
- In a separate microwave-safe bowl, melt the white chocolate chips with the remaining 1/2 teaspoon of vegetable oil, following the same microwave and stirring method. Once smooth, transfer the white chocolate into another piping bag or sandwich bag and snip a small corner. Drizzle generously over the snack mix. Immediately scatter Easter sprinkles over the wet white chocolate, ensuring they stick.
- Refrigerate the sheet pan until the entire snack mix has completely hardened, which typically takes about 30 minutes to 1 hour. Once firm, break the mix into irregular clusters and serve. Store any leftover clusters in an airtight container in the refrigerator, as the chocolate tends to soften at room temperature.
Recipe Notes
Note 1: Chocolate Quality & Substitutions. Choosing high-quality chocolate chips (such as Ghirardelli or Guittard) will significantly enhance the flavor and texture of your snack mix. While milk chocolate is used to maintain the classic S’mores taste, you can easily substitute with semi-sweet or dark chocolate, or even a blend of different chocolates, based on your preference.
Note 2: Dehydrated Marshmallows. These provide a delightful crispy texture and deliver robust marshmallow flavor without becoming stale or squishy, unlike regular marshmallows. You can often find them near hot chocolate mixes in most grocery stores, or purchase them conveniently online. If you cannot find dehydrated marshmallows, the snack mix will still be delicious without them; it is not recommended to use regular soft marshmallows, as they do not hold up well in this recipe.
Storage: To ensure your Easter Snack Mix remains fresh and firm, store it in an airtight container in the refrigerator for up to 1 week. This prevents the chocolate from melting and maintains the integrity of the mix.
Nutrition
Serving: 1 serving | Calories: 581kcal | Carbohydrates: 79g | Protein: 3g | Fat: 29g | Saturated Fat: 17g | Polyunsaturated Fat: 1g | Monounsaturated Fat: 2g | Trans Fat: 0.1g | Cholesterol: 6mg | Sodium: 143mg | Potassium: 231mg | Fiber: 1g | Sugar: 63g | Vitamin A: 62IU | Vitamin C: 0.2mg | Calcium: 108mg | Iron: 1mg
Nutrition information is automatically calculated and should be used as an approximation only.
Enjoyed this recipe? Share your thoughts and leave a comment below!