
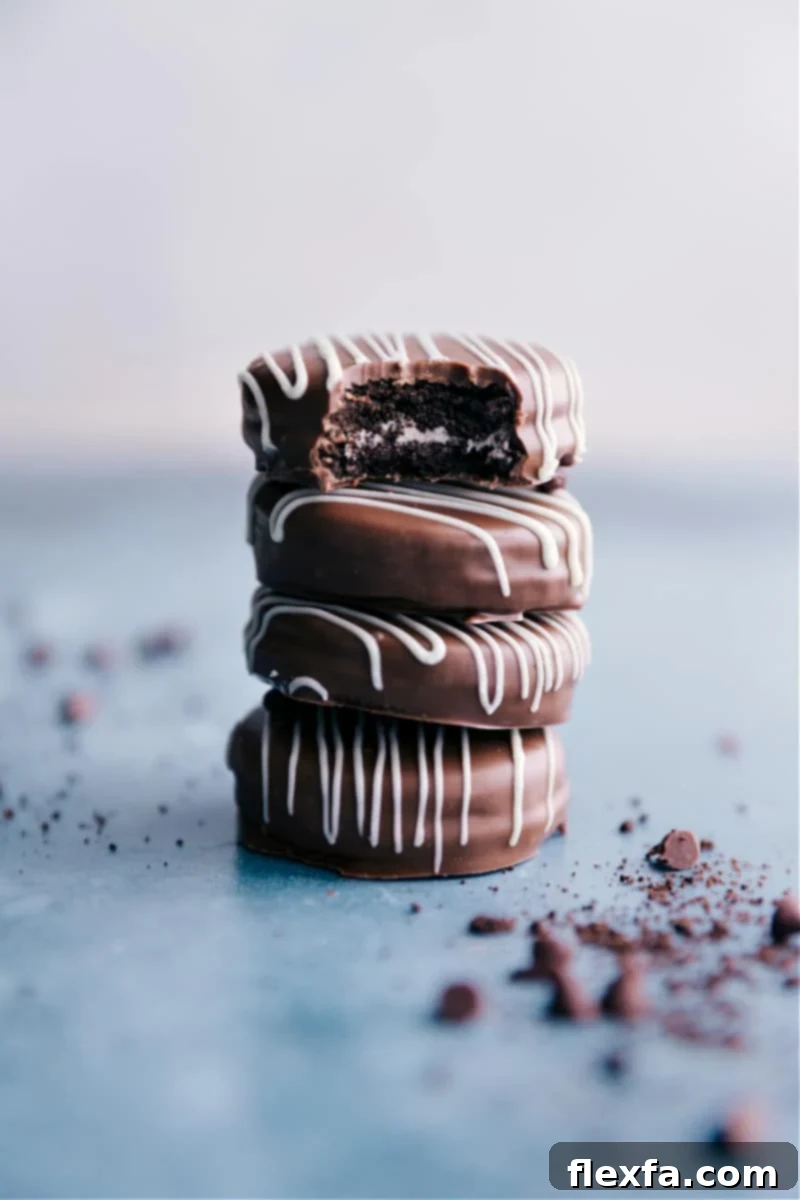
Indulge in the ultimate treat with these incredible Chocolate Covered Oreos! They are wonderfully rich, decadently chocolatey, and surprisingly simple to prepare right in your own kitchen. Elevate these delightful cookies with your favorite toppings, such as vibrant sprinkles, refreshing crushed peppermint, or even a sprinkle of extra cookie crumbs for an irresistible texture and a fun, festive touch.
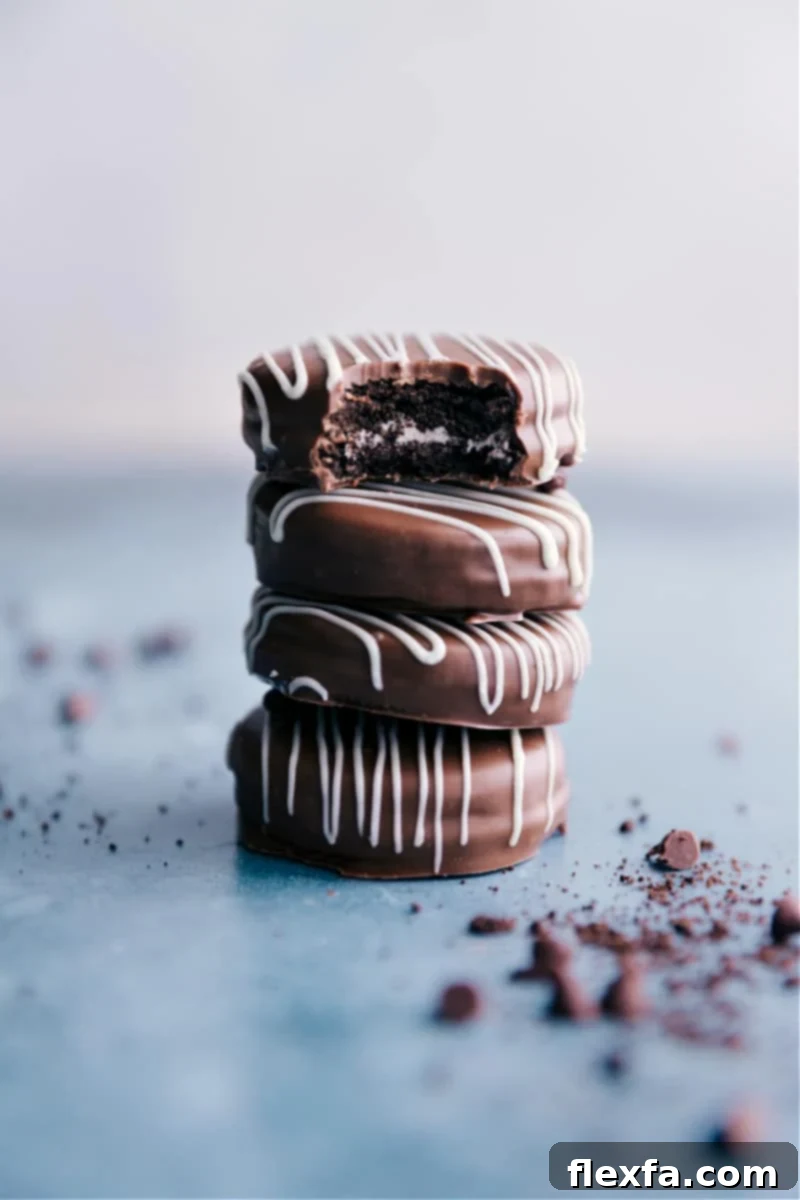

A Note From the Author
Chocolate Covered Oreos: A Timeless Treat That Always Delivers Joy!
There are some memories that just stick with you, especially those tied to special treats. For me, it was always the holiday season when a thoughtful neighbor would deliver a precious bag of chocolate-covered Oreos. I used to eagerly anticipate those delectable cookies all month long. They were, without a doubt, my absolute favorite treat as a little girl, a symbol of festive cheer and pure indulgence.
Given my deep affection for these delightful cookies, it’s almost unbelievable that it took me so many years to finally recreate them myself. The truth is, they’re incredibly simple to make, which only adds to their charm. Yet, despite their apparent ease, I’ve discovered a few invaluable tips and tricks along the way—lessons learned from my own dipping mishaps. I’m excited to share these secrets with you below, ensuring your homemade chocolate-covered Oreos turn out perfectly every single time, with a smooth, glossy finish.
These aren’t just cookies; they’re a ticket to nostalgia, a simple pleasure that never disappoints. I truly believe this is one of the best treats you can make, and I absolutely cannot wait for you to experience the magic of making and tasting them!
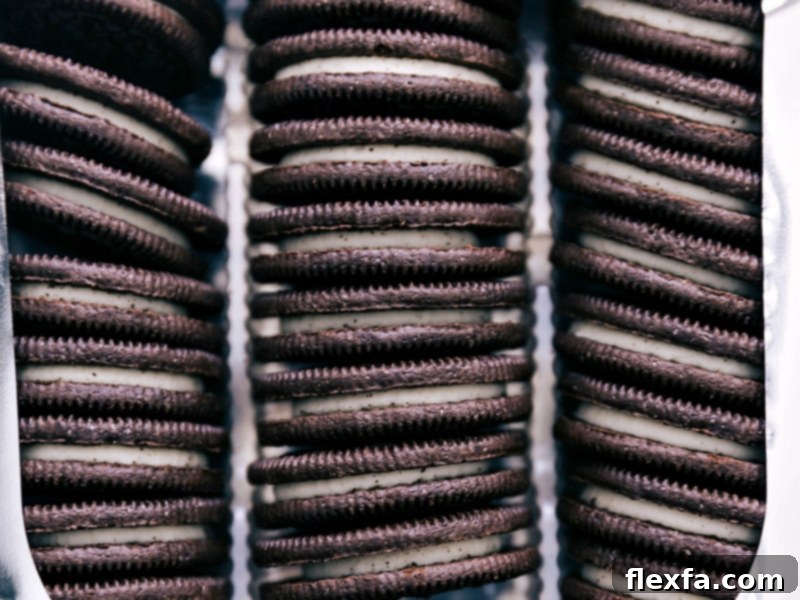
Essential Ingredients for Perfect Chocolate Covered Oreos
Crafting these delectable chocolate-covered Oreos requires just a few key ingredients. The quality of your chocolate makes a significant difference in the final taste and appearance. Here’s what you’ll need, along with some helpful tips for each:
| Ingredient | Swaps & Tips for Success |
|---|---|
| Oreo Cookies | Don’t limit yourself to just the classic! Experiment with original, Double Stuf for extra creaminess, Golden Oreos for a vanilla twist, or even seasonal flavors for a festive touch. Oreo Thins also work beautifully for a lighter bite. |
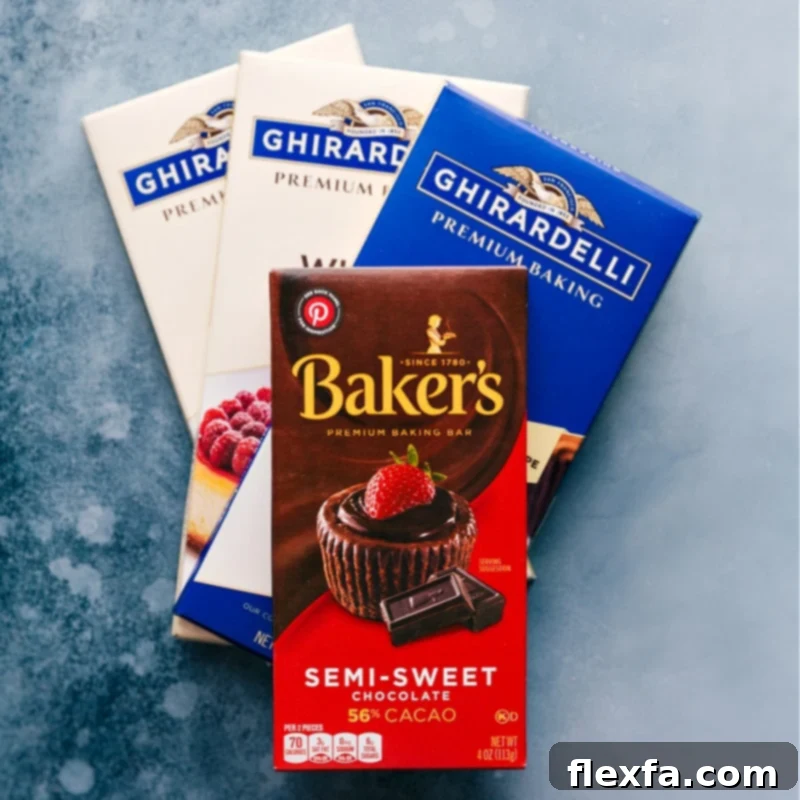
| High-Quality Melting Chocolate | This is crucial for a smooth, glossy coating. Opt for chocolate melting wafers or premium baking bars. If you only have chocolate chips, you’ll need to thin them slightly; add 1 to 2 teaspoons of a neutral oil (like coconut or vegetable oil) per 16 oz of chips to improve their melt consistency. |
| Neutral or Coconut Oil | Used specifically to help chocolate chips achieve a smooth, dippable consistency. Only add a tiny bit more if your chocolate still feels too thick after initial melting and stirring. It aids in tempering and achieving a shiny finish. |
| Decorations | This is where the fun begins! Have your chosen toppings ready before you start dipping. Always add them while the chocolate coating is still wet and tacky, ensuring they adhere perfectly. |
Choosing the right chocolate is paramount. High-quality baking bars or melting wafers (like Ghirardelli or Baker’s) contain fewer stabilizers than standard chocolate chips, resulting in a much smoother, more manageable melt and a superior finished texture. This will prevent your chocolate from becoming thick or seizing, giving you that beautiful, professional-looking coat.
Thoughtful Gift Idea!
Transform these chocolate-covered Oreos into delightful gifts! Once the rich chocolate coating has fully hardened, simply gather a few of these elegant treats and place them into a small, decorative gift bag or a charming box. Tie it with a festive ribbon, and you’ve created a wonderful, handmade present that’s perfect for friends, teachers, coworkers, neighbors, or anyone who deserves a sweet token of appreciation during the holidays or any special occasion. They look incredibly fancy but carry the heartwarming touch of a homemade creation.
Unleash Your Creativity: Decorating and Topping Ideas
One of the most enjoyable aspects of making chocolate-covered Oreos is customizing them with a myriad of toppings. This allows you to tailor them for any holiday, theme, or personal preference. Here are some fantastic ideas to get your creative juices flowing:
- Salty-Sweet Perfection: For a sophisticated contrast that truly elevates the flavor, sprinkle a few delicate Maldon sea salt flakes onto the wet chocolate. The slight crunch and salinity perfectly complement the rich sweetness.
- Double the Cookie Fun: Can you ever have too much Oreo? Crush some extra Oreo cookies into fine crumbs and sprinkle them over the freshly dipped treats for an extra layer of cookie goodness and texture. Alternatively, miniature chocolate chips add a delightful bite.
- Holiday Cheer & Festive Themes: Embrace the spirit of any season by using colored candy melts (red and green for Christmas, orange and black for Halloween) or festive sprinkles. Think specialized sprinkles for Christmas or Halloween themes to match occasions like Christmas Oreo Pops and Halloween Oreo Pops.
- Peanut Butter Lover’s Dream: After dipping your Oreos in dark or milk chocolate, melt some peanut butter chips and drizzle them artfully over the top. The combination of chocolate and peanut butter is always a winner.
- Chocolate-on-Chocolate Extravaganza: Dip your Oreos in one type of chocolate (e.g., milk chocolate), and then, while still wet, sprinkle them with mini chocolate chips for added texture and an extra boost of chocolate flavor. You can even drizzle a contrasting chocolate (like white chocolate over dark) for a marbled effect.
Remember, the key to successful decorating is to work quickly while the chocolate coating is still molten. Have all your toppings prepared and within arm’s reach before you begin dipping.
Mastering the Art: How To Make Chocolate Covered Oreos (Expert Tips for a Perfect Finish)
Making chocolate-covered Oreos is a straightforward process, but a few expert tips can make all the difference, ensuring a smooth, shiny, and professional-looking result every time. Follow these steps for flawless treats:
- Efficient Preparation is Key: Before you even start melting chocolate, line a large baking sheet with parchment paper. This non-stick surface is essential for easy transfer and prevents the chocolate from sticking. For an even faster set, place your empty, lined tray in the refrigerator for a few minutes to chill. This slight coolness will help the chocolate shell firm up more quickly, preserving its shape and shine.
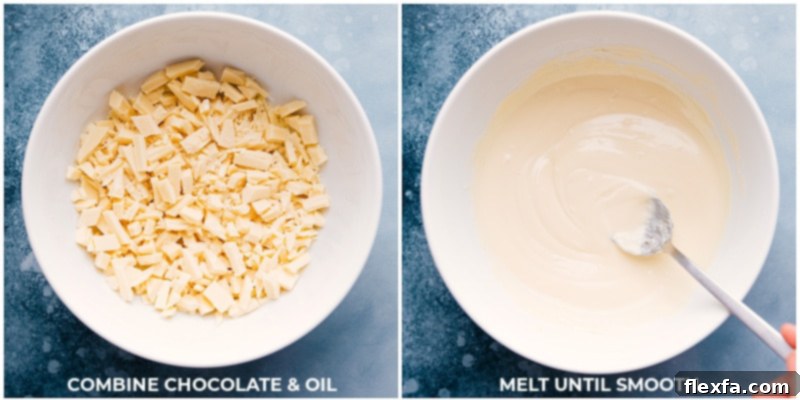
- The Art of Melting Chocolate: Patience is a virtue when melting chocolate. Heat your chocolate in short, controlled bursts in the microwave (typically 15-second intervals). The crucial part is to stop heating when the chocolate is *mostly* melted, with a few small lumps remaining. Then, remove it from the microwave and stir vigorously until the remaining chocolate melts completely and the mixture is silky smooth. This gentle, indirect melting process prevents scorching and helps maintain the chocolate’s temper, leading to a beautiful, glossy finish without streaks.
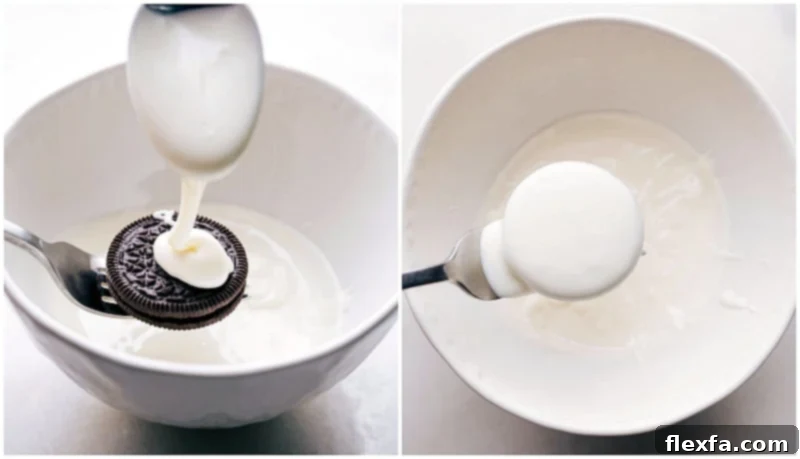
- The Perfect Dip Technique: Using a fork is the easiest and cleanest way to dip your Oreos. Place an Oreo on the tines of the fork, then submerge it fully in the melted chocolate. Gently tap the fork against the side of the bowl several times. This action helps shake off any excess chocolate, ensuring a thin, even coating. Before transferring, carefully scrape the bottom of the fork along the rim of the bowl to remove any drips. This minimizes pooling around the base of the cookie.
- Decorate Instantly for Best Adhesion: If you plan to add sprinkles, crushed peppermint, or any other toppings, do so immediately after transferring the dipped Oreo to the parchment-lined tray. The chocolate will still be wet and tacky, allowing the decorations to adhere perfectly. If you wait too long, the chocolate will begin to set, and your toppings won’t stick.
- Allow for Proper Setting: For the most beautiful, glossy finish, allow your chocolate-covered Oreos to set at room temperature. While it might be tempting to rush the process by refrigerating or freezing them, this can sometimes lead to a dull or streaky appearance on the chocolate surface due to rapid temperature changes. Patience here will be rewarded with a professional-looking shine.
By following these detailed tips, you’ll be able to create stunning chocolate-covered Oreos that taste as incredible as they look!
Proper Storage for Lasting Freshness
Ensuring your delicious chocolate-covered Oreos stay fresh and enjoyable for as long as possible is simple with these storage guidelines:
- Room Temperature Storage: Store your chocolate-covered Oreos in an airtight container at room temperature. This is ideal for maintaining the chocolate’s texture and shine. When layering the cookies, place a sheet of parchment paper or wax paper between each layer to prevent them from sticking together and to protect their delicate coating. Stored correctly, they will remain fresh and delicious for 2 to 3 weeks.
- Freezing Considerations: While freezing is technically possible, it’s generally not recommended if presentation is a priority. After thawing, the chocolate may develop a cloudy appearance (known as “bloom”) due to moisture changes, even though the taste remains unaffected. If you do freeze them, ensure they are in an airtight container to minimize moisture exposure and thaw them gradually in the refrigerator before bringing them to room temperature.
Craving More Oreo Delights? Explore These Recipes!
Desserts
Mini Oreo Cheesecakes
Desserts
Crumbl Oreo Cookies
Desserts
Oreo Fudge
Desserts
Oreo Icebox Cake

Print Recipe
Rated 5 out of 5 stars from 1 vote
Chocolate Covered Oreos
These Homemade Chocolate Covered Oreos are not only elegant but also incredibly simple to prepare. Each rich, chocolatey cookie boasts a delightful creamy center, making them a truly irresistible treat. Perfect for any occasion, they can be beautifully customized with various toppings like colorful sprinkles, crushed peppermint, or even extra cookie crumbs.
Equipment
-
Sheet pan (15″ x 10″) lined with parchment paper
Ingredients
- 1 (13.29-ounce) package Oreos any flavor (original, Double Stuf, Golden, or seasonal)
- 2 (10-ounce) packages chocolate melting wafers or high-quality baking bars, see Note 1 below for best chocolate options
- 3 teaspoons coconut oil or vegetable oil, divided (used for thinning chocolate chips if necessary, see Note 3)
- Toppings as desired such as sprinkles, crushed peppermint, additional crushed Oreos, or candy melts (see Note 2 for ideas)
Instructions
-
Begin by preparing your workspace: line a large sheet pan with parchment paper and set it aside. If you are using baking bars instead of melting wafers, coarsely chop the chocolate to help it melt more evenly and quickly. Remember to melt chocolate slowly and gently to prevent scorching. Avoid microwaving for excessive periods or too frequently, and stir the chocolate often as it melts to distribute heat. Once coated, allow the cookies to harden at room temperature for the best appearance; avoid refrigeration or freezing unless absolutely necessary (see Note 4).
-
To prevent overheating and achieve a smooth consistency, work with one bag or two bars of chocolate at a time (refer to Note 3 for detailed melting tips). In a large microwave-safe bowl, combine most of the chopped chocolate or wafers (reserving about 2 tablespoons) with 1-1/2 teaspoons of coconut or vegetable oil. Microwave for 15 seconds, then remove and stir vigorously for another 15 seconds. Continue repeating this process—15 seconds in the microwave, then 15 seconds of stirring—until the chocolate is mostly melted. At this point, add the reserved 2 tablespoons of chocolate and stir continuously until the mixture is completely smooth and free of lumps. Be patient; much of the melting will occur from the residual heat while stirring. Only microwave in short 5-second bursts if the chocolate is stubbornly not melting after a full minute of stirring.
-
Once your chocolate is perfectly melted and smooth, it’s time to dip! Place an Oreo cookie onto the tines of a fork. Submerge the Oreo completely into the melted chocolate. Gently tap the fork against the edge of the bowl a few times to encourage any excess chocolate to drip off, ensuring an even and elegant coating. Then, gently scrape the bottom of the fork along the bowl’s rim to remove any lingering drips. Carefully use a table knife or a second fork to slide the perfectly coated cookie onto your prepared parchment-lined tray.
-
Repeat this dipping process until you have coated approximately half of your cookies. Keep an eye on your melted chocolate; if it starts to thicken or harden as it cools, return it to the microwave for another 15-second burst and stir thoroughly. You might find it helpful to switch to a clean fork and knife periodically if they become too coated in cooling chocolate. You may also need to add a tiny bit more oil if the chocolate becomes too viscous. Once half the cookies are dipped, proceed to decorating if desired. If not decorating, allow the cookies to set at room temperature until the chocolate firms up completely. Repeat the entire melting and dipping process with your remaining chocolate and oil for the rest of the Oreos.
-
For beautifully decorated cookies, sprinkle your chosen toppings (sprinkles, Oreo crumbs, crushed peppermint) onto the chocolate immediately after transferring the dipped cookie to the baking tray, while the chocolate is still wet and tacky. To create a elegant chocolate drizzle, transfer some melted chocolate into a small plastic bag and snip off a tiny corner. You can drizzle this over the Oreo in one of two ways: for a drizzle that blends slightly into the cookie and creates a seamless pattern, apply it immediately after coating the Oreo in chocolate. For a more distinct, raised drizzle, wait until the base chocolate layer has fully hardened before applying. Feel free to add additional sprinkles, peppermint, or Oreo crumbs on top of your chocolate drizzle for extra flair.
Recipe Notes
Note 1: Choosing the Best Chocolate for Melting: For the absolute best results and a smooth, shiny coating, it is highly recommended to use high-quality baking bars (such as Baker’s, Lindt, or Ghirardelli) or premium melting wafers. Standard chocolate chips and baking morsels often contain stabilizers that prevent them from melting into a perfectly smooth, fluid consistency required for dipping. You have the flexibility to choose any type of chocolate – milk, semi-sweet, dark, or white – or even mix two different types for stunning dipping and decorating effects.
Note 2: Creative Topping Suggestions: The possibilities for decorating are endless! My personal favorites include colorful sprinkles, refreshing crushed peppermint (especially festive for holidays), extra crushed Oreos for a delightful crunch, and vibrant colored candy melts (which can be drizzled or used as a base coat for specific themes). Let your imagination guide you!
Note 3: The Secret to Perfectly Melted Chocolate: The fundamental key to preventing your chocolate from scorching, seizing, or developing an unappetizing appearance is to melt it in very short, controlled bursts and to stir it frequently and vigorously. A significant amount of the melting process will occur outside the microwave, solely from the residual heat as you stir. The goal is never to make the chocolate hot, but rather just warm enough to melt gradually into a smooth, liquid state. Once it’s perfectly melted, it should ideally be at room temperature for the best dipping consistency and a stable finish.
Note 4: Understanding Chocolate Tempering for a Glossy Finish: Melting chocolate slowly and stirring it constantly helps to keep the cocoa butter from separating and rising to the surface. This technique is crucial for achieving a beautiful, glossy finish and preventing unsightly streaks on your chocolate coating. Additionally, adding a small amount of unmelted chocolate towards the end of the melting process helps to cool the overall mixture and “seeds” it. This seeding promotes the formation of the correct chocolate crystals, which are essential for a smooth, hard shell that sets perfectly at room temperature. This careful process ensures your chocolate looks professional, doesn’t melt easily in your hands, and maintains its satisfying snap.
Storage Recommendations: For optimal freshness and to maintain the beautiful appearance of your chocolate-covered Oreos, store them at room temperature in an airtight container. To prevent sticking and preserve their delicate coating, arrange the cookies in single layers, separated by sheets of wax paper or parchment paper. When stored correctly, these delightful treats will stay fresh and delicious for 2 to 3 weeks.
Nutrition Facts
Serving Size: 1 Oreo
Calories: 128kcal
Carbohydrates: 1g
Protein: 0.1g
Fat: 0.8g
Fiber: 0.1g
Sugar: 0.9g
Nutrition information is automatically calculated and should be used as an approximation. Actual values may vary based on ingredients and preparation methods.
Love this recipe? Share your thoughts below!
Your feedback helps us create more delicious content!
Chocolate Covered Oreos: Frequently Asked Questions
The secret to a smooth, even chocolate coating lies in two key techniques. Firstly, after dipping an Oreo, gently tap the fork against the side of your bowl. This action helps shake off any excess chocolate, preventing thick, uneven patches. Secondly, stir your bowl of melted chocolate frequently while you work. This keeps the chocolate at an even temperature and consistency, minimizing lumps and ensuring a fluid, easy-to-dip texture for every cookie.
Absolutely not! While molds can be used for specific shapes, you do not need any special equipment or molds to create beautiful chocolate-covered Oreos. This recipe relies on a simple, traditional dipping method. All you need is a microwave-safe bowl for melting your chocolate, a regular kitchen fork for dipping, and a sheet pan lined with parchment paper for the cookies to set on. This method is incredibly easy and yields perfectly round, professionally-looking results every time.
Chocolate seizing (becoming thick and clumpy) usually occurs due to two main reasons: overheating or exposure to moisture. To avoid overheating, melt chocolate in short bursts (15-20 seconds) in the microwave, stirring vigorously between each burst. Stop heating when the chocolate is mostly melted and let residual heat finish the job. For moisture, ensure your bowl and utensils are completely dry, as even a tiny drop of water can cause chocolate to seize. Using high-quality melting wafers or baking bars (as opposed to chocolate chips) can also help, as they are formulated to melt more smoothly.
Yes, absolutely! This recipe is incredibly versatile. Feel free to experiment with any flavor of Oreo cookie you love. Original, Double Stuf, Golden Oreos, mint, peanut butter, or even seasonal varieties like gingerbread or red velvet will all taste fantastic once coated in chocolate. Each flavor offers a unique twist, allowing you to customize your chocolate-covered Oreos for any occasion or personal preference.
When stored properly in an airtight container at room temperature, your homemade chocolate-covered Oreos will remain fresh and delicious for approximately 2 to 3 weeks. Layering them with parchment or wax paper will prevent them from sticking together. While they can be frozen, this might cause a slight “bloom” (cloudy appearance) on the chocolate after thawing, though their taste will still be good.