
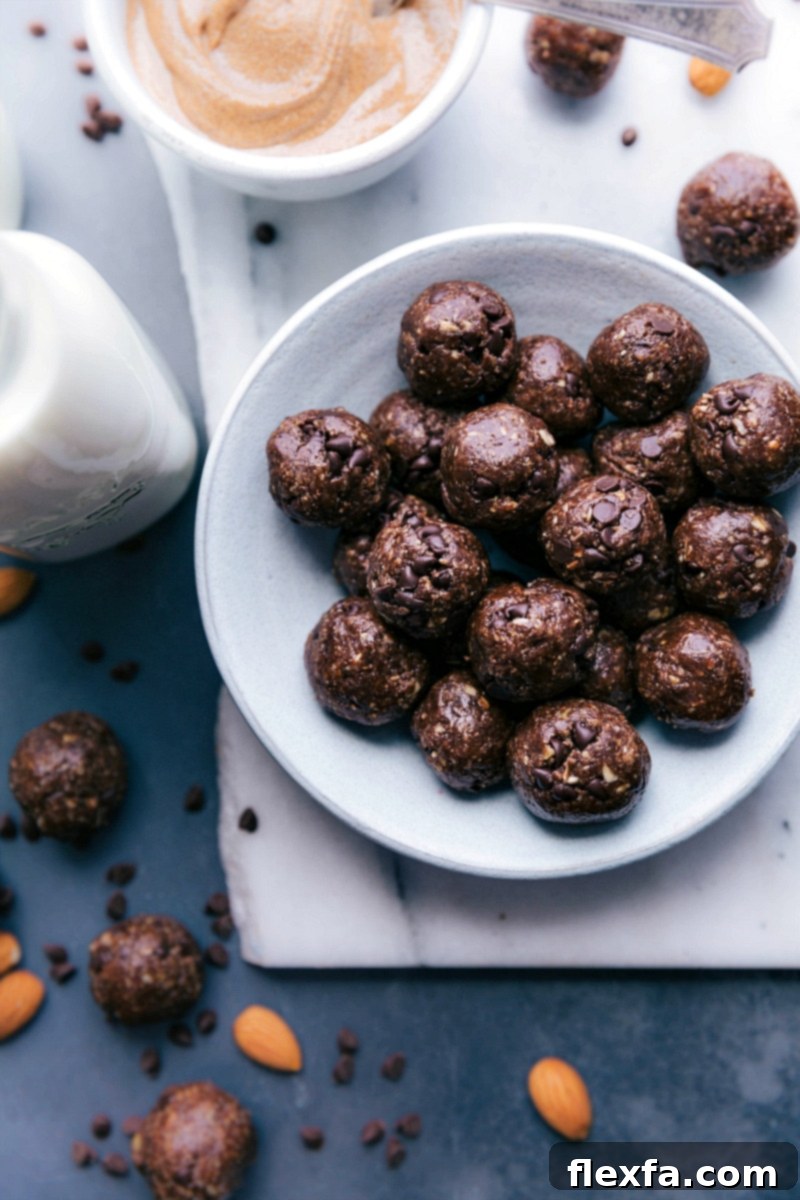
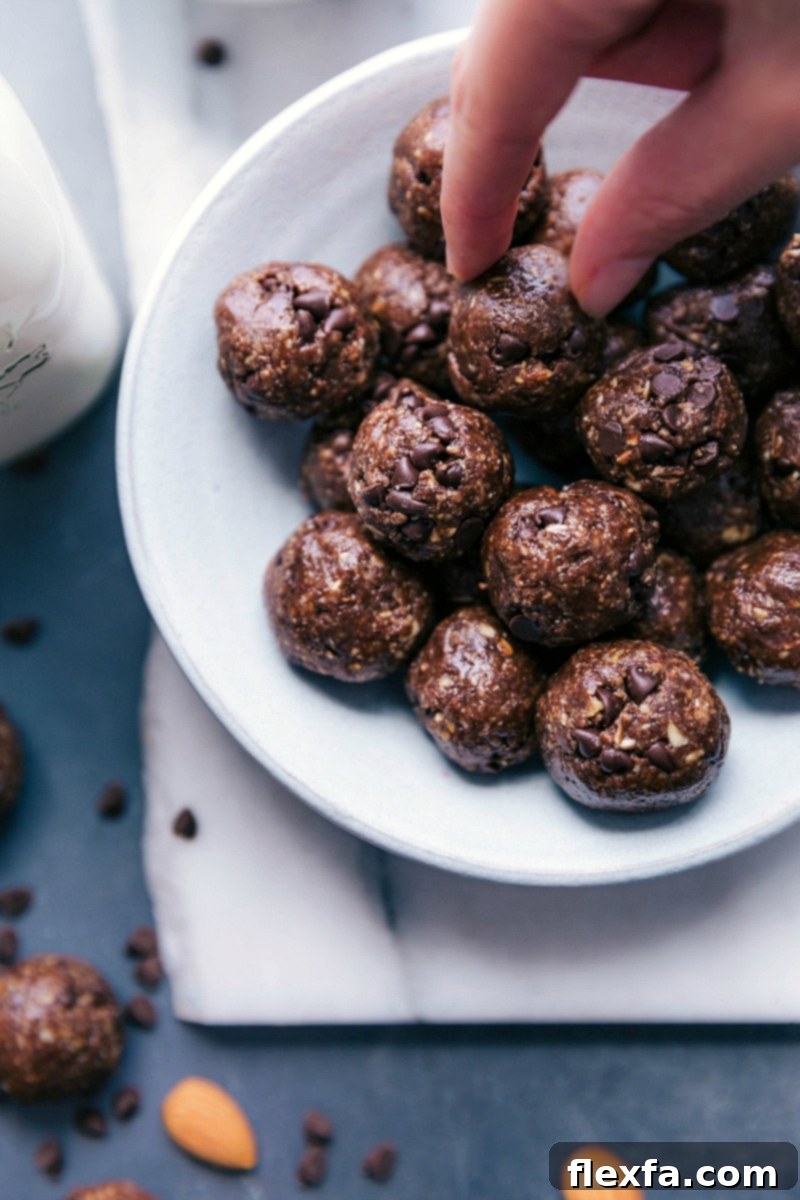
Chocolate Protein Balls are your ultimate solution for a quick, nutritious, and incredibly satisfying snack. Rich, delightfully nutty, and effortlessly prepared with only a handful of wholesome ingredients, these energy bites are so good, you’ll want them as a staple in your weekly routine.
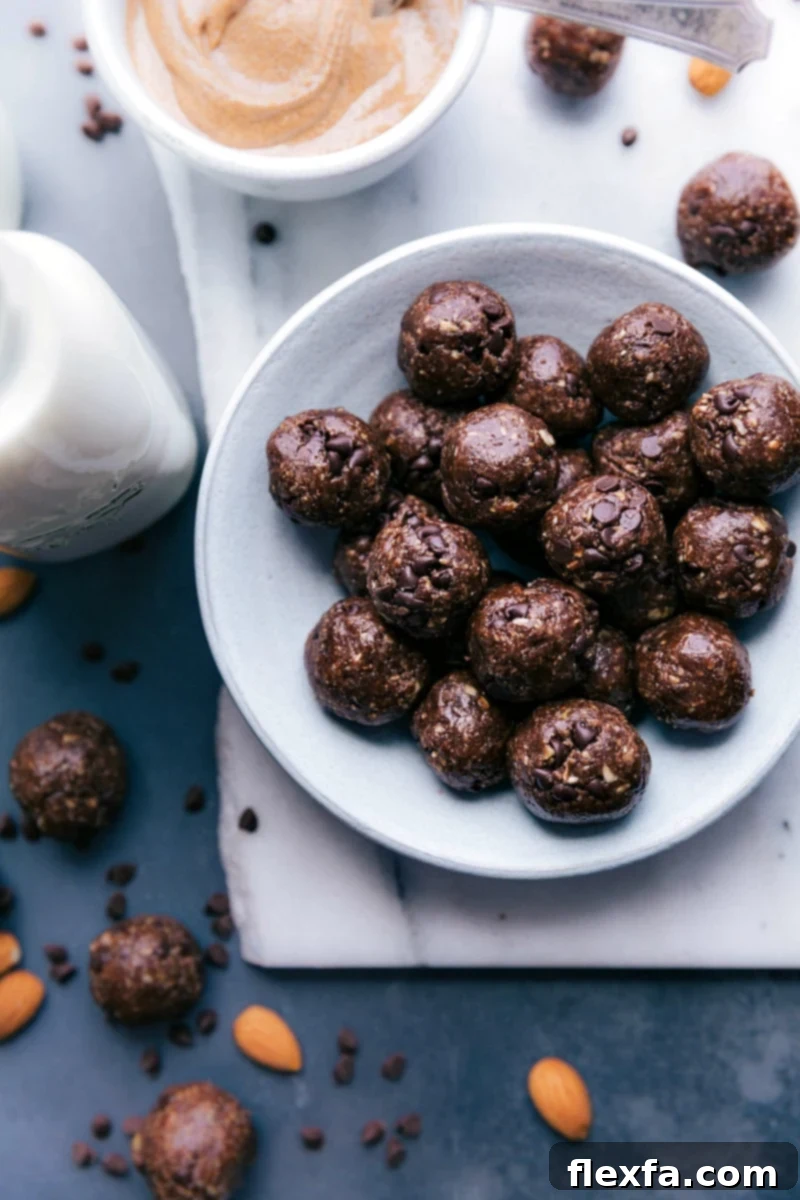
Mastering Homemade Chocolate Protein Balls
These homemade chocolate protein balls quickly became my absolute favorite energy bite recipe. Each bite delivers a harmonious blend of cocoa and roasted almond flavors, perfectly balanced with a subtle hint of sweetness that satisfies without overwhelming. Beyond their incredible taste, what truly sets these protein balls apart is their simplicity; they are quick to prepare, requiring only 7 core ingredients, making them ideal for busy schedules and health-conscious individuals alike.
In a recipe with such a minimal ingredient list, the quality and type of each component can profoundly impact the final taste and texture. Below, I’ll share my top recommendations for ingredients to use in these easy chocolate protein balls, along with tips to ensure your homemade treats turn out perfectly every time.
Why Opt for Homemade Energy Bites?
In a world full of processed snacks, crafting your own energy bites offers numerous advantages. Homemade chocolate protein balls allow you complete control over what goes into your body, ensuring you’re fueling up with clean, nutrient-dense ingredients without any hidden sugars, artificial flavors, or preservatives. They are also incredibly cost-effective compared to store-bought options and provide a fresh, wholesome alternative for satisfying cravings or boosting energy.
Whether you’re an athlete seeking a post-workout recovery snack, a busy professional needing a quick desk-side bite, a student looking for a brain-boosting treat, or a parent searching for a healthy option for the kids, these chocolate protein balls fit the bill. They provide sustained energy, thanks to a balanced mix of healthy fats, complex carbohydrates, and protein, helping you stay full and focused throughout your day.
The Essential Chocolate Protein Balls Ingredients
Let’s dive deeper into the key components that give these protein balls their irresistible flavor and perfect texture. Choosing quality ingredients is paramount for a superior outcome.
- Oats (Old-Fashioned or Quick Oats): Oats serve as the base for these energy bites, providing complex carbohydrates for sustained energy and a good source of fiber. This fiber helps with digestion and contributes to a feeling of fullness. Both old-fashioned (rolled) oats and quick oats work wonderfully here, just ensure they are plain and unflavored. When blended, they create a flour-like consistency that helps bind the balls.
- Almonds (Dry Roasted & Lightly Salted): Roasted almonds are crucial for depth of flavor. Their rich, toasty notes elevate the overall profile of these protein balls. Using dry roasted and lightly salted almonds not only saves you the step of toasting them yourself but also adds a subtle savory contrast to the sweetness, enhancing the “cocoa-roasted almond” taste. Almonds are packed with healthy fats, protein, and essential vitamins and minerals, contributing to the snack’s nutritional power.
- Almond Butter: More than just a binder, quality almond butter is a cornerstone of this recipe. It contributes healthy monounsaturated fats, protein, and a creamy texture that holds the balls together. Its rich flavor complements the almonds and cocoa beautifully. Choosing the right almond butter is key, and we’ll discuss this in more detail below.
- Honey: As a natural sweetener, honey provides the perfect hint of sweetness while also acting as a sticky binder for the mixture. It offers a healthier alternative to refined sugars and adds a unique, subtle floral note. The amount of honey can be adjusted slightly based on your preference and the consistency of your almond butter.
- Dutch Process Cocoa Powder: This is the secret ingredient for a truly rich, deep chocolate flavor. Unlike natural cocoa powder, Dutch process cocoa is treated with an alkali to neutralize its acidity, resulting in a darker color and a smoother, less bitter, and more intensely chocolatey taste. This makes a significant difference in the overall experience of these protein balls, which we’ll explore further below.
- Vanilla Extract: A touch of vanilla extract is a fantastic flavor enhancer, complementing the chocolate and almond notes. While not strictly essential if you don’t have it on hand, it definitely adds an extra layer of aromatic complexity that makes these treats even more enjoyable.
- Miniature Dark Chocolate Chips: These tiny morsels are not just for added texture and bursts of chocolatey goodness, but they also boost the nutritional profile. While milk or semi-sweet chips can be used, dark chocolate is preferred for its health benefits. Dark chocolate is a potent source of antioxidants and contains essential fats that your body needs, making your indulgence a little healthier. (Source: Healthline).
Quick Tip for Flavor Balance
If you opt for unsalted almonds and unsalted almond butter, a critical step is to incorporate a pinch or two of fine sea salt into your chocolate protein ball mixture. This small addition will significantly enhance all the other flavors, bringing out the sweetness of the honey and the richness of the cocoa.
The Importance of a Quality Almond Butter
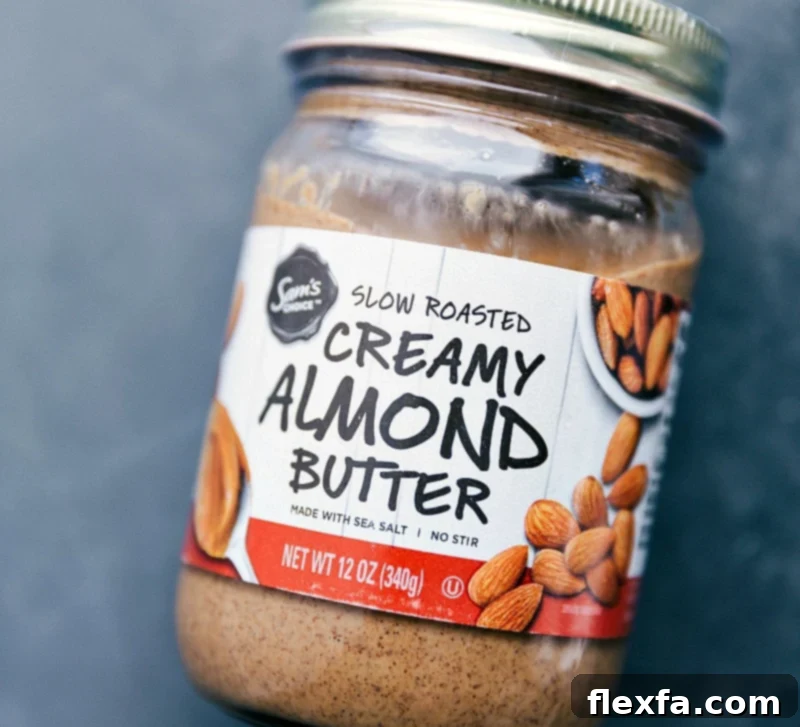
The almond butter in this recipe is not merely a binding agent; it’s a primary contributor to both flavor and texture. It infuses these protein balls with essential healthy fats and additional protein. When selecting almond butter, I cannot stress enough the importance of choosing a slow-roasted and lightly salted variety that you genuinely enjoy eating straight from the jar. The quality and flavor of your almond butter will directly translate to the quality and flavor of your finished protein balls.
If the almond butter itself doesn’t taste great on its own, it won’t magically improve when mixed with other ingredients. Look for brands that have a smooth, creamy texture and a rich, authentic almond flavor, often with minimal ingredients (just almonds and perhaps a touch of salt). Natural almond butter, where the oil separates, is perfectly fine; just be sure to stir it thoroughly before measuring to achieve a consistent texture.
Dutch Process Cocoa Powder: The Secret to Deep Chocolate Flavor
Among all the ingredients, the choice of cocoa powder is arguably what truly elevates these chocolate protein balls from good to exceptional. I strongly recommend using Dutch-process cocoa powder over natural or plain cocoa powder. The Dutch process involves treating cocoa beans with an alkalizing agent, which neutralizes their natural acidity. This results in a darker cocoa powder with a milder, less bitter, and significantly more robust and intensely deep chocolate flavor.
Regular, natural cocoa powder, being acidic, might react with baking soda (though not relevant in this no-bake recipe) and often produces a lighter color and a slightly drier, more astringent taste. For the rich, decadent chocolate experience we’re aiming for with these protein balls, Dutch-process cocoa is the clear winner. Many grocery stores readily stock Dutch-process cocoa; for instance, Hershey’s “Special Dark”® cocoa powder is a widely available and excellent Dutch-process option.
Preparing the Dry Ingredients: Blending the Almonds & Oats
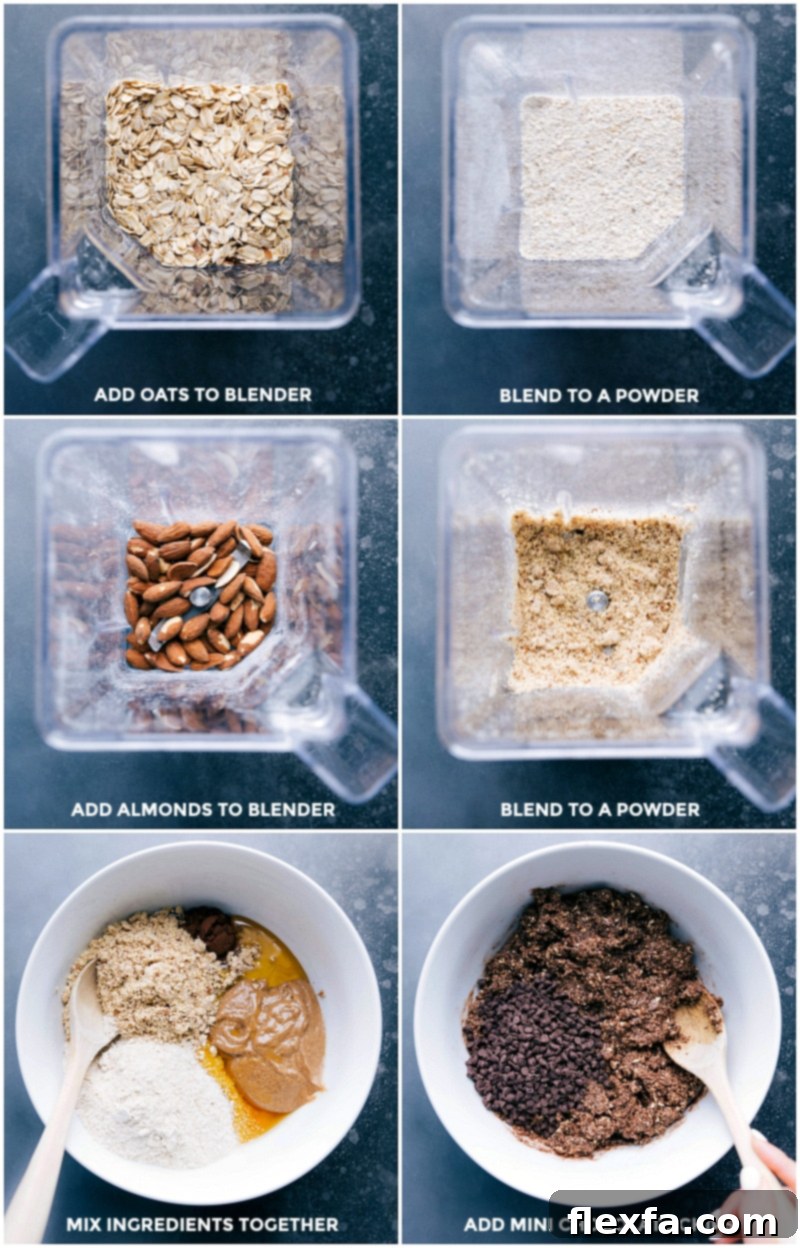
For achieving the perfect texture in your chocolate protein balls, a high-powered blender or a food processor is indispensable. These tools are crucial for quickly pulsing the oats and almonds into a fine, flour-like consistency.
When blending the oats, process them until they resemble fine flour. You might need to pause and stir the contents of the blender or food processor to ensure all oats are evenly processed. The same meticulous approach applies to the almonds. Pulse them carefully until they achieve a flour-like texture. It’s vital to avoid over-processing the almonds; blending them for too long will release their oils and cause them to turn into almond butter, which is not what we want for this recipe. The goal is a fine powder that integrates smoothly into the mixture. I find that pulsing a few times, stirring, then pulsing again, and repeating, works best until the desired flour-like consistency is formed. Remember, the measurements for oats and almonds should be taken *before* blending.
Mixing the Chocolate Protein Balls Dough
Once your dry ingredients are perfectly prepped, it’s time to combine everything. The dough for these chocolate protein balls is naturally quite thick and sticky, which is exactly what you want for perfectly formed, satisfying bites. For ease and efficiency in mixing all the ingredients together, I highly recommend using an electric hand mixer. A stand mixer equipped with a paddle attachment also works exceptionally well and will make light work of the dense mixture.
If you’re mixing by hand with a sturdy wooden spoon, be prepared for a bit of an arm workout! You might find it necessary to set aside the spoon after initial mixing and use your hands to knead the mixture. This tactile approach ensures all the ingredients are thoroughly combined and the dough comes together nicely, achieving that uniform, pliable texture essential for rolling.
Quick Tip for Perfect Consistency
The precise amount of honey or oats required can vary slightly depending on the exact brands of almond butter and oats you use, as well as the humidity in your kitchen. If your mixture feels too wet and sticky to roll, gradually add a bit more of the ground oats (in tablespoon increments) until it reaches a manageable consistency. Conversely, if the dough seems too dry and crumbly, slowly incorporate additional almond butter or honey (in teaspoon increments) until it comes together beautifully. Trust your instincts and adjust as needed to achieve that perfect rollable dough.
Customization and Variations: Make Them Your Own
One of the joys of making homemade energy bites is the endless potential for customization! While this recipe for chocolate protein balls is perfect as is, feel free to experiment with different additions and substitutions to match your taste preferences or dietary needs.
- Add-ins for Texture and Flavor:
- Coconut Flakes: Add 1/4 to 1/2 cup of unsweetened shredded coconut for extra flavor and chewiness.
- Seeds: Boost nutrition with chia seeds, flax seeds, or hemp seeds (1-2 tablespoons). They also help with binding.
- Other Nuts: Swap almonds for walnuts, pecans, or cashews for a different nutty profile.
- Spices: A pinch of cinnamon, nutmeg, or even a tiny dash of cayenne pepper (for a Mexican hot chocolate kick) can add a delightful twist.
- Sweetener Alternatives: If you prefer, maple syrup can be used instead of honey, maintaining a natural sweetness and binding quality. Adjust amounts to taste.
- Nut Butter Swaps: Peanut butter or cashew butter can replace almond butter for different flavor profiles. Be mindful of consistency, as some nut butters are thicker or thinner than others.
- Vegan Option: To make these chocolate protein balls fully vegan, simply substitute honey with an equal amount of maple syrup or agave nectar.
- Gluten-Free: This recipe is naturally gluten-free as long as you use certified gluten-free oats.
Storage and Shelf Life
Proper storage is key to maintaining the freshness and deliciousness of your chocolate protein balls. Once rolled, these energy bites are quite versatile in how they can be stored:
- Room Temperature: If you plan to consume them within a few days, you can store them in an airtight container at room temperature. However, they may soften slightly, especially in warmer climates.
- Refrigerator: For optimal freshness and firmness, store your chocolate protein balls in an airtight container in the refrigerator for up to 1-2 weeks. Chilling also helps them set even further, making them less sticky and easier to handle.
- Freezer: For longer-term storage, these protein balls freeze beautifully. Place them in a single layer on a baking sheet lined with parchment paper and freeze until firm. Once frozen, transfer them to a freezer-safe airtight bag or container for up to 2-3 months. Thaw at room temperature for a few minutes or enjoy them straight from the freezer for a firmer, chewier treat.
More Wholesome Snack Ideas to Try
If you loved these chocolate protein balls, you’ll surely enjoy exploring other wholesome and easy-to-make snack recipes. Expand your repertoire of healthy treats with these delightful options:
- No Bake Energy Bites: Another fantastic, customizable, and quick snack.
- Easy homemade Granola: Perfect for breakfast or snacking, endlessly adaptable.
- Chocolate Granola Bars with coconut oil: A richer, more decadent granola experience.
- No bake Healthy Breakfast Cookies: A delicious way to start your day or have a guilt-free treat.
- Healthy Blueberry Muffins: For those who love a baked good, these are lightened up and flavorful.
Print Recipe
Chocolate Protein Balls
Equipment
-
Blender or food processor
-
Hand mixer
Ingredients
- 1-1/2 cups old-fashioned oats or quick oats
- 1/2 cup dry roasted and lightly salted almonds
- 1-1/2 tablespoons Dutch process cocoa powder
- 1 teaspoon vanilla extract
- 6 tablespoons honey divided
- 1/2 cup almond butter
- 1/2 cup mini chocolate chips
Instructions
-
1. In a high-powered blender or food processor, add the old-fashioned or quick oats. Pulse or blend until they achieve a fine flour-like consistency. You may need to pause and stir the contents to ensure all oats are fully blended. Transfer the blended oats to a large mixing bowl.
-
2. Next, add the dry roasted and lightly salted almonds to the same processor or blender. Pulse until they also resemble a fine flour. Be careful not to blend for too long, as the almonds can quickly turn into almond butter. Add these ground almonds to the bowl with the ground oats. Note: The initial measurements of oats and almonds should be taken before blending; there’s no need to re-measure after blending.
-
3. To the bowl containing the ground oats and almonds, add the Dutch-process cocoa powder, vanilla extract, 4 tablespoons of honey (reserving 2 tablespoons for potential adjustment), almond butter, and mini chocolate chips. If your almond butter or almonds are unsalted, consider adding a small pinch of fine sea salt at this stage to enhance the flavors. Using an electric hand mixer, thoroughly combine all the ingredients. After initial mixing, you may need to knead the mixture with your hands until a thick, uniform dough forms. If the mixture appears too dry or isn’t coming together, add the remaining 2 tablespoons of honey. (I often find this extra honey is necessary, but occasionally, the almond butter is moist enough that it’s not needed). If the dough is too wet, gradually add a bit more of the powdered oats until the desired consistency is reached.
-
4. Once the dough is ready, roll portions of the mixture into small balls. Each dough ball should be approximately 2 teaspoons in size. This will yield around 30 perfectly sized protein balls. For best results, place the rolled balls on a plate or tray and chill them in the refrigerator for at least 20 minutes to help them firm up before serving or storing.
Recipe Notes
Nutrition Information (Approximate Per Serving)
Nutrition information is automatically calculated, so should only be used as an approximation and can vary based on specific ingredients and brands used.
Frequently Asked Questions (FAQ) About Chocolate Protein Balls
Can I make these protein balls vegan?
Absolutely! To make these chocolate protein balls vegan, simply substitute the honey with an equal amount of pure maple syrup or agave nectar. Both provide natural sweetness and act as an excellent binder. Ensure your dark chocolate chips are dairy-free as well.
Are these chocolate protein balls gluten-free?
Yes, this recipe is inherently gluten-free, provided you use certified gluten-free oats. While oats are naturally gluten-free, they can sometimes be cross-contaminated during processing. Look for a label that specifically states “certified gluten-free” if you have a severe gluten sensitivity or celiac disease.
Can I use a different type of nut butter?
You certainly can! While almond butter is recommended for its specific flavor profile and nutritional benefits, you can experiment with other nut butters. Peanut butter will give them a classic chocolate-peanut butter taste, while cashew butter will result in an even creamier, milder flavor. Just be aware that the consistency of the dough might vary slightly depending on the nut butter you choose, so you may need to adjust the oats or honey accordingly.
How long do these protein balls last?
When stored properly in an airtight container in the refrigerator, these chocolate protein balls will stay fresh and delicious for 1 to 2 weeks. If you keep them at room temperature, they are best consumed within 3-5 days, especially in warmer environments. For longer storage, they can be frozen.
Can I freeze chocolate protein balls?
Yes, freezing is a fantastic way to extend their shelf life! Once you’ve rolled the balls, place them in a single layer on a parchment-lined baking sheet and freeze until solid. Then, transfer the frozen balls to a freezer-safe airtight container or bag. They will keep well in the freezer for up to 2-3 months. You can thaw them in the refrigerator overnight or at room temperature for a quick snack, or even enjoy them frozen for a chewier texture.
What if my mixture is too dry or too wet?
It’s common to need slight adjustments due to variations in ingredient moisture content. If your mixture is too dry and crumbly, slowly add more almond butter or honey, a teaspoon at a time, until the dough comes together and is easy to roll. If it’s too wet and sticky, add a tablespoon of the ground oats until it reaches a manageable consistency. The goal is a pliable dough that holds its shape.
Can I add protein powder to this recipe?
While this recipe provides natural protein from oats, almonds, and almond butter, you can absolutely boost the protein content further by adding a scoop of your favorite unflavored or chocolate-flavored protein powder. Start with one scoop (about 20-30g) and adjust the wet ingredients (honey or almond butter) as needed to maintain the desired dough consistency, as protein powder can absorb a lot of moisture.
Are these suitable for kids?
These chocolate protein balls are an excellent healthy snack for kids! They are packed with wholesome ingredients, provide sustained energy, and taste like a treat. Just be mindful of any nut allergies. You can also involve children in the rolling process, making it a fun kitchen activity.
What makes Dutch process cocoa better than natural cocoa for this recipe?
Dutch process cocoa powder is treated to neutralize its acidity, resulting in a darker color and a smoother, richer, and less bitter chocolate flavor. This processing enhances the deep chocolate notes, making it ideal for no-bake recipes like these protein balls where the cocoa flavor needs to stand out without the acidic edge of natural cocoa. Natural cocoa, being acidic, tends to have a sharper flavor and lighter color.
Can I add other healthy mix-ins?
Absolutely! Get creative with your mix-ins. Consider adding a tablespoon of chia seeds or flax seeds for extra fiber and omega-3s, a sprinkle of sea salt flakes for a sophisticated sweet-and-salty flavor, or even a tablespoon of instant coffee granules for a mocha twist. Just remember that adding dry ingredients might require a slight adjustment to the wet ingredients to maintain consistency.
Embrace the simplicity and deliciousness of these chocolate protein balls. They are more than just a snack; they are a healthful indulgence that supports your energy levels and satisfies your sweet tooth without compromise. Enjoy the process of making them and savor every rich, nutty bite!