
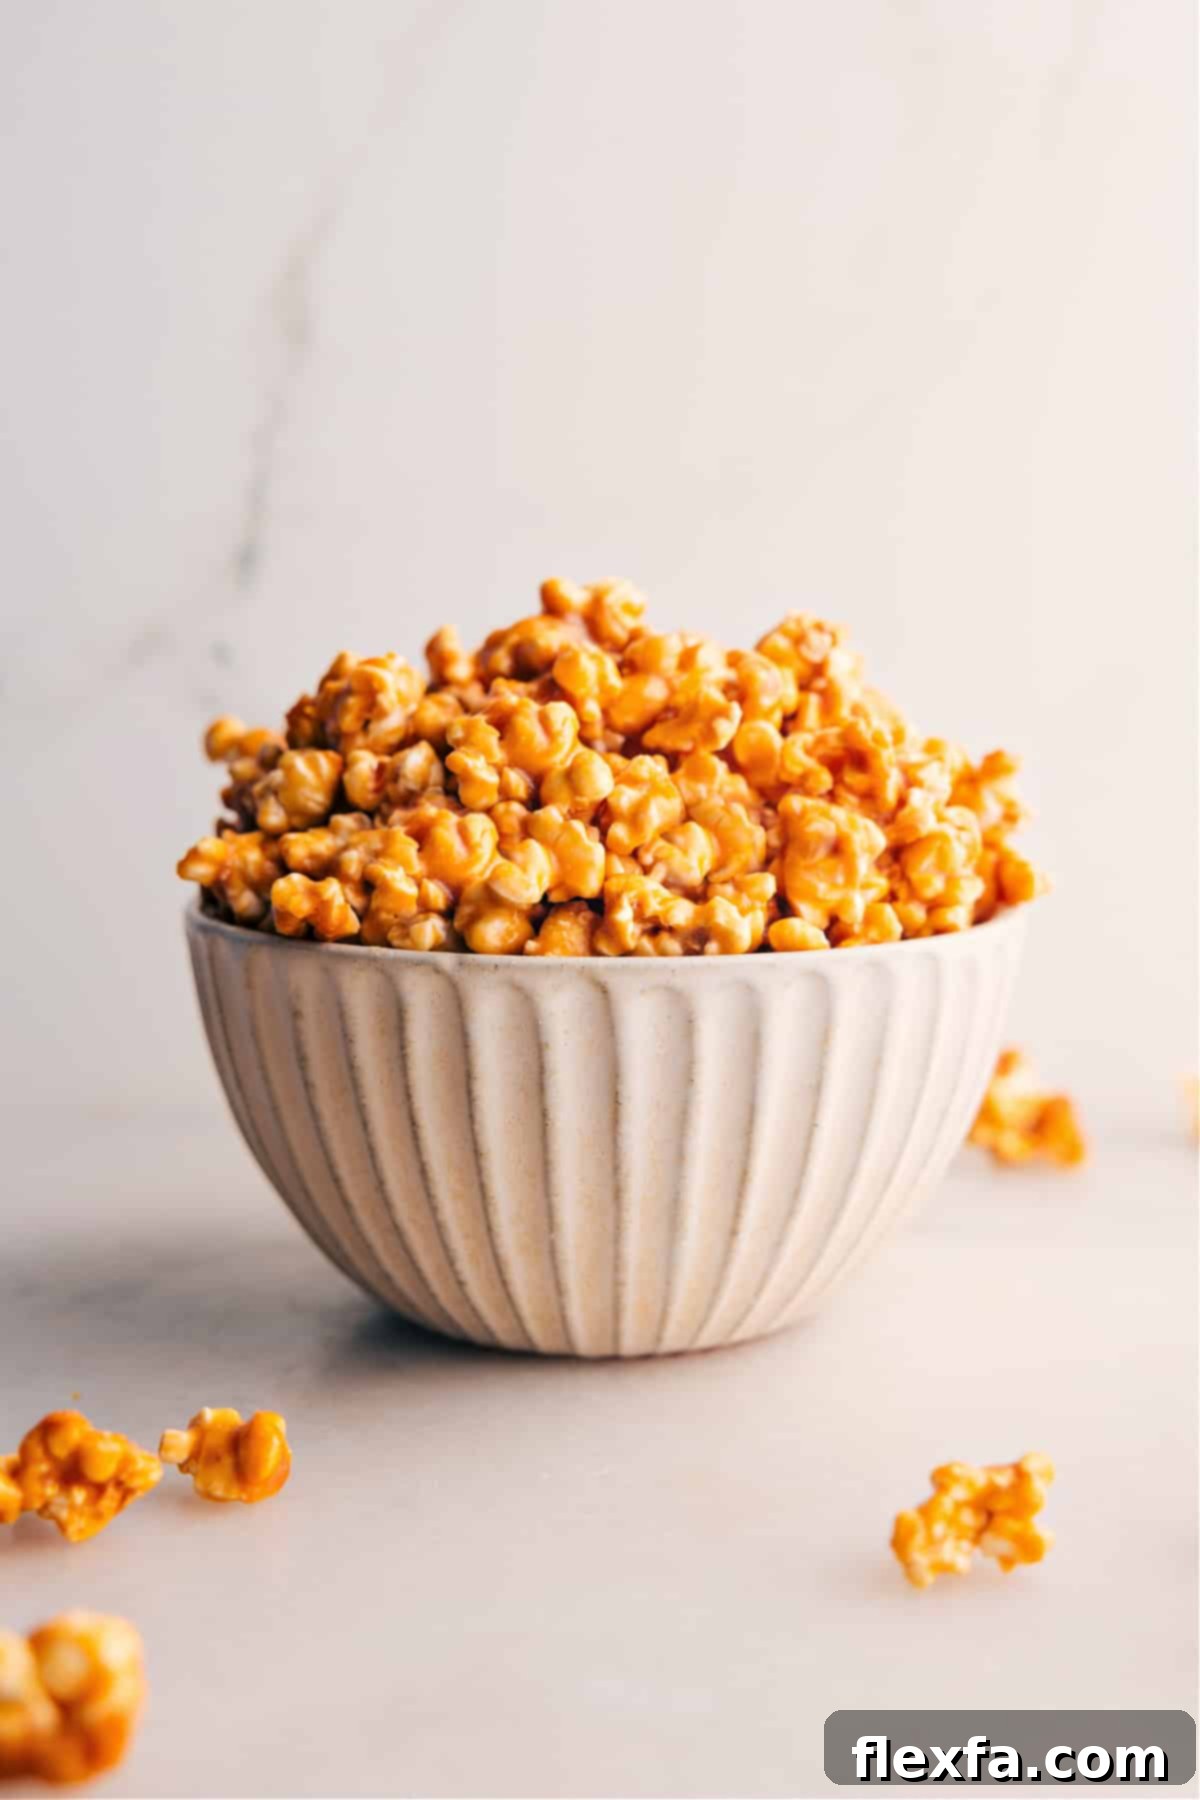
The Ultimate Easy Caramel Corn Recipe: Buttery, Crunchy Perfection
Experience the joy of making the best homemade caramel corn with this incredibly easy recipe. Prepare for perfectly popped kernels, generously coated in a rich, buttery, and irresistibly crunchy caramel glaze. This classic treat is guaranteed to become a family favorite, perfect for movie nights, parties, or simply satisfying that sweet craving.
Looking to explore more delightful popcorn variations? After mastering this classic, you might enjoy trying Zebra Popcorn, Cinnamon Roll Popcorn, or Chocolate Popcorn for exciting flavor twists.
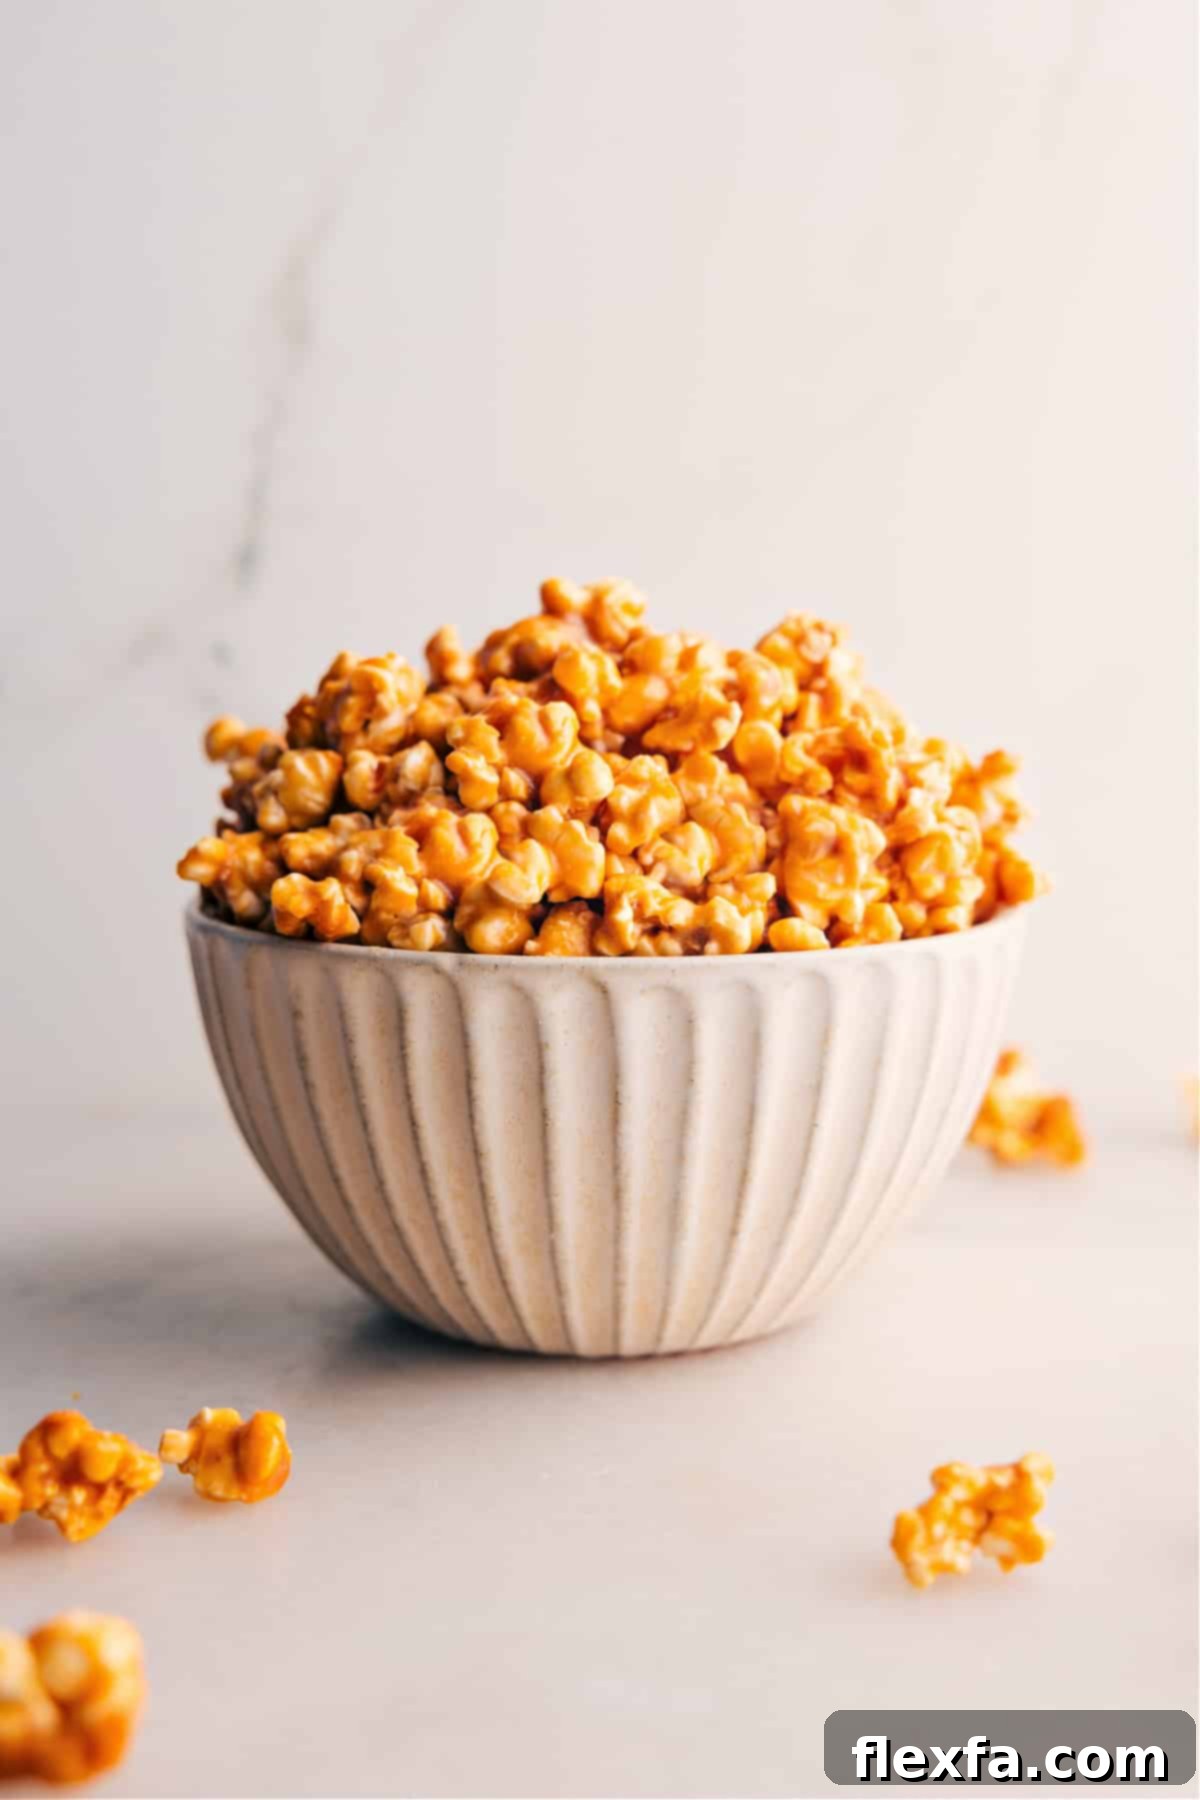

How to Make Caramel Corn Like a Pro at Home!
Growing up, my home was a popcorn paradise, largely thanks to my dad. A movie night was simply incomplete without a massive bowl of popcorn. That tradition deeply rooted itself in me, and while I still adore classic buttery popcorn, caramel-coated popcorn has always held a special place in my heart – it’s my ultimate weakness! The moment I perfected this homemade caramel corn recipe, I knew our family movie nights, and my snack game, would be forever transformed.
Now, whenever the sweet aroma of caramel fills my kitchen, my children inevitably gather, patiently (or not-so-patiently!) waiting for the caramel corn to cool. A little chocolate drizzle takes it to another level, and honestly, I could devour an entire batch myself without sharing a single piece!
Beyond personal indulgence, this caramel corn has become my absolute favorite edible gift. I love packaging it in charming cellophane bags, tied with festive ribbons, creating a delightful present that’s always a huge hit at parties or as thoughtful neighbor gifts during the holidays. It’s truly a recipe that brings joy, whether shared or savored alone.
Why Homemade Caramel Corn is the Best
There’s nothing quite like the taste and aroma of freshly made caramel corn. While store-bought options exist, homemade caramel corn offers an unparalleled experience:
- Superior Flavor: You control the quality of ingredients, resulting in a richer, more authentic caramel taste that store-bought versions simply can’t match.
- Perfect Texture: Achieve that ideal balance of crisp, crunchy popcorn and a smooth, buttery caramel coating. No more stale or overly sticky results!
- Customization: Easily adapt the recipe to your preferences. Add a sprinkle of sea salt for a sweet and savory kick, mix in nuts, or drizzle with chocolate.
- Freshness: Enjoy your caramel corn at its peak freshness, still warm from the oven, with that delightful crackle and chew.
- Sense of Accomplishment: There’s a real satisfaction in creating such a delicious treat from scratch.
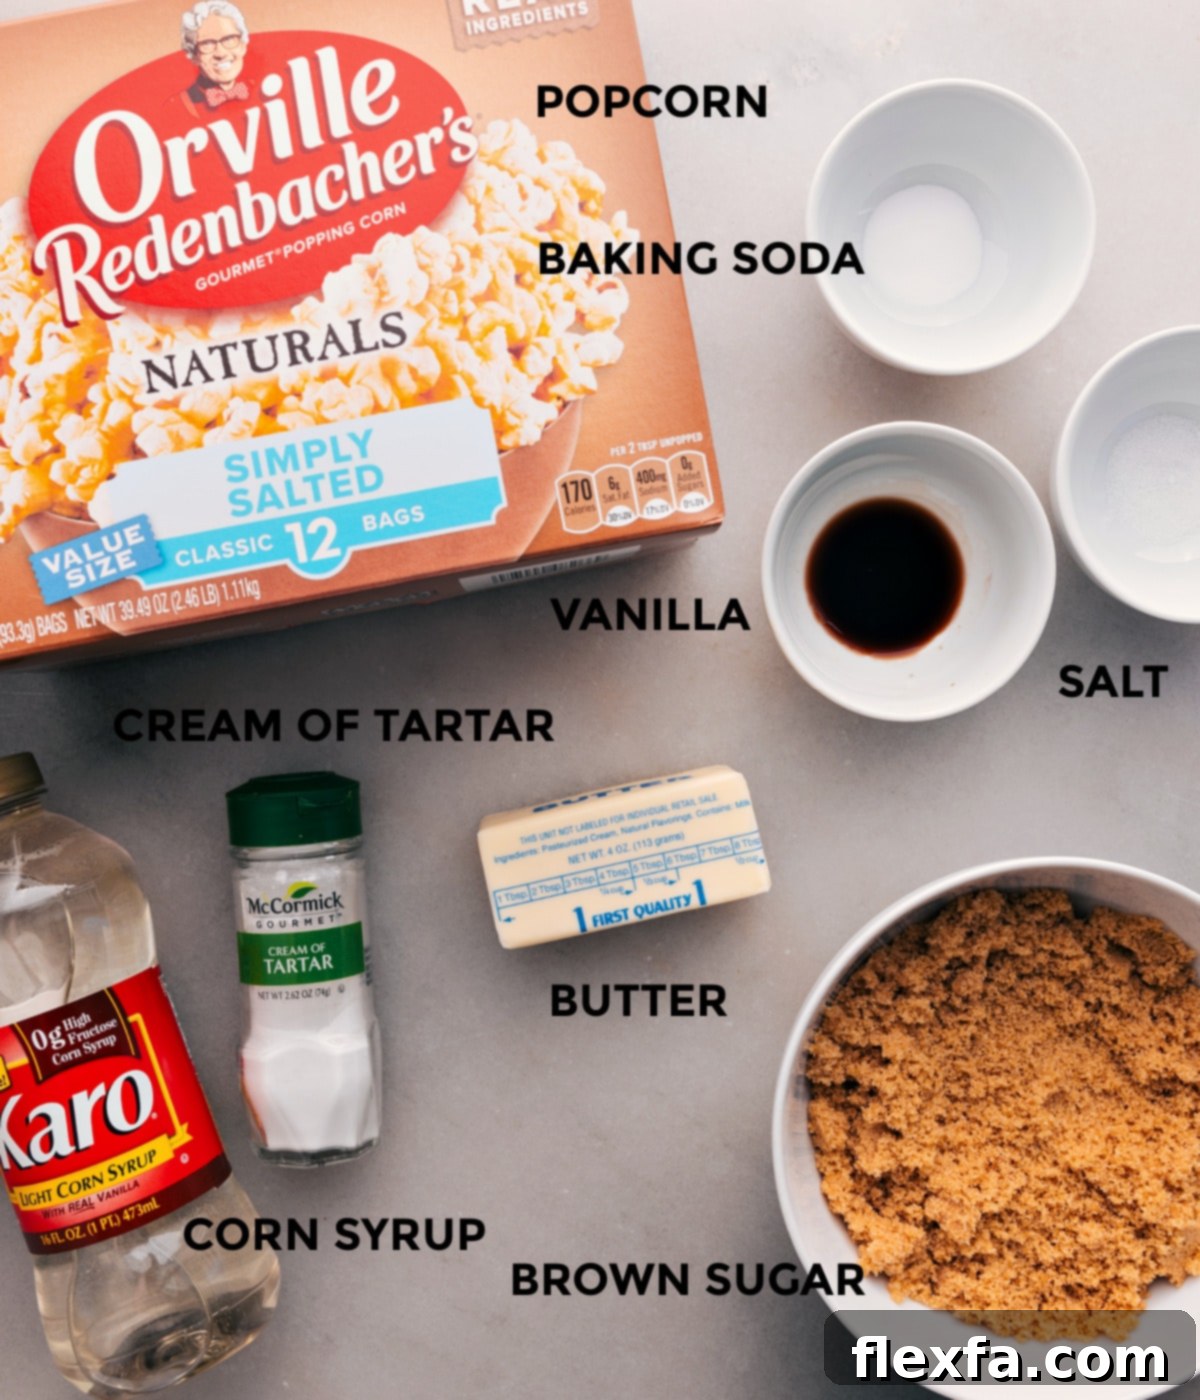
Ingredients for Perfect Caramel Corn
Crafting the best caramel corn starts with simple, quality ingredients. Here’s what you’ll need for this easy recipe, along with some helpful tips and potential swaps:
| Ingredient | Purpose & Tips for Success |
|---|---|
| Plain popped popcorn | This is the star! Use freshly popped or pre-popped. For a fun twist, swap with plain puff corn to create delightful caramel puff corn. Aim for 10 cups of kernels *after* popping. |
| Unsalted butter | Provides that rich, buttery flavor and smooth texture to the caramel. If you only have salted butter, simply reduce the amount of added salt in the recipe to balance the taste. |
| Light corn syrup | Essential for preventing sugar crystallization, which keeps your caramel smooth and glossy, not grainy. In a pinch, honey can be substituted, but be aware it will slightly alter the caramel’s flavor profile. |
| Light brown sugar | Adds depth of flavor with its molasses notes. For an even richer, more pronounced molasses taste, you can opt for dark brown sugar. Make sure it’s firmly packed when measuring. |
| Salt | A crucial ingredient that balances the sweetness of the caramel, enhancing all the flavors. If your popcorn is already salted (e.g., microwave popcorn), you may want to reduce or even skip the added salt. |
| Cream of tartar | This is an optional but highly recommended ingredient. It acts as an interfering agent, further preventing sugar crystals from forming, ensuring a silky-smooth caramel every time. |
| Baking soda | Do NOT skip this ingredient! Baking soda reacts with the acidic brown sugar and corn syrup to create tiny air bubbles. This is key for achieving that light, airy, and wonderfully crunchy texture, allowing the caramel to expand and coat the popcorn effectively. |
| Vanilla extract | Adds a warm, aromatic depth that complements the caramel beautifully. For a unique flavor twist, consider using almond extract for a subtle nutty note. |
Quick Tip: Perfecting Your Popcorn Base
To ensure your caramel corn is free of hard, un-popped kernels, use a cooling rack placed over a baking tray. Pour your freshly popped popcorn onto the rack, and any un-popped kernels or small pieces will fall through, leaving you with only fluffy popcorn. Then, simply scoop and measure the clean popcorn – it’s an incredibly easy and effective trick!
Essential Tools for Homemade Caramel Corn
Having the right equipment makes all the difference in achieving perfect caramel corn:
- Large Sheet Pan (15″ x 21″ or two standard ones): Critical for spreading the caramel-coated popcorn in a single, even layer. This ensures consistent baking and crispness. Using two smaller pans is also fine if you don’t have an extra-large one.
- Parchment Paper or Silicone Baking Mats: Absolutely essential! These prevent the sticky caramel corn from adhering to your baking sheets and allow for easy cleanup and removal.
- Medium to Large Nonstick Pot: Choose a pot larger than you think you’ll need, as the caramel mixture will foam and expand significantly once the baking soda is added. A nonstick surface helps prevent sticking and burning.
- A Candy Thermometer: The secret weapon for precise caramel making. It ensures your caramel reaches exactly 235°F (soft ball stage), which is vital for achieving the ideal crunchy, yet not overly hard, texture. This tool is also fantastic for other candy-making adventures like Buttercrunch, Toffee, or Honeycomb!
- Large, Non-Metal Mixing Bowl: You’ll need ample space to toss the popcorn with the hot caramel. Avoid metal bowls as they can sometimes impart a metallic taste to the caramel.
- Heat-Resistant Spatula or Wooden Spoon: For stirring the caramel and tossing the popcorn without melting or getting sticky.
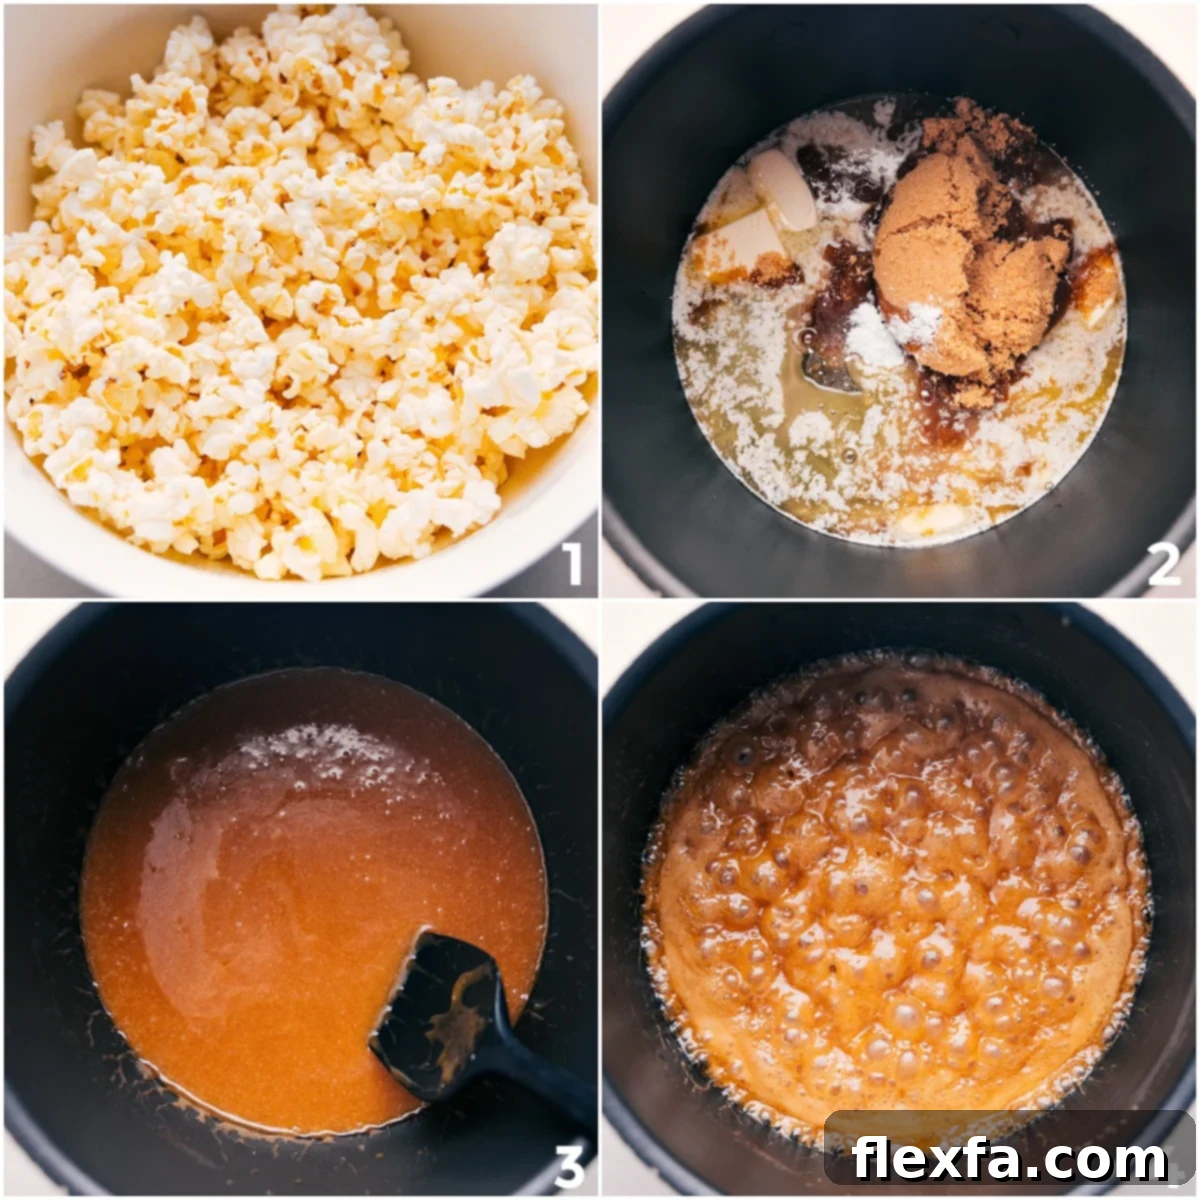
How to Make Easy Caramel Corn: Step-by-Step Instructions
Follow these detailed steps to create your own batch of irresistible homemade caramel corn:
- Prepare Your Workspace:
- Line a large cookie sheet (15×21-inch) or two standard baking sheets with parchment paper or silicone baking mats. This is crucial for preventing sticking.
- Preheat your oven to 225°F (107°C).
- Lightly spray a very large, non-metal mixing bowl with nonstick cooking spray. A ceramic or glass bowl is ideal; metal bowls can sometimes give the popcorn an off-flavor.
- Sift your baking soda to ensure there are no clumps, which can lead to uneven caramel texture.
- Pro Tip: Prep Ahead! Measure all your ingredients before you start. The caramel-making process moves quickly, and having everything ready prevents scrambling.
- Prepare the Popcorn:
- Pop your plain popcorn kernels (either stovetop, air popper, or microwave unbuttered/unsalted bags).
- Carefully remove any unpopped kernels. (Remember the cooling rack trick from our “Quick Tip” section!).
- Measure out 10 cups of the fluffy, popped popcorn and transfer it into your prepared greased bowl.
- Make the Caramel Coating:
- In a medium-sized, heavy-bottomed saucepan, combine the unsalted butter (cut into tablespoon-sized pieces for quicker melting), light corn syrup, firmly packed light brown sugar, cream of tartar (if using), and salt.
- Stir this mixture continuously over medium heat. Keep stirring until the butter is fully melted and all the ingredients are smoothly combined.
- Bring the mixture to a full, rolling boil. Once it reaches a boil, stop stirring.
- Allow the caramel to boil undisturbed for exactly 5 minutes, or until a candy thermometer registers 235°F (113°C). This temperature is crucial for the perfect chewy-crunchy texture.
- Important: Maintain a steady medium heat throughout the boiling process to prevent the caramel from burning or cooking unevenly.
- Combine Caramel and Popcorn:
- Immediately remove the saucepan from the heat.
- Stir in the baking soda and vanilla extract until they are fully incorporated. The mixture will foam up considerably – this is normal and desired!
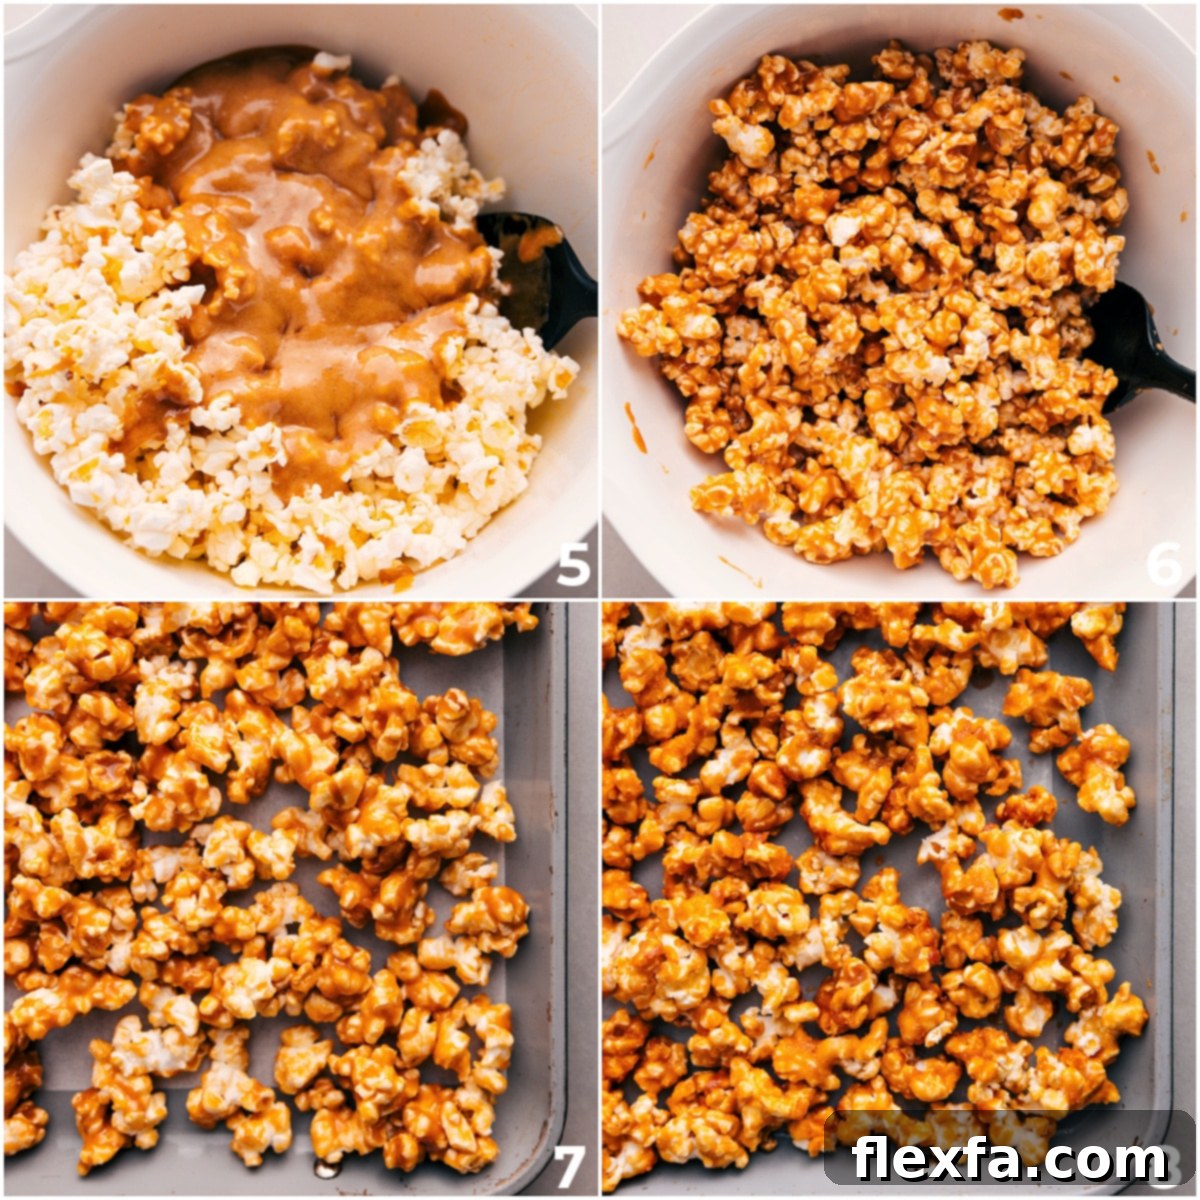
- Working quickly, pour the hot, foamy caramel evenly over the popcorn in the greased bowl.
- Using a sturdy heat-resistant spatula or wooden spoon, gently yet thoroughly toss the popcorn for about 2 minutes, ensuring every kernel is coated in that delicious caramel.
- Bake for Ultimate Crunch:
- Spread the caramel-coated popcorn in a single, even layer onto your prepared cookie sheet(s). Avoid crowding the pan, as this can lead to uneven baking and softer caramel corn.
- Bake for 45 minutes in the preheated 225°F (107°C) oven.
- To ensure uniform crispness, stir the popcorn every 15 minutes. If you’re using two baking sheets, remember to rotate them between the oven racks during stirring.
- Cool and Enjoy:
- Once baked, remove the caramel corn from the oven.
- Let it cool completely at room temperature for approximately 1 hour. This cooling period is vital, as the caramel will continue to harden and crisp up as it cools.
- Once fully cooled, break the caramel corn into delightful clusters.
- Your perfect homemade caramel corn is now ready to be enjoyed!
Flavor Variations & Customization
While classic caramel corn is fantastic on its own, feel free to get creative:
- Caramel Puff Corn: Easily transform this recipe by swapping regular plain popcorn for plain puff corn. The larger, lighter texture absorbs the caramel beautifully for a unique snack.
- Nutty Caramel Corn: Stir in 1/2 to 1 cup of roasted peanuts, pecans, or mixed nuts with the popcorn before adding the caramel.
- Chocolate Drizzle: After the caramel corn has cooled, melt some chocolate chips (milk, dark, or white) and drizzle it over the clusters. Let it set before serving.
- Sea Salt Caramel: Add an extra pinch of flaky sea salt over the caramel corn right after you spread it on the baking sheets for a sophisticated sweet and salty flavor.
- Spiced Caramel Corn: Incorporate a 1/2 teaspoon of ground cinnamon or pumpkin pie spice into the caramel mixture with the vanilla for a warm, autumnal twist.
Storage Tips for Optimal Freshness
To keep your easy caramel corn recipe fresh and crunchy for as long as possible:
Store it in an airtight container at room temperature. Place the container in a cool, dry place away from direct sunlight and humidity. When stored properly, homemade caramel corn will remain deliciously crunchy for up to a week. Mason jars or other sealable glass containers work wonderfully for this!
If You Love Caramel, You’ll Love These Other Treats!
Desserts
Caramel Cookie Bars
Desserts
Caramel Apple Bites
Desserts
Salted Caramel Cookies
Desserts
Caramel Apple Dessert Cups
Easy Homemade Caramel Corn Recipe
By Chelsea Lords
This Easy Caramel Corn is a sweet, buttery snack featuring crunchy popcorn generously coated in a rich homemade caramel, perfect for sharing (or not!).
20 minutes
1 hour
1 hour
2 hours 20 minutes
8 servings
Equipment
- Large sheet pan (15″ x 21″) or two standard ones
- Large ceramic bowl
- Medium pot (nonstick recommended)
- Candy thermometer (optional, but highly recommended for best results)
- Heat-resistant spatula or wooden spoon
- Parchment paper or silicone baking mats
Ingredients
- Cooking spray
- 10 cups plain popped popcorn (see Note 1 below for popcorn tips)
- 8 tablespoons unsalted butter (1 stick), cut into tablespoon-sized pieces
- 1/4 cup light corn syrup
- 1 cup light brown sugar, firmly packed
- 1/4 teaspoon salt (see Note 2 if popcorn is pre-salted)
- 1/8 teaspoon cream of tartar (optional, see Note 3 for smoother caramel)
- 1/2 teaspoon baking soda, sifted
- 1 teaspoon vanilla extract
Instructions
- Prepare for Baking: Line a large cookie sheet (15×21-inch) or two standard sheets with parchment paper or silicone baking mats. Preheat oven to 225°F (107°C). Spray a large, non-metal mixing bowl with nonstick cooking spray. Sift baking soda to prevent clumps.
- Prepare Popcorn: Pop the popcorn and meticulously remove any unpopped kernels. Measure out 10 cups of popped popcorn and transfer to the greased bowl.
- Cook the Caramel: In a medium saucepan, combine the butter, corn syrup, brown sugar, cream of tartar (if using), and salt. Stir over medium heat until butter melts and mixture is smooth. Bring to a full rolling boil, then stop stirring. Let the mixture boil for 5 minutes, or until it reaches 235°F (113°C) on a candy thermometer.
- Combine Caramel & Popcorn: Remove the saucepan from heat. Quickly stir in the sifted baking soda and vanilla extract until fully combined (mixture will foam). Immediately pour the hot caramel over the popcorn in the bowl and, using a heat-resistant spatula, toss for about 2 minutes until the popcorn is evenly coated.
- Bake to Perfection: Spread the coated popcorn in a single, even layer on the prepared cookie sheet(s). Bake for 45 minutes, stirring gently every 15 minutes. If using two sheets, rotate them between oven racks halfway through baking.
- Cool & Serve: Remove from the oven and allow the caramel corn to cool completely at room temperature for about 1 hour. The caramel will harden as it cools, becoming wonderfully crunchy. Break into clusters and enjoy!
Recipe Notes
Note 1: Popcorn Preparation: For convenience, you can use pre-popped popcorn. Otherwise, pop plain kernels yourself using a stovetop, air popper, or plain (unbuttered and unsalted or lightly salted) microwave packets. Ensure it’s not heavily buttered or salted to start.
Note 2: Adjusting Salt: If your chosen popcorn is already salted, we recommend reducing the 1/4 teaspoon of added salt in the caramel recipe by half, or omitting it entirely, to avoid an overly salty flavor.
Note 3: The Role of Cream of Tartar: Cream of tartar is an acidic ingredient that acts as an anti-crystallization agent. It helps prevent sugar crystals from forming in the caramel, ensuring a perfectly smooth and glossy coating. While optional, it is highly recommended for the best texture.
Storage: To store your delicious Caramel Corn, place it in an airtight container (Mason jars or Weck® mold jars are excellent choices). Keep the container in a cool, dry place to maintain its crunchiness for up to a week.
Nutrition Facts (Approximate)
Serving: 1 serving | Calories: 295 kcal | Carbohydrates: 46g | Protein: 2g | Fat: 13g | Saturated Fat: 8g | Polyunsaturated Fat: 1g | Monounsaturated Fat: 3g | Trans Fat: 0.5g | Cholesterol: 32mg | Sodium: 158mg | Potassium: 94mg | Fiber: 2g | Sugar: 35g | Vitamin A: 396IU | Calcium: 29mg | Iron: 1mg
Nutrition information is automatically calculated and should be used as an approximation.
Love this recipe? Leave a comment below and let us know what you think!
Caramel Corn Recipe Troubleshooting & FAQs
Grainy caramel corn typically occurs if sugar crystals form during the cooking process. This can happen if the mixture is stirred too much once boiling, or if sugar crystals splatter onto the sides of the pot and fall back in. Using cream of tartar (as suggested in the recipe) helps prevent this crystallization, ensuring a smooth, luxurious caramel. Also, avoid scraping the sides of the pot once boiling starts.
Forgetting the baking soda is a common mishap that significantly impacts the final product. Baking soda reacts with the acids in the brown sugar and corn syrup to create carbon dioxide bubbles. This process makes the caramel lighter, more porous, and allows it to expand and evenly coat the popcorn, resulting in that signature airy crunch. Without it, your caramel will be dense, hard, and won’t coat the popcorn properly, leading to a much chewier, denser texture.
If your caramel corn turns out soft and chewy, it’s usually due to one of two reasons: either the caramel wasn’t cooked long enough or didn’t reach a high enough temperature (below 235°F / 113°C), meaning there was too much moisture left in the caramel. Or, the caramel-coated popcorn wasn’t baked long enough in the oven, preventing it from fully drying out and crisping up. Ensure you use a candy thermometer for accuracy and bake for the full recommended time, stirring regularly.
Caramel corn that’s too hard or brittle is often a sign that the caramel was cooked for too long or at too high a temperature. When the caramel exceeds the soft ball stage (235°F / 113°C), it loses too much moisture and becomes very hard upon cooling. Precision with your candy thermometer is key here – aim for exactly 235°F (113°C) for the perfect balance of crunch and chewiness.
While some caramel corn recipes can be adapted for the microwave, this particular recipe is designed for stovetop caramel making followed by oven baking to achieve its signature rich flavor and ultimate crunch. The controlled heat of the stovetop and oven allows for precise caramel cooking and even crisping that is difficult to replicate perfectly in a microwave.