
Spooky Sweet Creations: Your Ultimate Guide to Halloween Oreo Pops!
This post may contain affiliate links. Please read my disclosure policy.
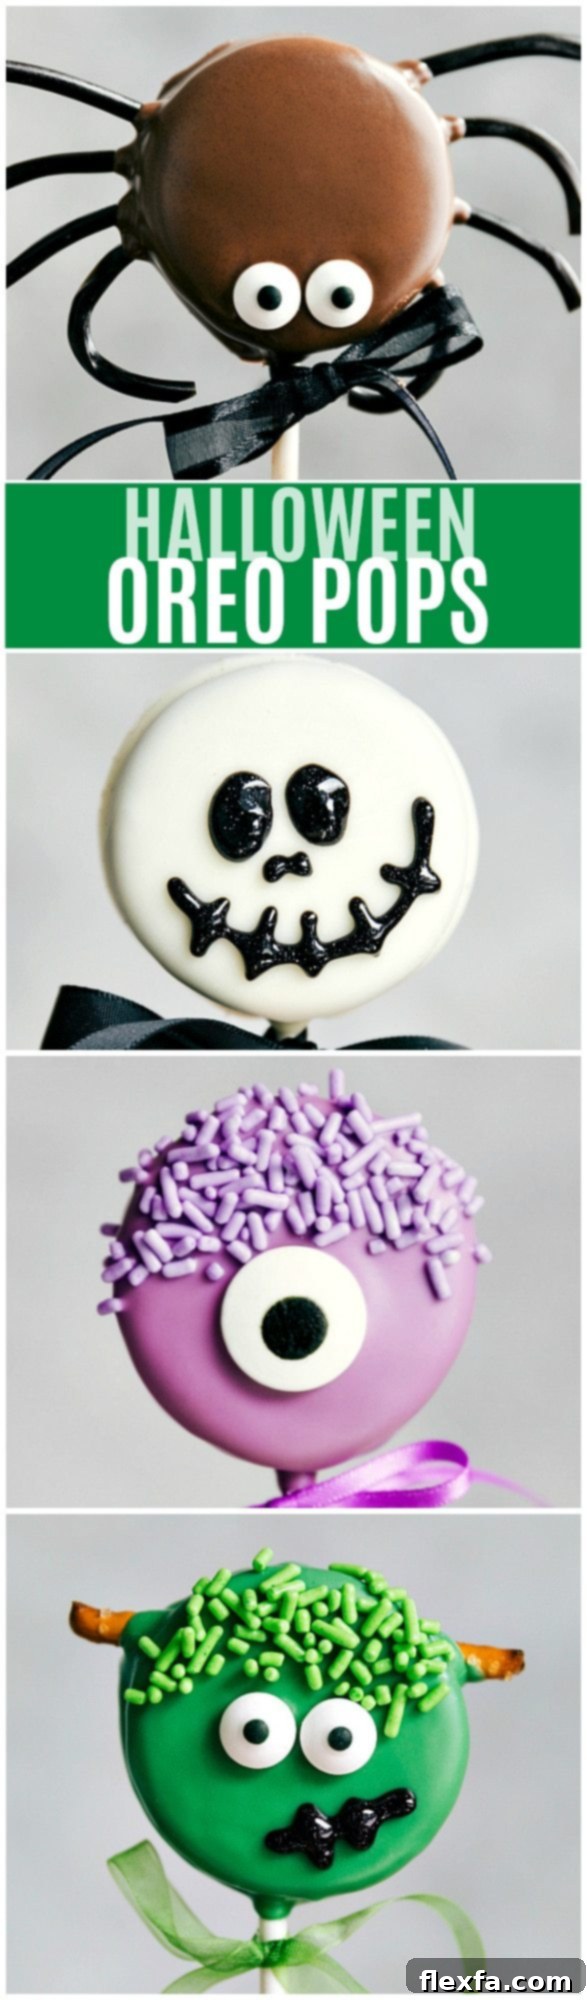
Get ready to cast a spell of deliciousness this Halloween with these incredibly simple and absolutely adorable Oreo Pops! Whether you’re planning a ghoulish gathering, preparing treats for trick-or-treaters, or just looking for a fun, festive activity with the kids, these chocolate-covered Oreo delights are sure to be a monstrous hit. We’ve brewed up four fantastically easy designs: Spider Oreo Pops, Skeleton Oreo Pops, Frankenstein Oreo Pops, and Monster Oreo Pops. Each recipe is designed for maximum impact with minimal effort, ensuring your Halloween celebrations are both spooky and sweet!
Forget complicated baking or elaborate decorations. Our guide focuses on making these treats accessible and enjoyable for everyone, even beginner decorators. With just a few basic ingredients and some creative flair, you’ll transform ordinary Oreos into extraordinary Halloween masterpieces on a stick. Dive into the enchanting world of Halloween treats and discover how effortlessly you can create these crowd-pleasing confectionery characters.
While a quick video tutorial (approximately 1 minute, 6 seconds of pure inspiration) usually accompanies these recipes, detailed step-by-step instructions for each of these delightful Halloween Oreo Pops are provided below. Remember, each individual recipe yields about 20-25 pops. If you’re planning to create a variety and want a mixed assortment, consider halving or quartering each recipe to manage your batch sizes effectively and ensure you have enough variety for everyone.
To help you perfect your Oreo pop presentation, a cake pop holder can be incredibly useful (like the one often demonstrated in videos). We highly recommend a sturdy Nordic Ware one for both displaying your creations and allowing them to dry without touching. Additionally, ensure you have plenty of Parchment Paper on hand. This is crucial for laying out your freshly dipped Oreo pops, allowing the chocolate to harden beautifully without sticking, making them easy to peel off and serve.
Casting the Spell: General Tips for All Halloween Oreo Pops
Before we dive into the individual character recipes, here are some universal tips and essential equipment that will make your Oreo pop crafting experience smooth and enjoyable, ensuring professional-looking results every time.
- Parchment Paper is Your Best Friend: Always line your baking sheets with parchment paper. This prevents your chocolate-dipped pops from sticking and makes cleanup a breeze once they’ve hardened.
- The Right Sticks: Standard lollipop sticks are perfect for these treats, providing a sturdy handle for dipping and enjoying.
- Melting Chocolate Mastery: Whether you’re using chocolate chips or candy melts, proper melting is key. Using a microwave is fast and efficient, but patience is vital. Always melt in short bursts (20-30 seconds), stirring thoroughly between each interval. This prevents scorching and ensures a smooth, workable consistency.
- Thinning the Chocolate (Optional but Recommended): For a smoother dip and a more even coating, consider adding 1/2 to 1 teaspoon of vegetable oil or shortening to your melted chocolate or candy melts. This helps achieve a fluid consistency, making it easier to work with without affecting the taste.
- Working in Batches: To prevent your melted chocolate from hardening too quickly, it’s a good practice to divide your chocolate into 2-3 portions. Melt one portion at a time, keeping the others aside until needed. This ensures you always have perfectly smooth chocolate for dipping.
- Gentle Oreo Separation: When twisting Oreos apart, do so slowly and carefully to maximize your chances of keeping the cream filling intact on one side. Don’t worry if some break; you can still use the halves!
- The “Tap” Technique: After dipping your Oreo in melted chocolate, gently tap the stick against the edge of your bowl to remove any excess chocolate. This creates a clean, even coating and a professional finish.
- Patience for Hardening: Allow your pops to harden completely at room temperature or in the refrigerator. Rushing this step can lead to smudged decorations and a less appealing final product.
- Storage Savvy: Store your finished Oreo pops in an airtight container at room temperature for up to a week, or in the refrigerator for extended freshness, especially if your kitchen is warm. Lay them in a single layer to protect those carefully crafted decorations from getting smudged.
Armed with these tips, you’re ready to create your bewitching collection of Halloween Oreo Pops!
Creepy-Crawly Delight: Spider Oreo Pops
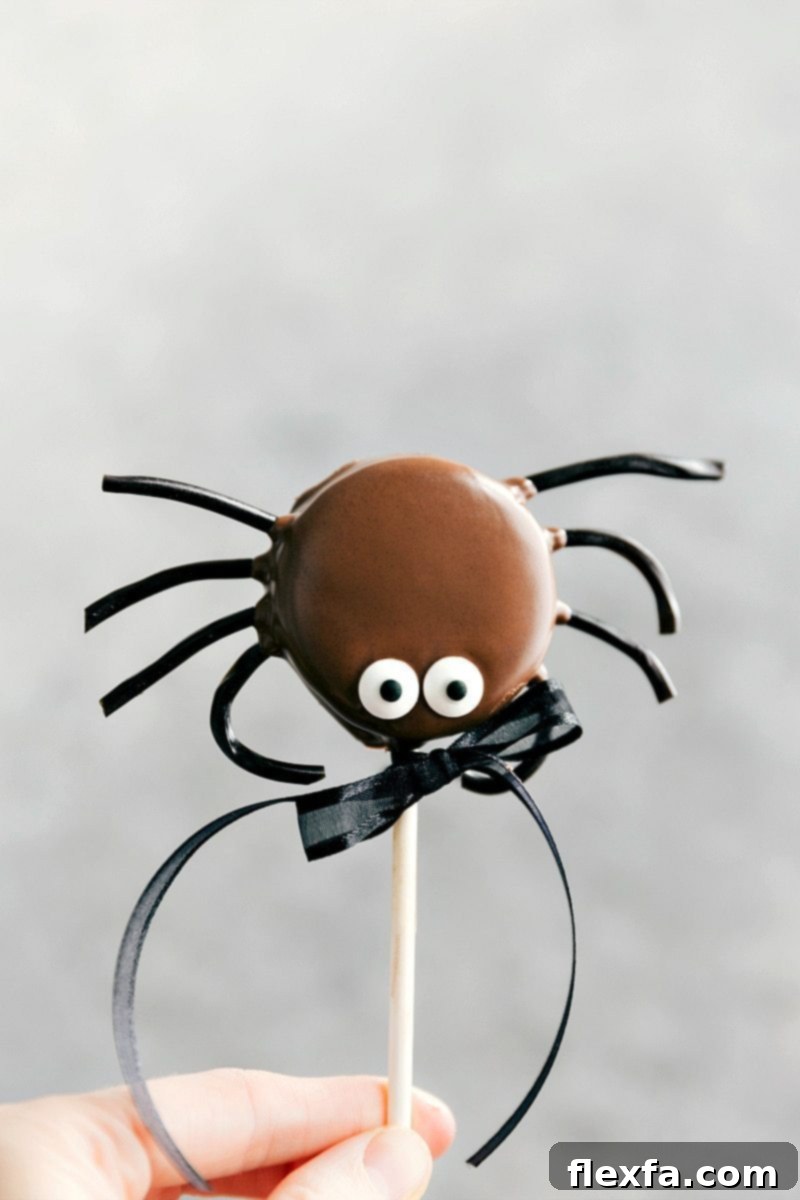
Spin a web of deliciousness with these incredibly easy Spider Oreo Pops! These playful treats feature eight licorice legs and big candy eyes, making them the perfect spooky-cute addition to any Halloween party spread. Kids and adults alike will get a kick out of these chocolatey arachnids on a stick, and you’ll love how simple they are to assemble. They’re a classic Halloween favorite with a fun, edible twist that’s sure to capture everyone’s attention.
Spider Oreo Pops
By Chelsea Lords
Spider Oreo Pops are the ultimate spooky, fun treat for Halloween! Twist apart Oreos, add licorice legs, dip in melted chocolate, and finish with candy eyes to create these adorable, edible spiders.
Total Time: 20 minutes
Yields: 24 pops (depending on Oreo package)
Rating: 5 from 1 vote
Equipment
- Large sheet pan (15″ x 21″)
- Parchment paper
Ingredients
- 1 package Oreos (use your favorite!)
- 1 (12-ounce) bag milk chocolate chips
- 48 candy eyeballs
- 1 bag string black licorice laces
- 1-1/2 teaspoons vegetable oil or shortening (optional, makes the chocolate easier to work with)
- Lollipop sticks
Instructions
- Line a large sheet pan with parchment paper and set aside. This will be your designated drying station for the finished pops, ensuring they don’t stick.
- Gently separate each Oreo cookie by slowly twisting the halves apart. The objective is to keep the cream filling intact on one side. Don’t fret if some break; simply use the halves that remain mostly whole.
- Divide the milk chocolate chips into three separate microwave-safe bowls. This method helps prevent the chocolate from hardening too quickly as you proceed with decorating your batch of pops.
- Into each bowl of chocolate chips, optionally add about 1/2 teaspoon of vegetable oil or shortening. This addition will slightly thin the chocolate, making it smoother and easier to dip your Oreos without forming thick clumps. Adjust the amount as needed to achieve your desired consistency.
- Melt the chocolate in the microwave using short 20-second bursts. After each burst, remove the bowl and stir thoroughly for 20 seconds to distribute the heat evenly. Repeat this process until the chocolate is completely smooth and melted, being patient to avoid burning.
- Take a lollipop stick and dip one end into the melted chocolate. Immediately press the chocolate-dipped end into the cream-filled side of an Oreo. This acts as an edible “glue” to securely attach the stick.
- Next, cut the black licorice laces into even pieces, approximately one inch long. Carefully press four of these cut licorice laces into the cream filling on the right side of the Oreo, and another four into the cream on the left side. These will form the spider’s eight distinctive legs.
- Place the other plain half of the Oreo on top and gently press and hold it in place to sandwich the licorice legs and lollipop stick. Allow this assembly to harden slightly, which can be expedited by placing them in the fridge for a few minutes.
- Once the Oreo is securely on the stick, gently spoon additional melted chocolate over the top of the entire Oreo pop, aiming for an even coating. While it’s good to be careful, don’t worry if a little chocolate gets on the licorice legs.
- Immediately, while the chocolate coating is still wet, gently place two candy eyeballs onto the chocolate-covered Oreo to create the spider’s beady eyes.
- Carefully set the finished (but still wet) Oreo pops onto your prepared parchment-lined tray. It’s essential to use parchment paper, as the chocolate will easily peel off once hardened without sticking.
- Allow the Spider Oreo Pops to harden completely at room temperature or in the refrigerator. Once firm to the touch, they are ready to be served or displayed for your Halloween guests!
Recipe Notes
Storage: Store leftover Spider Oreo Pops in an airtight container at room temperature for up to 1 week. If your kitchen is warm, storing them in the fridge can prevent melting and keep them fresh for up to 2 weeks. Always arrange them in a single layer to avoid smudging their adorable decorations and keep them looking perfect.
Nutrition
Serving: 1 serving | Calories: 112 kcal | Carbohydrates: 14g | Protein: 1g | Fat: 6g | Saturated Fat: 2g | Polyunsaturated Fat: 0.3g | Monounsaturated Fat: 1g | Cholesterol: 0.5mg | Sodium: 91mg | Potassium: 110mg | Fiber: 1g | Sugar: 10g | Calcium: 12mg | Iron: 1mg
Nutrition information is automatically calculated and should be used as an approximation.
Like this? Leave a comment below!
Bone-Appétit! Spooky Skeleton Oreo Pops
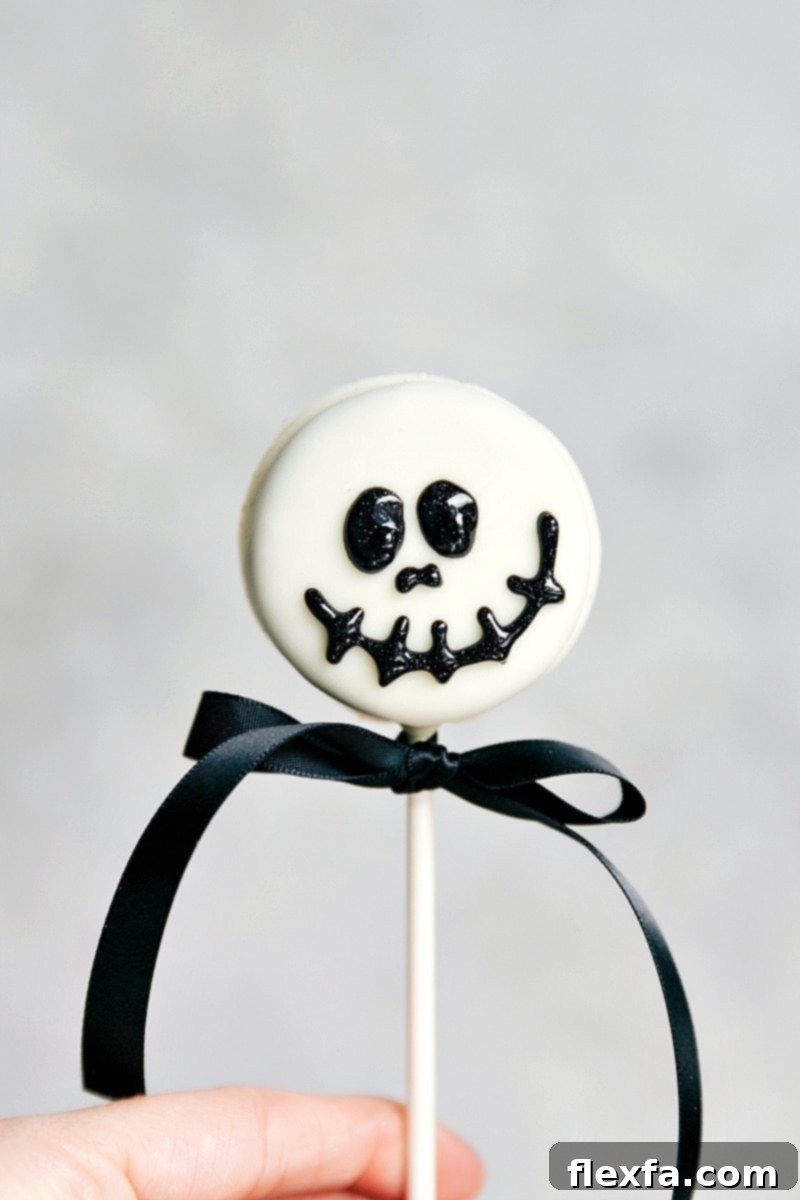
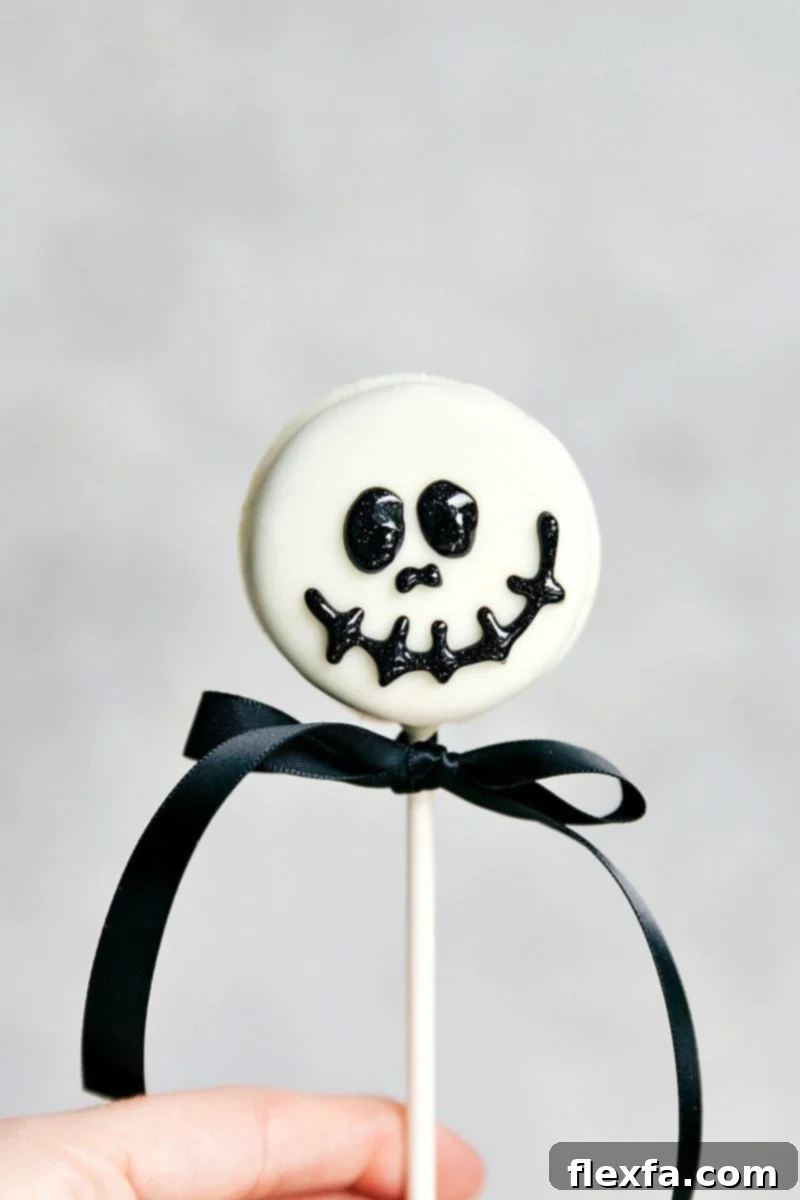
Unearth some Halloween fun with these delightfully eerie Skeleton Oreo Pops! Dipped in pristine white chocolate and adorned with simple yet striking black gel designs, these skeletal sweets are an effortless way to bring a touch of macabre charm to your holiday spread. They are incredibly popular at Halloween parties and make for a wonderfully ghastly treat that’s both easy to create and fun to devour. Prepare to impress with these bone-chillingly good pops!
Skeleton Oreo Pops
By Chelsea Lords
These easy-to-make Skeleton Oreo Pops are perfect for Halloween parties and will be a hit with kids and adults alike! A fun and spooky Halloween treat!
Total Time: 20 minutes
Yields: 24 pops (depending on Oreo package)
Rating: 5 from 1 vote
Equipment
- Large sheet pan (15″ x 21″)
- Parchment paper
Ingredients
- 1 package Oreos (your favorite flavor works great!)
- 1 (12-ounce) bag white chocolate chips
- Black decorating gel
- 1-1/2 teaspoons vegetable oil or shortening (optional, to achieve a smoother chocolate consistency)
- Lollipop sticks
Instructions
- Prepare your workspace by lining a large sheet pan with parchment paper. This will prevent your Skeleton Oreo Pops from sticking as they harden, making them easy to remove.
- Carefully twist apart each Oreo cookie to separate the halves. Aim to keep the cream filling mostly on one side of the cookie. A gentle, slow twist works best to prevent breakage.
- Divide the white chocolate chips into three separate microwave-safe bowls. This strategy helps maintain the optimal melting consistency of the chocolate throughout the decorating process, preventing it from hardening prematurely.
- For an ultra-smooth and professional-looking coating, add about 1/2 teaspoon of vegetable oil or shortening into each bowl of white chocolate chips. You can add a little more if a thinner consistency is desired for even easier dipping.
- Melt the white chocolate in 20-second bursts in the microwave, stirring well for 20 seconds after each burst. Continue this process until the chocolate is perfectly smooth and liquid. Be cautious not to overheat or burn the white chocolate, as it can seize very easily.
- Dip one end of a lollipop stick into the melted white chocolate, then gently press this chocolate-coated end into the cream side of an Oreo. This melted chocolate acts as the anchor, securing your stick in place.
- Place the other plain Oreo half on top of the cream-filled side, carefully pressing them together to secure the stick. Allow this assembly to set for a few minutes until firm, possibly in the refrigerator for a quick chill.
- Once the stick is secure, spoon melted white chocolate generously over the entire Oreo pop, ensuring an even and complete coating. Gently tap the lollipop stick against the rim of your bowl to remove any excess chocolate and achieve a smooth finish. You might opt for a second coat if you desire a perfectly opaque white finish.
- Immediately transfer the freshly dipped white chocolate Oreo pops onto the prepared parchment-lined tray. Let them harden completely at room temperature. This step is crucial for the black gel decorations to adhere properly later.
- After the white chocolate has fully hardened, it’s time to bring your skeletons to life! Using the black decorating gel, carefully draw two large round eye sockets. Below them, add two small vertical lines for the “nose” cavity. Finally, create a half-moon shape for the mouth, then draw small horizontal lines across the mouth to resemble teeth, as depicted in the reference image and video.
- For the gel to set firmly before display, place the finished Skeleton Oreo Pops in the refrigerator or freezer for a short period (about 5-10 minutes). Once the gel is dry to the touch, they are ready to stand tall in an Oreo pop stand/holder or be served!
Like this? Leave a comment below!
It’s Alive! Electrifying Frankenstein Oreo Pops
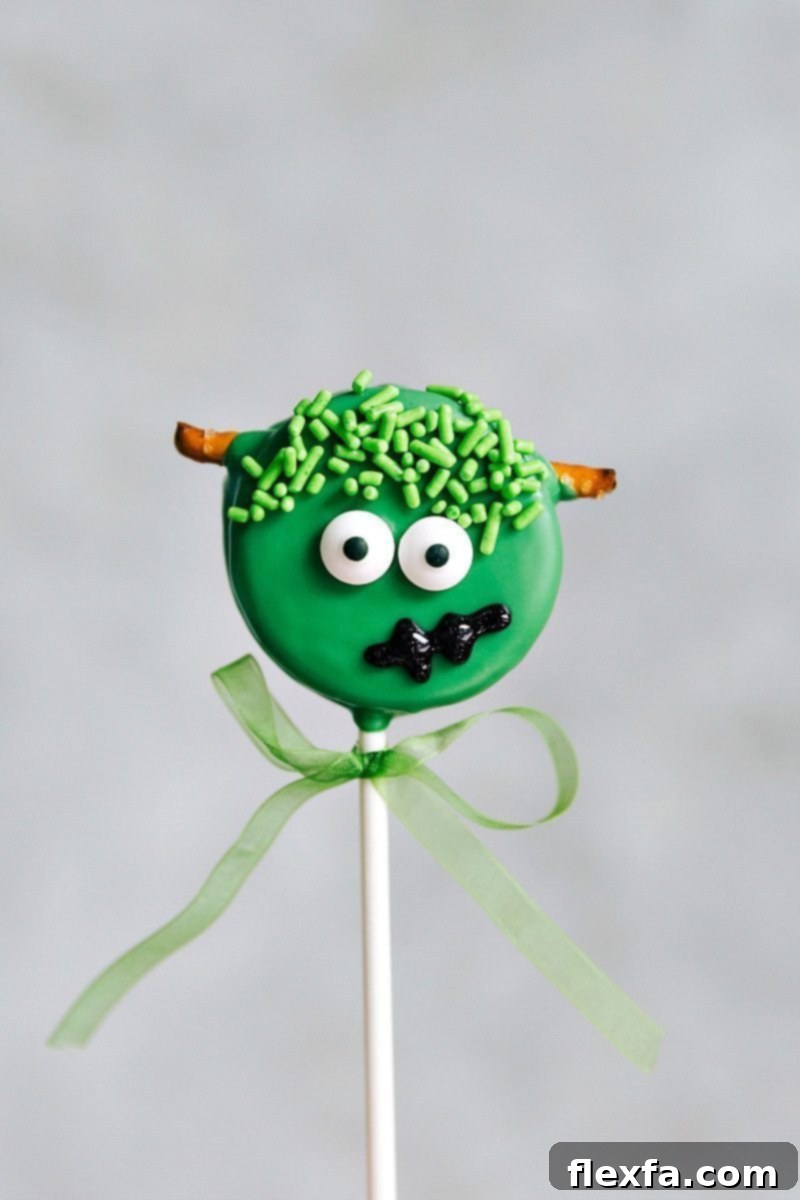
Bring the iconic monster to life in the most delicious way with these Frankenstein Oreo Pops! Sporting vibrant green candy melts, a pretzel “bolt” through the neck, and an adorably crooked smile, these pops are a playful nod to the classic horror character. They are incredibly fun to make and are guaranteed to be a hit at any Halloween gathering, adding a touch of mad science to your dessert table. Get ready for some monstrously good fun that will thrill all your guests!
Frankenstein Oreo Pops
By Chelsea Lords
Frankenstein Oreo Pops are a spooky and adorable Halloween treat that are super fun to make! Perfect for Halloween parties or a festive snack that’s sure to be a monster hit!
Total Time: 20 minutes
Yields: 24 pops (depending on Oreo package)
Rating: 5 from 1 vote
Equipment
- Large sheet pan (15″ x 21″)
- Parchment paper
Ingredients
- 1 package Oreos (feel free to use your favorite flavor!)
- 1 (12-ounce) bag green candy melts
- 24 pretzel sticks
- 48 candy eyeballs
- Green jimmies sprinkles
- 1-1/2 to 3 teaspoons vegetable oil or shortening (optional, helps thin the candy melts for easier dipping)
- Lollipop sticks
Instructions
- Begin by lining a large sheet pan with parchment paper. This non-stick surface is essential for your pops to harden without sticking, ensuring easy removal later.
- Gently separate each Oreo cookie by slowly twisting the halves apart. The goal is to keep the cream filling predominantly on one side. Work carefully to minimize any breakage.
- Divide the green candy melts into three separate microwave-safe bowls. This method helps maintain a fluid consistency throughout the decorating process, preventing the melts from setting too soon.
- To achieve a smoother and thinner coating, consider adding about 1/2 to 1 full teaspoon of vegetable oil or shortening to each bowl of candy melts. Adjust the amount as needed to reach your desired dipping consistency.
- Melt the candy melts in 20-second intervals in the microwave, stirring thoroughly for 20 seconds after each burst. Be patient and stir constantly to ensure a smooth melt and prevent burning, which can happen quickly with candy melts.
- Dip one end of a lollipop stick into the melted green candy melts and press it firmly into the cream-filled side of an Oreo. This secures the stick in place and prepares it for the next step.
- Immediately, insert a pretzel stick into the top cream filling of the Oreo, positioning it like Frankenstein’s iconic neck bolt. Ensure it’s firmly embedded.
- Place the other plain Oreo half on top, gently pressing and holding to sandwich the stick and pretzel. Allow this assembled Oreo to harden slightly before proceeding, perhaps with a quick chill in the refrigerator for a few minutes.
- Once the pop is secure, carefully spoon melted green candy melts over the entire Oreo, being mindful to avoid covering the pretzel “bolt” too much. Gently tap the stick against the edge of the bowl to allow excess candy melts to drip off, creating a smooth, even coating.
- While the green candy melts are still wet, press two candy eyeballs onto the pop to create Frankenstein’s eyes. Immediately after, generously sprinkle green jimmies above the eyes to represent his iconic hair, ensuring they stick to the wet coating.
- Transfer the decorated Oreo pops to the prepared parchment-lined pan. Allow them to harden completely at room temperature or in the refrigerator until firm to the touch.
- Once the green candy melts have fully set, use black edible gel to draw a fun, crooked “smile” on Frankenstein’s face, adding to his charmingly spooky character.
- For the gel decorations to set properly, place the Frankenstein Oreo Pops in the fridge or freezer for a short while before displaying them in an Oreo pop stand or serving to your eager guests.
Recipe Notes
Storage: Store leftover Frankenstein Oreo Pops in an airtight container at room temperature for up to 1 week. If your home is particularly warm, the refrigerator can extend their freshness to up to 2 weeks. Always store them in a single layer to protect the detailed decorations from smudging or sticking together.
Nutrition
Serving: 1 serving | Calories: 112 kcal | Carbohydrates: 14g | Protein: 1g | Fat: 6g | Saturated Fat: 2g | Polyunsaturated Fat: 0.3g | Monounsaturated Fat: 1g | Cholesterol: 0.5mg | Sodium: 91mg | Potassium: 110mg | Fiber: 1g | Sugar: 10g | Calcium: 12mg | Iron: 1mg
Nutrition information is automatically calculated and should be used as an approximation.
Like this? Leave a comment below!
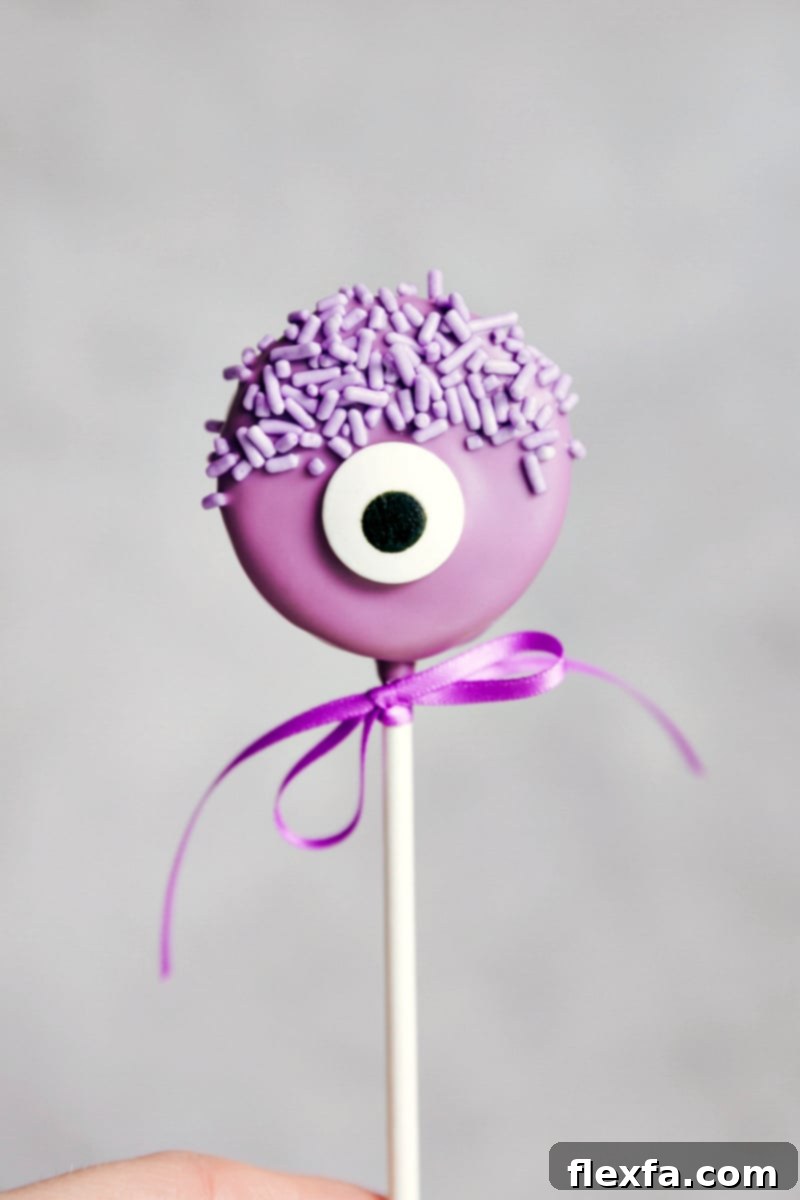
Monstrously Cute: Colorful Monster Oreo Pops
Unleash your inner mad scientist with these vibrantly colored Monster Oreo Pops! Dipped in bright purple candy melts and adorned with an array of playful candy eyes and matching sprinkles, these pops are a whirlwind of fun. The beauty of these monsters is that each one can be unique, allowing for endless creativity with single or multiple eyes. Perfect for adding a pop of color and whimsy to your Halloween dessert table, these treats are simple to make and guaranteed to bring smiles to all your little ghouls and goblins!
Monster Oreo Pops
By Chelsea Lords
Monster Oreo Pops are dipped in purple candy melts, then decorated with one or multiple candy eyes for a playful, monster-like look—perfect for a Halloween party!
Total Time: 20 minutes
Yields: 24 pops (depending on Oreo package)
Rating: 5 from 1 vote
Equipment
- Large sheet pan (15″ x 21″)
- Parchment paper
Ingredients
- 1 package Oreos (choose your favorite flavor!)
- 1 (12-ounce) bag purple candy melts
- 24 Large candy eyeballs or an assortment of small edible eyes (get creative with the eyes!)
- Purple jimmies sprinkles
- 1-1/2 to 3 teaspoons vegetable oil or shortening (optional, helps achieve a smooth coating)
- Lollipop sticks
Instructions
- Prepare your workstation by lining a large sheet pan with parchment paper. This will be where your Monster Oreo Pops rest and harden without sticking.
- Carefully separate each Oreo cookie by twisting the halves apart slowly. Your aim is to keep the cream filling intact on one side for easier assembly.
- Divide the purple candy melts into three separate microwave-safe bowls. This method helps prevent the candy melts from solidifying while you are in the midst of decorating, ensuring a consistent dipping experience.
- Optionally, add about 1/2 to 1 full teaspoon of vegetable oil or shortening to each bowl of candy melts. This addition helps thin the melts, resulting in a smoother, more even coat on your Oreos. Adjust the amount to achieve your desired consistency.
- Melt the candy melts in the microwave using short 20-second bursts. After each burst, thoroughly stir the melts for 20 seconds. Continue this process until the candy melts are completely smooth and liquid. Be patient and stir diligently to prevent burning or seizing.
- Dip one end of a lollipop stick into the melted purple candy melts. Immediately press this coated end into the cream-filled side of an Oreo. This serves as the secure anchor for your pop.
- Place the other plain Oreo half on top, gently pressing and holding it in place to secure the stick. Allow the assembled Oreo to harden slightly, which can be done by placing them in the refrigerator for a few minutes.
- Once the stick is firm, spoon melted purple candy melts evenly over the entire Oreo pop. Gently tap the lollipop stick against the rim of your bowl to encourage any excess candy melts to drip off, ensuring a beautifully smooth and uniform coating.
- While the purple candy melts are still wet, immediately press one large edible eye into the center of the Oreo pop. Alternatively, you can get creative and arrange an assortment of smaller eyes, such as three small eyes, to give each monster a unique personality!
- Generously sprinkle purple jimmies over the edible eye(s) and the surrounding wet candy melts. This adds texture and a fun, furry monster effect that makes each pop unique.
- Carefully transfer the decorated Monster Oreo Pops to your prepared parchment-lined sheet pan. Allow them to harden completely at room temperature or in the refrigerator until firm.
Recipe Notes
Storage: Store leftover Monster Oreo Pops in an airtight container at room temperature for up to 1 week. If your kitchen tends to be warm, placing them in the fridge can help them last up to 2 weeks. Ensure they are stored in a single layer to prevent any smudging of their vibrant decorations.
Nutrition
Serving: 1 serving | Calories: 112 kcal | Carbohydrates: 14g | Protein: 1g | Fat: 6g | Saturated Fat: 2g | Polyunsaturated Fat: 0.3g | Monounsaturated Fat: 1g | Cholesterol: 0.5mg | Sodium: 91mg | Potassium: 110mg | Fiber: 1g | Sugar: 10g | Calcium: 12mg | Iron: 1mg
Nutrition information is automatically calculated and should be used as an approximation.
Like this? Leave a comment below!
More Halloween Treat Fun: