
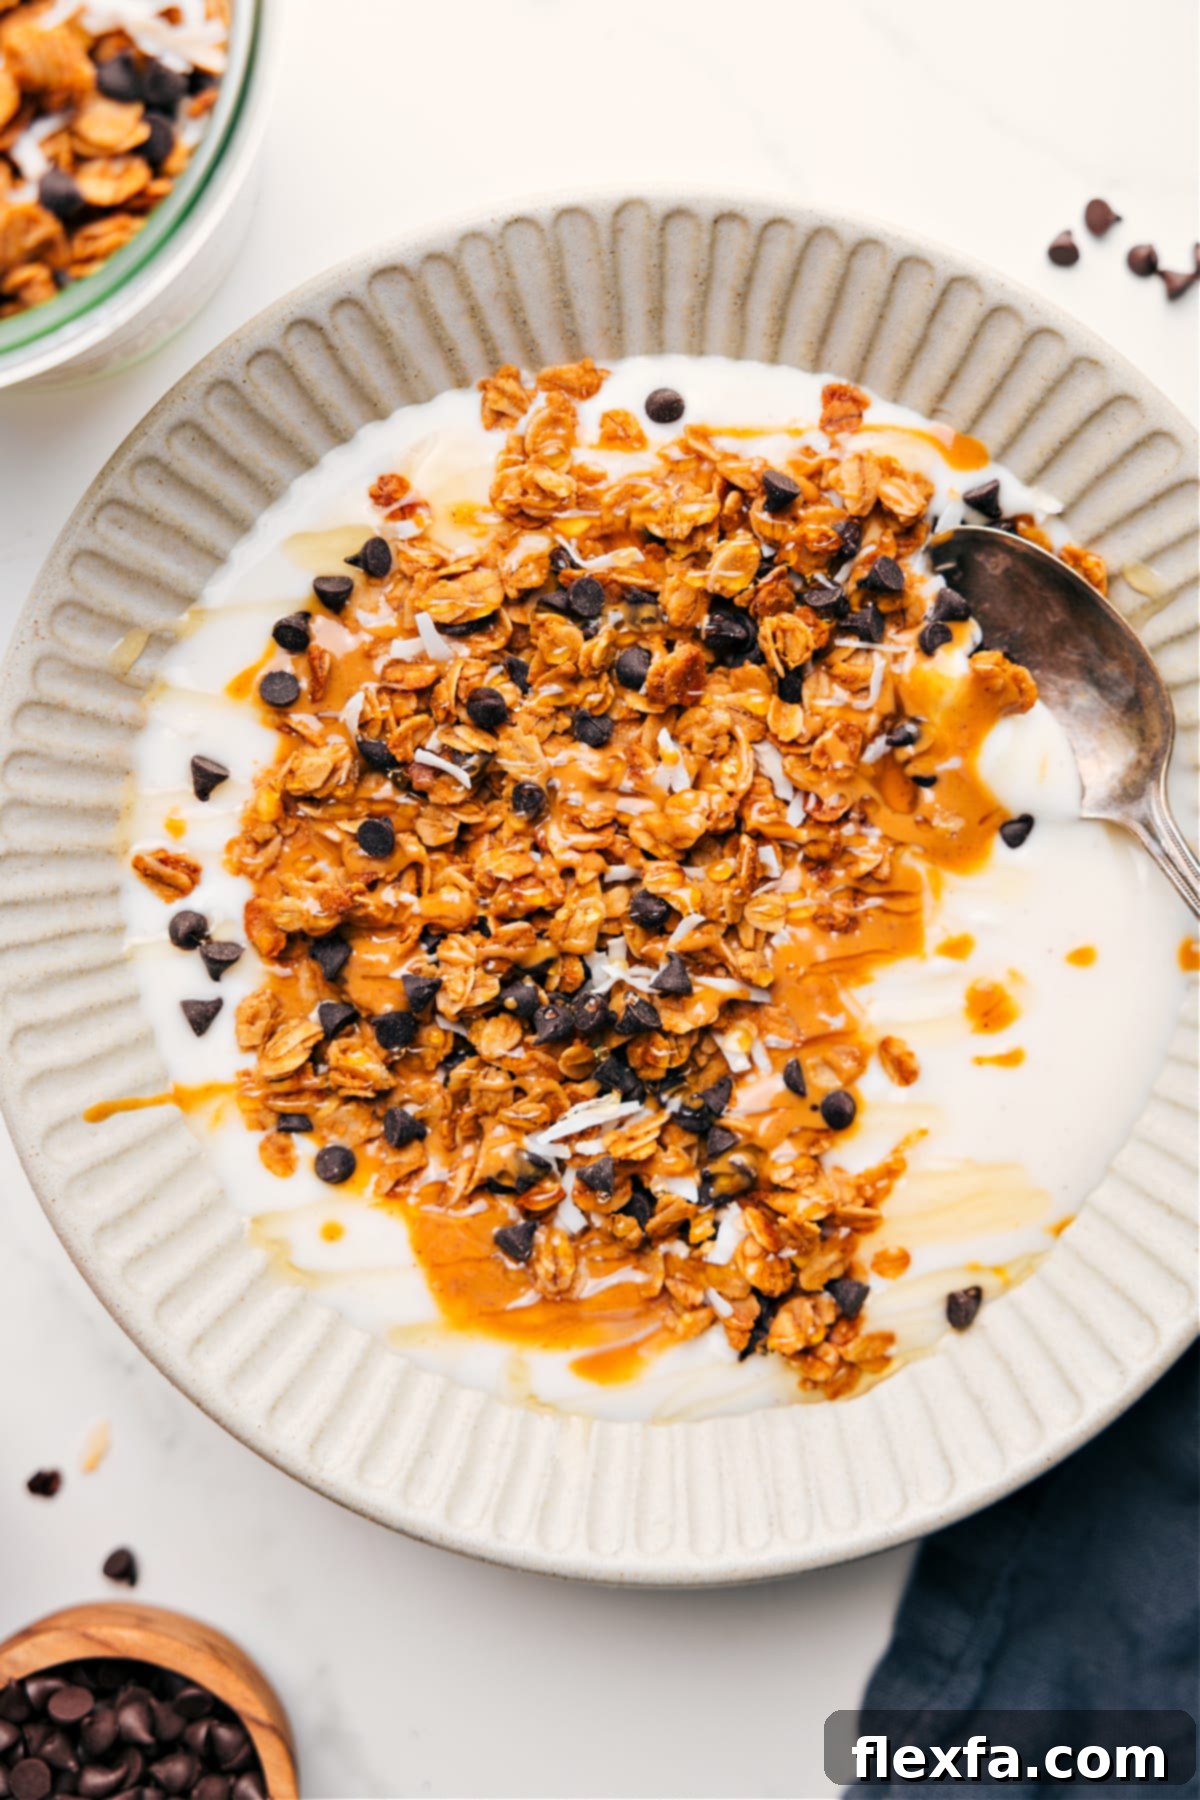
The Ultimate Homemade Peanut Butter Granola Recipe: Crunchy, Sweet, and Irresistible!
Indulge in the perfect blend of sweet and salty with our incredible Peanut Butter Granola Recipe. Crafted with wholesome old-fashioned oats, creamy peanut butter, golden honey, and a touch of coconut oil, this granola bakes into delightfully crunchy clusters. It’s an ideal choice for a nutritious breakfast, a satisfying snack, or a delightful topping. Elevate your experience even further by adding chocolate chips, shredded coconut, or your favorite mix-ins for an extra burst of flavor and fun!
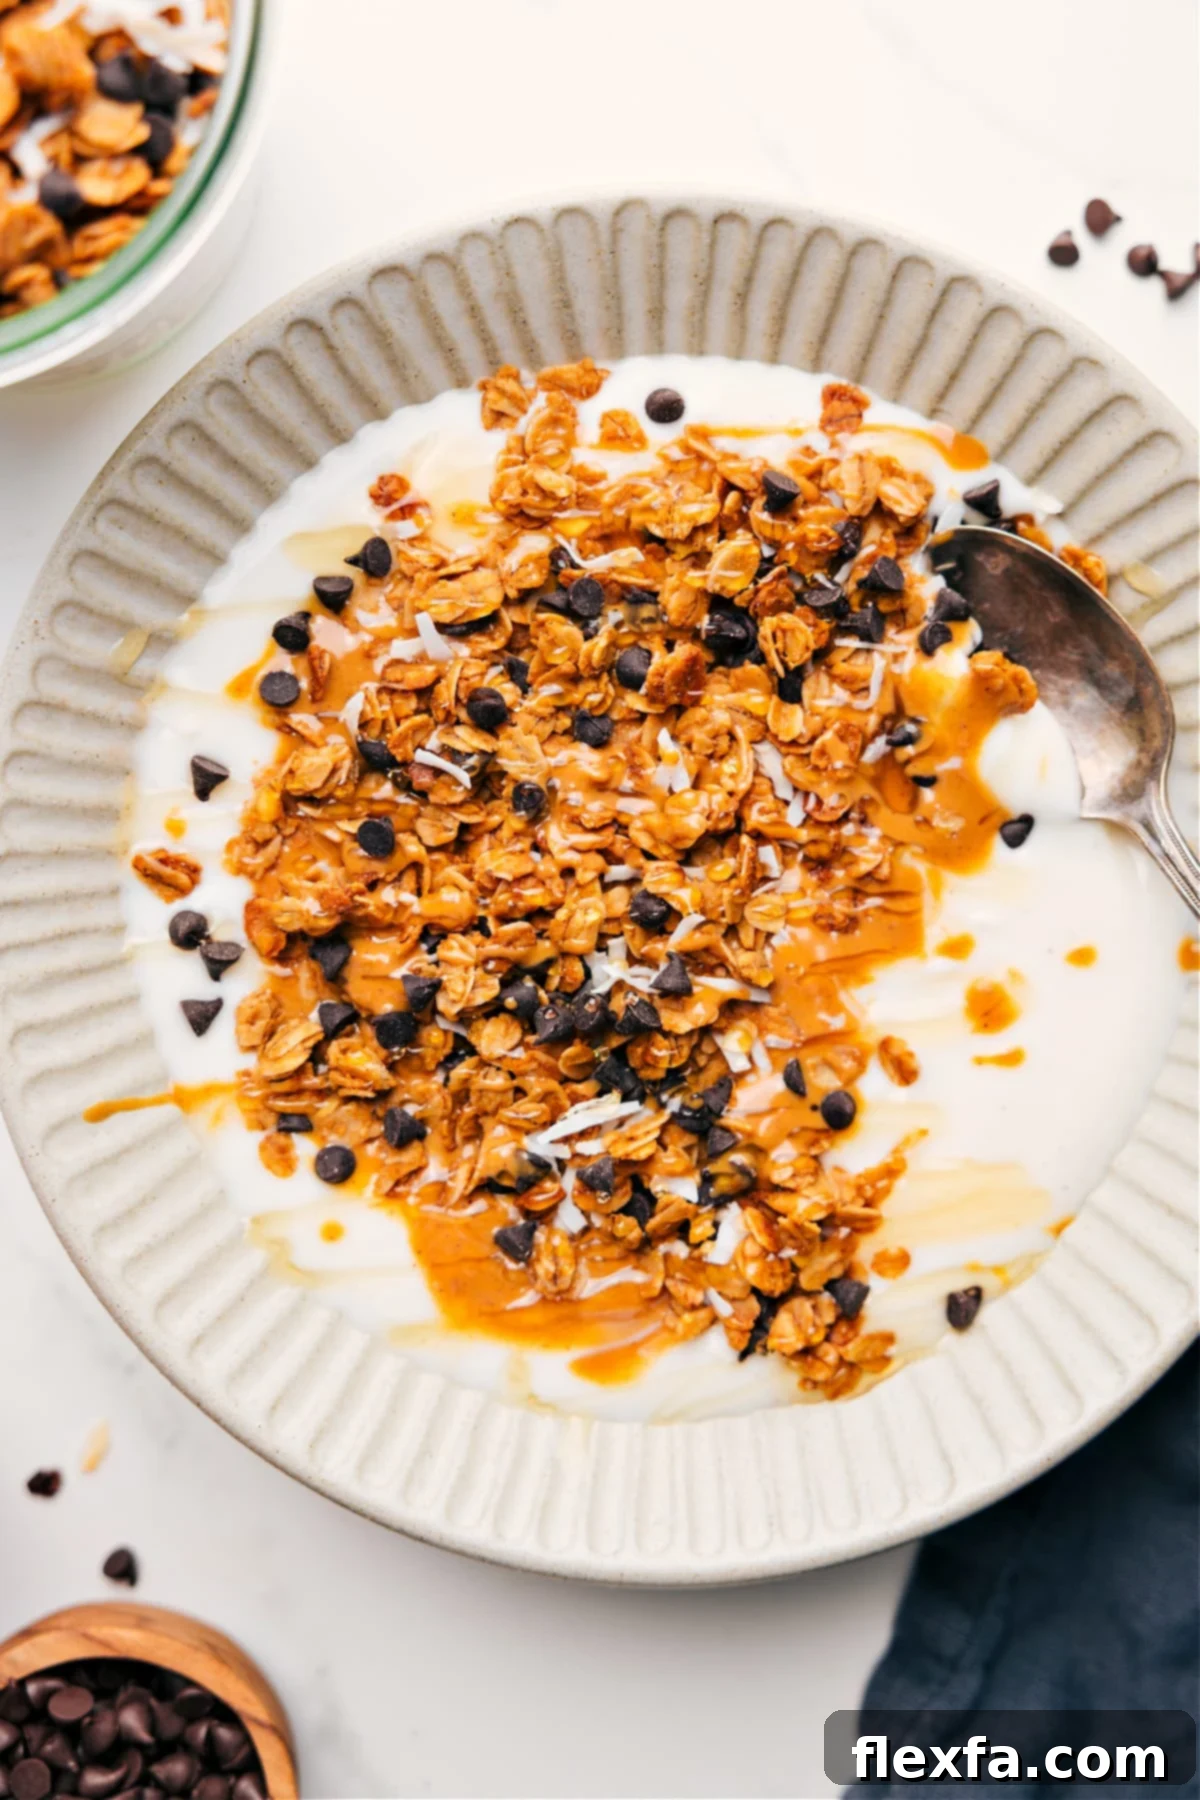

From the Author: My Granola Obsession & the Secret to Next-Level Crunch!
As a passionate home baker and avid granola enthusiast, I’m absolutely thrilled to share a recipe that holds a truly special place in my heart – and undeniably, in my dad’s too! My father and I have always shared a profound, almost insatiable, love for granola. Like I shared when I posted my popular chocolate granola recipe, we can both seriously do some damage to a freshly baked batch in record time. There’s an immense joy and satisfaction in surprising him with a bag of homemade granola, especially when I get to experiment with new and exciting flavors.
Given our mutual, deep-seated affection for anything combining chocolate and peanut butter, creating a dedicated peanut butter version just for him was an absolute imperative. I meticulously played around with the ratios, tweaking each ingredient and method until I achieved that elusive, perfect balance of sweetness, saltiness, and an unparalleled, addictive crunch. When I finally presented him with a batch, his reaction was truly priceless. He went absolutely wild for it, emphatically declaring it might just be his favorite granola recipe yet!
But here’s the game-changing secret that truly elevates this (and honestly, any) granola recipe to an extraordinary level: freeze it! You simply have to try this method. After the granola has completely cooled and hardened, I transfer the entire batch into a large, freezer-safe bag. Eating it cold, straight from the freezer, is an experience in itself – it’s wonderfully refreshing, intensifies the crunch, and honestly tastes like a healthier, more satisfying version of candy. The best part? No thawing is needed! Simply grab a handful whenever a craving strikes, whether it’s for breakfast, a mid-day snack, or a late-night treat. It’s also absolutely phenomenal tossed into creamy yogurt, sprinkled over fresh fruit, or even enjoyed the classic way in a bowl with a splash of cold milk. Promise me you’ll give this freezing method a try – it’s a revelation that will transform your granola experience!
Why Choose Homemade Granola? The Benefits You’ll Love
While store-bought granola offers undeniable convenience, crafting your own at home unlocks a multitude of benefits that truly enhance your breakfast and snacking repertoire. The primary advantage is gaining complete control over your ingredients. This empowerment means you can confidently avoid unwanted preservatives, artificial flavors, and the often excessive amounts of refined sugars prevalent in commercial varieties. You have the freedom to tailor the sweetness level precisely to your palate, choose organic or local ingredients, and even cater to specific dietary needs or preferences.
Beyond the health advantages, homemade granola offers a profoundly superior taste and texture. The intoxicating aroma that fills your kitchen as it bakes is a comforting signal of wholesome goodness being created. Achieving those perfect, satisfyingly chunky clusters is also far more attainable when you control the binding agents and baking process. Furthermore, in the long run, making your own granola can be significantly more cost-effective than regularly purchasing premium brands. It’s a simple, rewarding kitchen project that yields impressive results, adding a personalized touch to your meals and ensuring you always have a delicious, healthy, and perfectly crunchy option readily available.
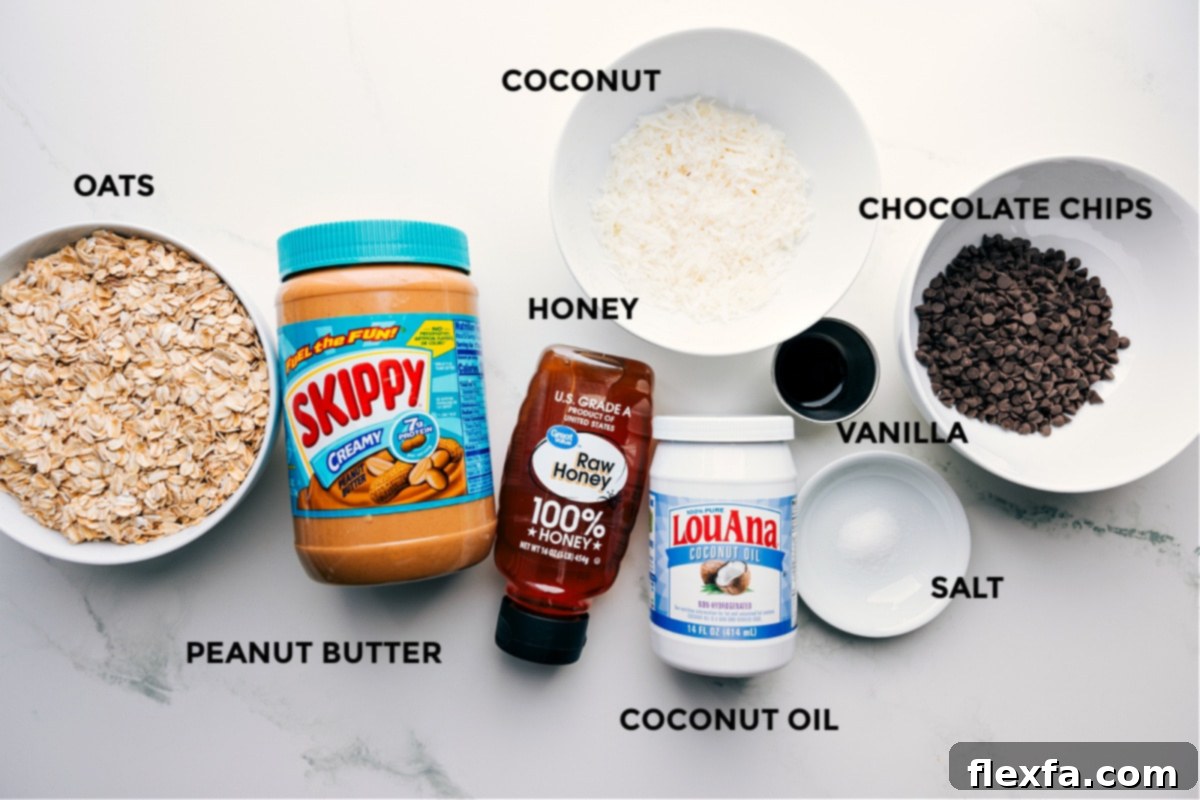
Essential Ingredients for Your Perfect Peanut Butter Granola
Crafting truly delicious and perfectly crunchy granola begins with a solid understanding of each ingredient’s role. Here’s a detailed breakdown of what you’ll need and why it matters, along with some helpful substitutions to fit your dietary needs or simply to experiment with different flavor profiles:
| Ingredient | What it Does | Try This Instead |
|---|---|---|
| Old-fashioned oats | These are the non-negotiable foundation of your granola. They provide that quintessential chewy yet crispy texture and are packed with wholesome fiber. Old-fashioned (rolled) oats are specifically designed to absorb the wet ingredients beautifully, which is crucial for forming those desirable, sturdy clusters. | It is absolutely critical to stick with old-fashioned (rolled) oats for this recipe. Quick-cooking oats are too finely cut and will likely become mushy during baking, while steel-cut oats are too dense and won’t bake properly, resulting in a tough, unappealing texture. |
| Creamy peanut butter | The undeniable star of this recipe, creamy peanut butter infuses every bite with its rich, nutty flavor. More than just flavor, its natural oils and consistency act as a primary binder, helping all the oats and other ingredients stick together and form those coveted crunchy clusters. Its fat content also contributes significantly to the granola’s overall crispness and richness. | For a delightful variation or if you prefer a different nut, a good quality roasted almond butter works wonderfully. Just ensure you genuinely enjoy its taste on its own, as its flavor will be prominent. For a nut-free option, sunflower seed butter (sunbutter) is an excellent choice, though it may alter the final color slightly. |
| Honey | Golden honey serves a crucial dual purpose in this recipe: it acts as a natural sweetener, adding a lovely golden hue and a subtle, complex floral note, and it functions as a key binding agent. Its stickiness is essential for helping the oats and peanut butter cling together, forming substantial, satisfying granola clusters. | For a vegan alternative, pure maple syrup is an excellent 1:1 substitute for honey. It offers a similar level of sweetness and binding quality, albeit with its own distinct earthy flavor profile, which pairs beautifully with peanut butter. |
| Coconut oil | Melted coconut oil plays a vital role in achieving the desired crispy texture. It helps to evenly toast the oats to a beautiful golden brown and further aids in binding all the ingredients, ensuring your granola holds its delightful clustered shape after cooling. | If you don’t have coconut oil on hand or prefer not to use it, an equal amount of melted unsalted butter can be used as a substitute. It will impart a slightly different, richer flavor but will still perform effectively in terms of browning and binding. |
| Cinnamon & vanilla extract | These aromatic additions are crucial for providing warm, sweet depth and complexity to the granola. Vanilla extract introduces a touch of creamy sweetness, while ground cinnamon offers a comforting, inviting spice that beautifully complements the robust flavor of peanut butter and the earthiness of the oats. | Feel empowered to experiment with other spices to customize your granola! For a cozy, seasonal twist, especially during autumn, consider trying pumpkin pie spice or apple pie spice. A tiny pinch of nutmeg, cardamom, or even a touch of ginger could also introduce delightful new dimensions of flavor. |
Optional Add-Ins for Custom Flavor and Texture
While this peanut butter granola is absolutely fantastic on its own, it also serves as a perfect canvas for your favorite additions. Feel free to toss in:
- Unsweetened coconut flakes: These add a wonderful tropical note and an extra layer of delightful chewiness to your granola.
- Mini chocolate chips: For the ultimate classic combination of peanut butter and chocolate, mini chocolate chips are a must! You can use milk, semi-sweet, or dark varieties depending on your preference.
- Chopped nuts: Boost the protein and crunch factor with additions like chopped almonds, pecans, walnuts, or cashews.
- Dried fruit: Introduce natural sweetness and chewiness with items like plump raisins, tangy dried cranberries, finely chopped apricots, or crunchy banana chips. Remember to add these after baking to prevent them from burning or becoming overly hard.
- Seeds: For an extra nutritional boost and textural interest, consider stirring in chia seeds, ground flax seeds, or toasted sunflower seeds.
Quick Tip: Effortless Honey Measuring
To make measuring sticky ingredients like honey or maple syrup incredibly easy and mess-free, simply lightly spray your measuring cup or spoon with nonstick cooking spray before adding the liquid. The viscous sweetener will slide right out with absolute ease, leaving your utensils clean!
How to Make the Best Peanut Butter Granola: Step-by-Step Instructions
Making your own wholesome and delicious granola from scratch is surprisingly simple and incredibly rewarding. Follow these easy, step-by-step instructions to achieve perfectly crunchy, flavorful peanut butter clusters every single time:
- Prepare Your Baking Sheet: Begin by preheating your oven to 325°F (160°C). This ensures the oven is at the correct temperature for even baking. Line a large, rimmed baking sheet with either parchment paper or a silicone baking mat. This crucial step prevents the granola from sticking and makes cleanup an absolute breeze.
- Combine Dry Ingredients: In a spacious large mixing bowl, carefully measure out your old-fashioned oats. Set this bowl aside for a moment; it will form the essential base for your granola.
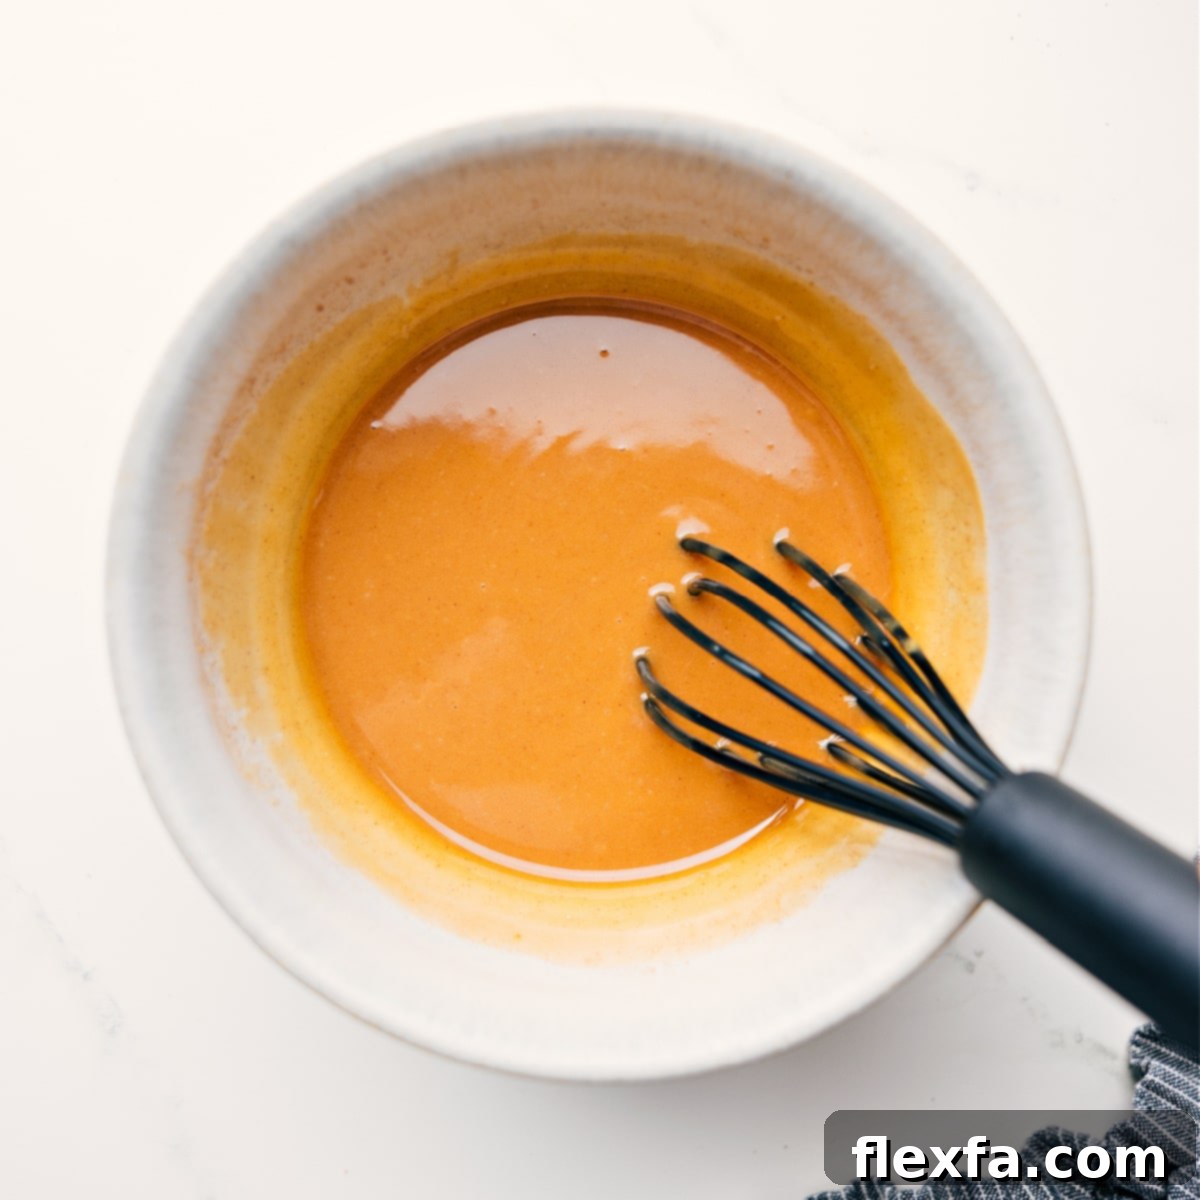
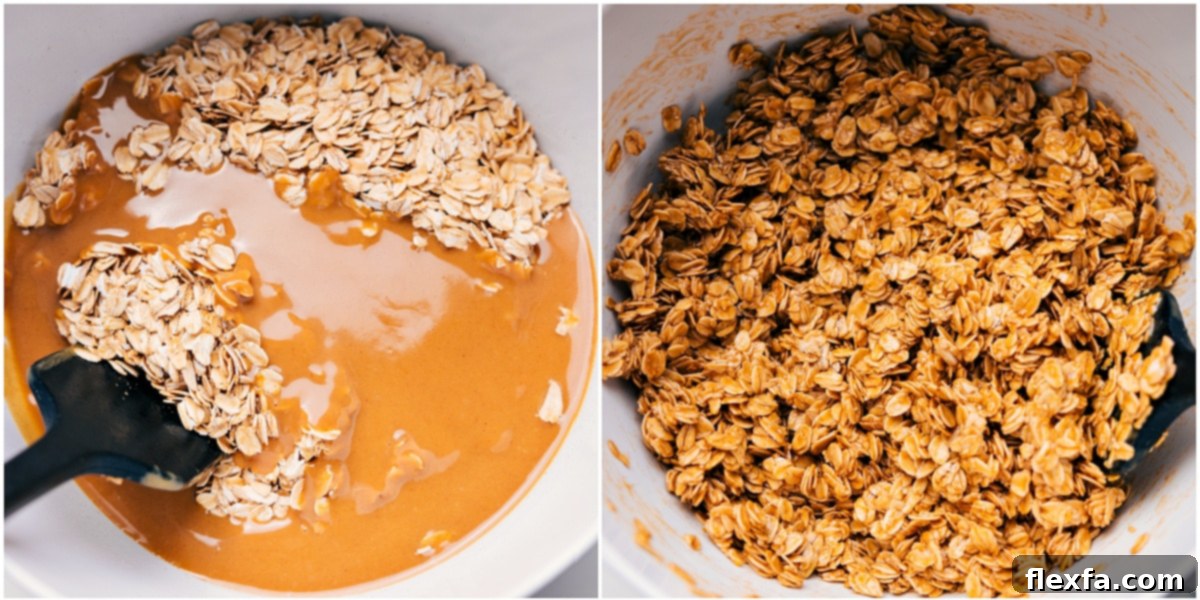
- Whisk Wet Ingredients: In a separate, medium-sized bowl, combine the creamy peanut butter, golden honey, melted coconut oil, vanilla extract, a pinch of salt, and the ground cinnamon (if you’ve chosen to include it). For the best results and a smooth, cohesive mixture, microwave these wet ingredients for approximately 20 seconds. This gentle heat will help soften the peanut butter and honey, allowing them to whisk together effortlessly until thoroughly combined. If the mixture isn’t entirely smooth and easily pourable after the first 20 seconds, microwave it for an additional 20 seconds.
- Combine Wet and Dry: Once your wet ingredients are perfectly smooth and pourable, pour the entire warm mixture over the old-fashioned oats in the large bowl. Using a sturdy spatula or a large spoon, mix thoroughly until all the oats are evenly coated and well incorporated with the wet mixture. It’s important to ensure there are no dry spots remaining.
- First Bake: Transfer the evenly coated granola mixture onto your prepared baking sheet. Spread it out into a single, flat, and even layer, being careful to minimize any overlap. This uniform spreading is key to achieving consistent crispness. Place the sheet pan in the preheated oven and bake for 7 minutes.
- Stir and Continue Baking: After the initial 7 minutes, carefully remove the pan from the oven. Using your spatula, gently but thoroughly stir the granola, breaking up any initial clusters that may have formed. Once stirred, spread it back into an even layer on the baking sheet. Return the pan to the oven and bake for another 7 minutes. Repeat this entire stirring and baking process one more time. In total, your granola will bake for 21 minutes, with two stirs in between. This intermittent stirring process is absolutely crucial for promoting even browning and ensuring maximum crispness across all the clusters.
- Cool and Add Mix-Ins: Once the granola has baked for the full 21 minutes, remove it from the oven. At this stage, it will still feel somewhat soft and pliable, but do not worry – this is normal! It will firm up significantly as it cools. If you plan to add unsweetened coconut flakes, sprinkle them over the warm granola now and gently toss. If you desire your chocolate chips to melt into luscious, gooey pockets within the granola, sprinkle them generously on top after the granola has cooled for about 5 minutes, then allow them to set without any further stirring. Otherwise, for intact, distinct chocolate chips or other delicate mix-ins, let the granola cool completely and harden for a full 3–4 hours before stirring them in.
Important Cooling Tip for Granola Clusters
Patience is your best friend when it comes to crunchy granola clusters! It’s absolutely normal for your granola to appear soft and somewhat pliable when it first comes out of the oven. This is the crucial stage where it needs ample time to cool completely and firm up into that perfect, satisfyingly crunchy texture. You must resist the urge to cover or package the granola before it has fully cooled and hardened (ideally 3-4 hours), as this can trap moisture and unfortunately make your delicious clusters soft and chewy instead of crisp.
Creative Ways to Enjoy Your Homemade Peanut Butter Granola
Once you’ve successfully made a batch of this incredibly irresistible peanut butter granola, you’ll quickly discover an endless array of delicious ways to incorporate its delightful crunch and flavor into your daily routine. Here are some of my absolute favorite ideas to inspire you:
- Luxurious Yogurt Parfait: Create a stunning and satisfying breakfast by layering creamy vanilla (or plain Greek) yogurt with vibrant fresh berries (strawberries, blueberries, raspberries are perfect), thinly sliced banana, and generous spoonfuls of this crunchy peanut butter granola. It’s a breakfast that feels incredibly indulgent yet is packed with wholesome goodness.
- Power-Packed Shake Topping: Elevate your morning smoothie or protein shake with a fantastic textural element! Sprinkle a handful of this granola over a peanut butter cup protein shake or a refreshing banana smoothie for an extra boost of flavor, satisfying crunch, and added substance.
- Homemade Trail Mix: Craft your ultimate energy-boosting snack by combining your peanut butter granola with roasted peanuts, plump raisins or tangy dried cranberries, and perhaps some mini pretzels for a perfect sweet and salty balance. It’s ideal for hikes, long road trips, or as an afternoon pick-me-up.
- Classic Cereal Bowl: Revisit a comforting childhood joy by pouring a generous amount of granola into a bowl and drowning it in cold milk. The clusters will soften ever so slightly while retaining their delicious peanut butter flavor and a pleasant chewiness.
- Life-Changing Freezer Candy: As I’ve mentioned, this is undeniably my absolute favorite way to enjoy this granola! Keep a bag conveniently stashed in the freezer and snack on it straight-up whenever you need a quick, cold, and incredibly satisfying treat. The intense crunch and cool temperature are truly transformative!
- Peanut Butter & Apple Enhancer: Take your classic apple and peanut butter snack to an entirely new level. Dip crisp apple slices into creamy peanut butter, then roll them generously in this granola for an added layer of delightful crunch and an explosion of flavor.
- Açaí Bowl Topping: Spoon a generous portion of this granola right on top of your favorite açaí bowl. It provides an essential crunchy contrast to the creamy base and complements the fresh fruit beautifully, making every bite more exciting.
Optimal Storage for Long-Lasting Crunch and Freshness
To ensure your homemade peanut butter granola maintains its wonderfully crunchy texture and remains fresh for as long as possible, proper storage is absolutely essential. Here are the best methods to keep your granola at its peak:
- Room Temperature Storage: Once your granola is completely cooled and fully hardened, transfer it to an airtight container. Store this container in a cool, dry place, away from direct sunlight, which can prematurely degrade its quality. When stored correctly at room temperature, your granola will maintain its freshness and satisfying crunch for 3–4 weeks. A crucial note: avoid refrigerating your granola, as the humidity in the fridge can actually introduce moisture and cause it to soften.
- Freezer Storage (Highly Recommended!): For the longest-lasting freshness and an unparalleled, delightful cold crunch, transfer your granola to a freezer-safe bag or container. It can be confidently frozen for up to 3 months, and often even longer (up to 6 months) if sealed very tightly to prevent freezer burn. The absolute best part? You can enjoy it straight from the freezer – there’s absolutely no thawing needed!
- Why Avoid the Fridge: It bears repeating: the high humidity levels found within most refrigerators can be detrimental to granola’s texture. Instead of preserving its crispness, refrigeration often causes granola to absorb moisture, leading to a chewy, rather than crunchy, result. Stick to room temperature or, for the ultimate experience, the freezer for the best texture and longevity.
More Delicious Snack & Breakfast Ideas You’ll Love:
Snacks
Monster Energy Balls
Breakfast
Breakfast Cookies
Breakfast
Yogurt Parfait Recipe
Snacks
Yogurt Bark
Peanut Butter Granola
By Chelsea Lords
This delightful homemade Peanut Butter Granola recipe is bursting with flavor and satisfying texture from creamy peanut butter, sweet honey, and wholesome coconut oil. It’s incredibly easy to make and perfect for customizing with your favorite mix-ins!
15 minutes
21 minutes
36 minutes
12 servings
Print Recipe
Video Tutorial
Equipment
- Rimmed sheet pan
- Parchment paper or silicone baking mat
- Large mixing bowl
- Medium mixing bowl
- Whisk
- Spatula
Ingredients
- 1/3 cup creamy peanut butter
- 1/3 cup honey
- 3 tablespoons melted coconut oil
- 1-1/2 teaspoons vanilla extract
- 1/4 teaspoon salt
- 1/2 teaspoon ground cinnamon (optional, but highly recommended for warm depth)
- 3 cups old-fashioned oats (do not use quick or steel-cut oats)
- 1/2 cup toasted coconut flakes (optional add-in, for extra texture and tropical flavor)
- 1/2 cup chocolate chips (optional add-in; use milk, semi-sweet, or dark according to preference)
Instructions
- Prepare Oven and Pan: Preheat your oven to 325°F (160°C). Line a large, rimmed sheet pan with parchment paper or a silicone baking mat to prevent sticking.
- Combine Dry & Wet Ingredients: Add the old-fashioned oats to a large mixing bowl. In a separate medium bowl, combine the creamy peanut butter, honey, melted coconut oil, vanilla extract, salt, and ground cinnamon (if using).
- Warm Wet Mixture: Microwave the wet ingredient mixture for approximately 20 seconds, then whisk thoroughly until it is smooth and well combined. If the mixture is still too thick to easily pour, microwave for an additional 20 seconds until it reaches a smooth, pourable consistency.
- Mix Granola: Pour all the warm, whisked wet ingredients into the large bowl with the oats. Use a sturdy spatula to mix until the oats are thoroughly coated and all ingredients are well combined, ensuring there are no dry spots.
- First Bake Segment: Spread the granola mixture evenly onto the prepared sheet pan in a flat, single layer, minimizing any overlap for even baking. Bake for 7 minutes.
- Stir & Continue Baking: Remove the pan from the oven after 7 minutes. Gently stir the granola with your spatula, breaking up any initial clusters, then spread it back into an even layer. Return to the oven and bake for another 7 minutes. Repeat this stirring and baking process one more time (for a total of 21 minutes of baking and two stirs).
- Cool & Add Final Mix-Ins: Remove the granola from the oven. If adding coconut flakes, toss them in now. The granola will still feel soft, but it will firm up as it cools. For melted chocolate chips, sprinkle them on top after about 5 minutes of cooling and allow them to set without stirring. For intact chocolate chips or other delicate additions, let the granola cool completely and harden for 3–4 hours before stirring them in.
Recipe Notes
- Even Spreading for Perfect Crunch: Throughout the baking process, after each stir, make sure to spread the granola back into a flat, even layer with as little overlap as possible. This technique is key to promoting uniform baking and achieving the crispiest, most satisfying texture.
- Storage Instructions: For optimal freshness and crunch, store your completely cooled and hardened granola in an airtight container at room temperature for 3 to 4 weeks. Always keep it away from direct sunlight. It’s important not to refrigerate granola, as the humidity can cause it to soften. For extended freshness and that unique frozen crunch, transfer the granola to a freezer-safe bag or container, where it can be stored for up to 3 months (or even 6 if sealed tightly). Enjoy it straight from the freezer for a truly life-changing snack!
Nutrition Information
Please note: Nutrition information is automatically calculated and should only be used as an approximation. Actual values may vary based on specific ingredients and preparation methods.
- Serving: 1 serving
- Calories: 241 kcal
- Carbohydrates: 29.6 g
- Protein: 5 g
- Fat: 11.4 g
- Sodium: 31.7 mg
- Fiber: 3.4 g
- Sugar: 14 g
Advanced Tips for Achieving Granola Perfection
Creating truly perfect granola, with ideal crunch and flavor, is all about mastering a few key techniques and paying attention to detail. Here are some advanced tips to ensure your homemade peanut butter granola is always a resounding success:
- Spread Evenly for Consistent Crispness: This is arguably the most golden rule for granola. A thin, single, and even layer on the baking sheet ensures that every oat cluster receives the same amount of heat exposure. This uniformity is crucial for achieving consistent golden-brown color and that coveted all-over crispness. Avoid piling it too high at all costs.
- Do Not Skip the Stirring During Baking: Stirring the granola every 7 minutes during the baking process is absolutely vital. This technique prevents the edges of your granola from burning while the center remains undercooked. It guarantees an even toast throughout the batch and actively promotes the formation of delightful, robust clusters.
- Embrace the Essential Cool-Down Period: The cooling process is where the true magic of granola texture development happens! Granola firms up significantly as it cools. It might initially feel soft or slightly chewy when it first comes out of the oven, but trust the process – it will become wonderfully crunchy. Patience, in this instance, is a profound virtue.
- Customize Your Chocolate Experience: How you incorporate chocolate chips depends entirely on your textural preference. For distinct, solid, and melt-free chocolate chips, wait until the granola is completely cooled and fully hardened before stirring them in. If, however, you absolutely love a melty, slightly fudgy chocolate swirl or pockets within your clusters, add the chips after about 5 minutes of initial cooling, then allow the granola to set without any further stirring.
- Avoid Overcrowding the Pan: This is a common pitfall. If you are doubling the recipe, it is strongly recommended to use two separate baking sheets. An overcrowded pan will trap steam, causing the granola to steam instead of properly baking and toasting. This results in a soft, chewy texture rather than the desired crisp clusters.
- Adjust Sweetness to Your Taste: Feel free to slightly reduce or increase the amount of honey based on your personal preference for sweetness. Just keep in mind that honey also contributes to the binding and browning process, so significant changes might subtly affect the final texture and color of your granola.
- Fresh, Quality Ingredients Matter: The quality of your ingredients directly impacts the flavor and texture of your finished product. Using fresh, vibrant old-fashioned oats and a good quality, creamy peanut butter will make a noticeable difference in the deliciousness of your homemade granola.