
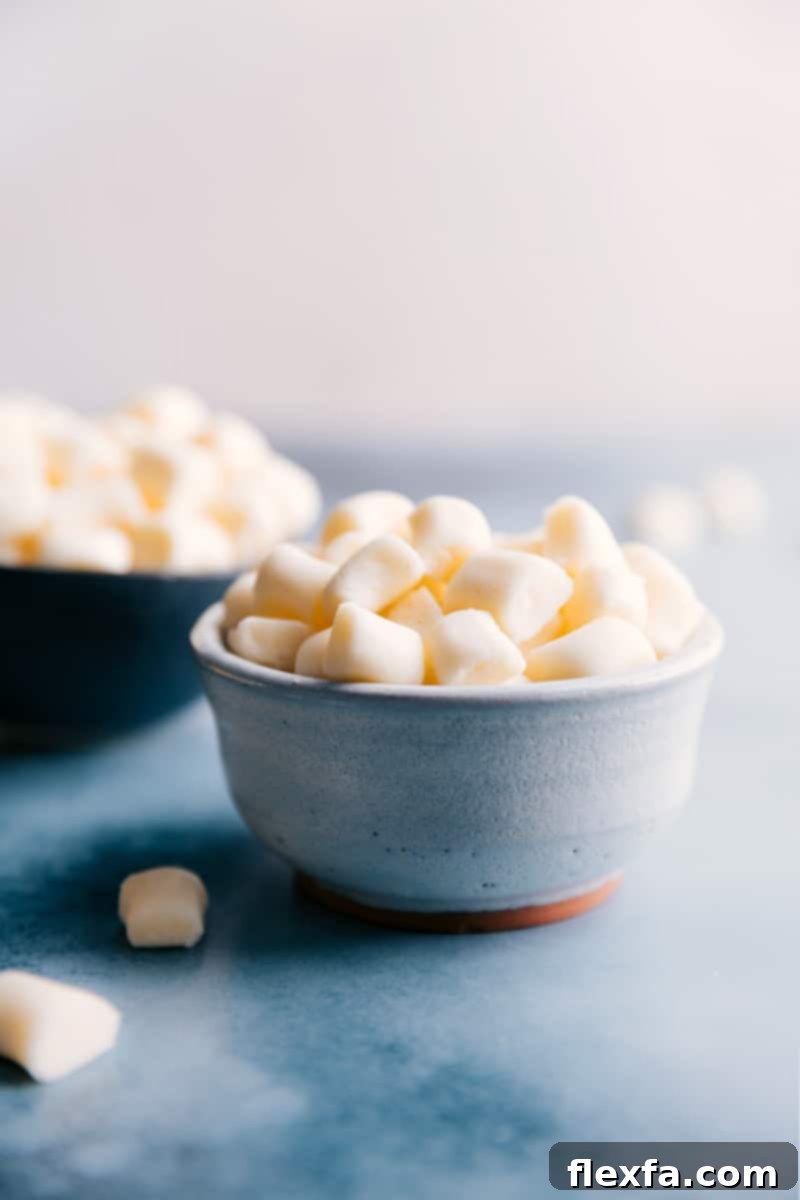
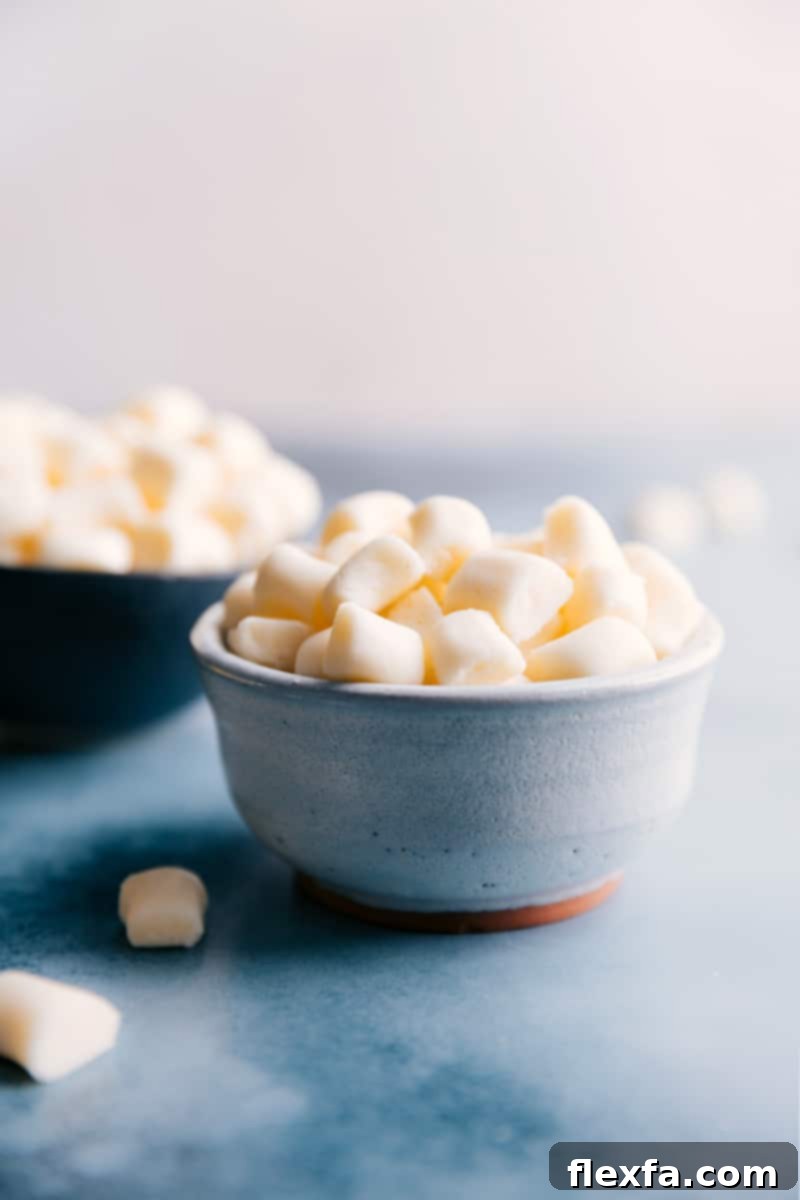
Butter Mints are a timeless confection, beloved for their sweet, refreshing peppermint flavor and incredibly soft, melt-in-your-mouth texture. Forget tough, store-bought versions; this homemade recipe is quick, remarkably easy, and best of all, requires absolutely no candy thermometer. Get ready to impress with these delightful, pillow-soft treats that practically dissolve on your tongue!

Author’s Insight
Why Homemade Butter Mints Are a Game Changer!
Butter Mints, fondly known as “Wedding Mints” or “Dinner Mints,” hold a special place in my heart. Their signature softness and creamy texture are simply irresistible. I remember my restaurant days, where a large bowl of these delightful confections sat by the host stand. On quieter evenings, I’m fairly certain I consumed my body weight in them! They were a simple pleasure, a small luxury that always brought a smile.
However, I often found that store-bought mints could be a hit or miss. Sometimes they were surprisingly stale, lacking that fresh, tender quality. Other times, the peppermint flavor was overwhelmingly strong, leaving an unpleasant aftertaste. Frustrated by the inconsistency, I decided it was time to take matters into my own hands and create my ideal butter mint recipe. And let me tell you, once you taste these homemade treasures, you’ll never look back!
What makes this recipe truly exceptional is its simplicity. You don’t need to be a seasoned candy maker or possess specialized equipment. There’s no complex candy thermometer involved, nor any other fancy tools. All you really need is a stand mixer (or a good hand mixer) and a few minutes of your time to whip up a batch of minty perfection that consistently impresses. These homemade butter mints are not just a treat; they’re an experience – offering a fresh, buttery, and perfectly pepperminty burst of flavor that truly melts away in your mouth.
Why You’ll Love This Butter Mints Recipe
There are countless reasons to adore these homemade butter mints, making them a staple in my recipe collection. Here’s why they’ll quickly become a favorite in your home too:
- Effortlessly Easy: Forget intimidating candy recipes! This recipe is designed for simplicity, making it accessible even for beginner bakers.
- No Candy Thermometer: A common fear for candy making is temperature control. This recipe expertly bypasses that need, focusing on a simple mixing process.
- Superior Flavor & Texture: Experience a freshness and tenderness that store-bought mints simply can’t match. The homemade version is incredibly creamy and literally melts in your mouth.
- Customizable: Easily adapt the color and even the flavor to suit any occasion, holiday, or personal preference.
- Perfect for Any Occasion: From elegant wedding favors and dinner party after-dinner treats to casual snack bowls and thoughtful homemade gifts, these mints fit right in.
- Cost-Effective: Making your own mints is often more economical than buying specialty candies from a store.
Ingredients for the Best Homemade Butter Mints
Crafting these delightful butter mints requires just a handful of common ingredients. The key to their incredible texture and flavor lies in selecting quality ingredients and preparing them correctly.
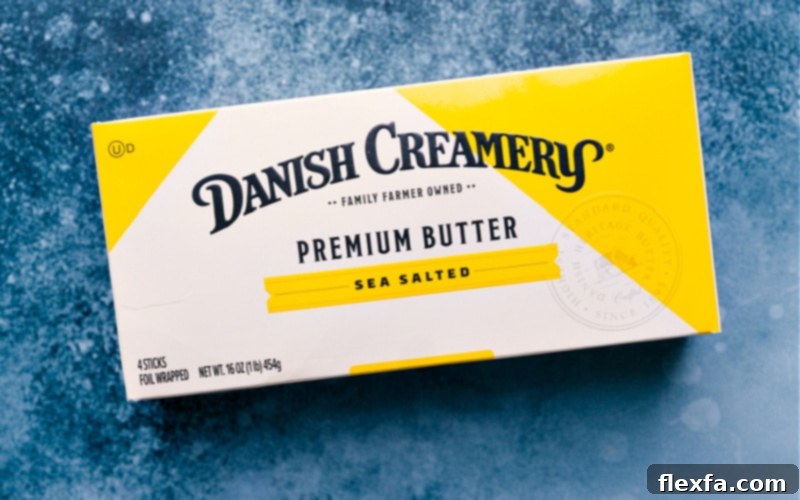
- Unsalted Butter (Room Temperature): This is the star of the show! Using high-quality unsalted butter ensures a rich, creamy base. It’s absolutely crucial that your butter is at true room temperature – soft enough to easily indent with your finger, but not melted or greasy. This allows it to cream smoothly with the sugar, creating that signature melt-in-your-mouth texture.
- Powdered Sugar (Confectioners’ Sugar): Powdered sugar is essential for achieving the smooth, fine texture of butter mints. Granulated sugar would result in a gritty product. You might need to adjust the amount slightly; if your dough feels too sticky, a little more powdered sugar will help achieve the perfect consistency.
- Heavy Cream: Don’t skimp on this! Heavy cream provides the necessary fat and thickness to bind the ingredients and create a rich, indulgent mouthfeel. Avoid substituting with lighter milk or half-and-half, as they simply aren’t thick enough and will yield a runny, unsuitable dough.
- Vanilla Extract: A touch of vanilla extract is a secret weapon that enhances the overall sweetness and complexity of the mints. It rounds out the sharp peppermint flavor, adding a subtle warmth that makes these treats irresistible.
- Peppermint Extract: Be sure to use peppermint extract, not peppermint oil. Extracts are alcohol-based and blend more evenly into the dough, providing a balanced and refreshing flavor. Peppermint oil is much more concentrated and can easily overpower the other flavors, leading to a medicinal taste if not used sparingly.
- Salt: Just a pinch of salt is vital to balance the sweetness and elevate all the other flavors. It prevents the mints from being cloyingly sweet and brings out the vibrant taste of the peppermint and rich butter.
- Food Coloring (Optional): While delicious plain, food coloring offers a fantastic opportunity to add a festive or personalized touch. A few drops can transform your mints into charming treats for holidays, baby showers, or themed parties.
How To Make Butter Mints: A Step-by-Step Guide
Making these homemade butter mints is surprisingly straightforward. Follow these simple steps for perfectly soft and delicious treats:
- Prepare Your Workspace: First, line a large sheet pan (approximately 15″ x 10″) with parchment paper. This will be where your finished mints dry, preventing them from sticking. Set it aside for now.
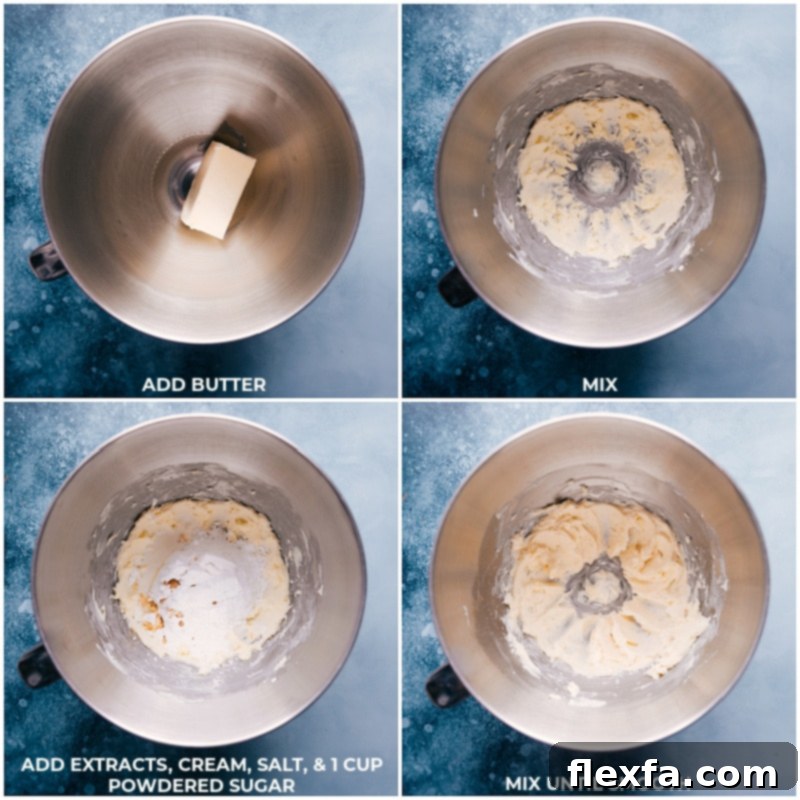
- Cream the Butter: In the bowl of a stand mixer fitted with a whisk attachment (or using a hand mixer), add your softened, room-temperature butter. Beat it on low speed until it becomes smooth and creamy, with no lumps remaining. This creates the essential base for your mints.
- Combine Wet and Dry Ingredients: Add 1 cup of the powdered sugar, along with the heavy cream, vanilla extract, peppermint extract, and salt to the butter. Beat on low speed until all these ingredients are just combined. Make sure to scrape down the sides of the bowl as needed to ensure everything is fully incorporated.
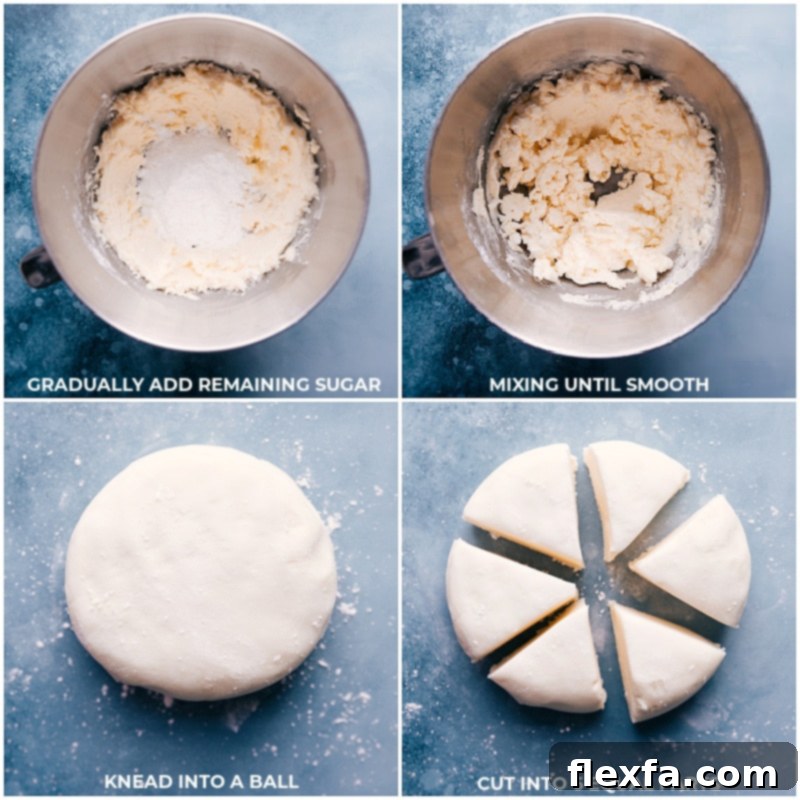
- Gradually Add Remaining Powdered Sugar: Now, begin to gradually add the remaining powdered sugar, about 1 cup at a time. Mix on low-to-medium speed after each addition until smooth. Continue scraping down the sides of the bowl to ensure a uniform dough. The dough will start to thicken and pull away from the sides.
- Incorporate Food Coloring (Optional): Once all the powdered sugar is fully incorporated and the dough has formed, you can add 2-3 drops of your chosen food coloring if desired. Increase the mixer speed to high and beat until the color is evenly distributed and a smooth, cohesive dough forms. Scrape the bowl once more to catch any unmixed bits.
- Knead and Shape the Dough: Turn off the mixer. Sprinkle a generous handful of powdered sugar onto a clean, dry work surface. Transfer the mint dough from the bowl onto the prepared surface. Gently knead the dough a few times, just enough to bring it together into a smooth, thick disc.
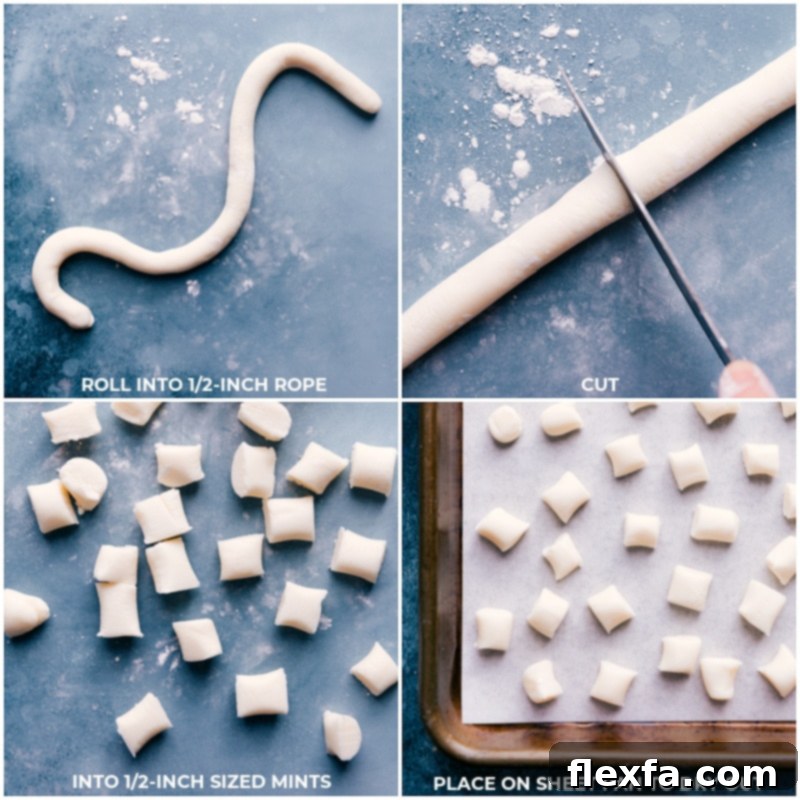
- Portion and Roll: Use a sharp knife to divide the dough disc into six equal portions. Take one portion and set it aside. Immediately cover the remaining five portions with a damp kitchen towel to prevent them from drying out while you work. Roll the removed portion of dough into a long, uniform tube shape, about 1/2-inch thick.
- Cut the Mints: Once you have a perfectly rolled tube, use your sharp knife to cut it into small, 1/2-inch wide individual mints. These bite-sized pieces are ideal.
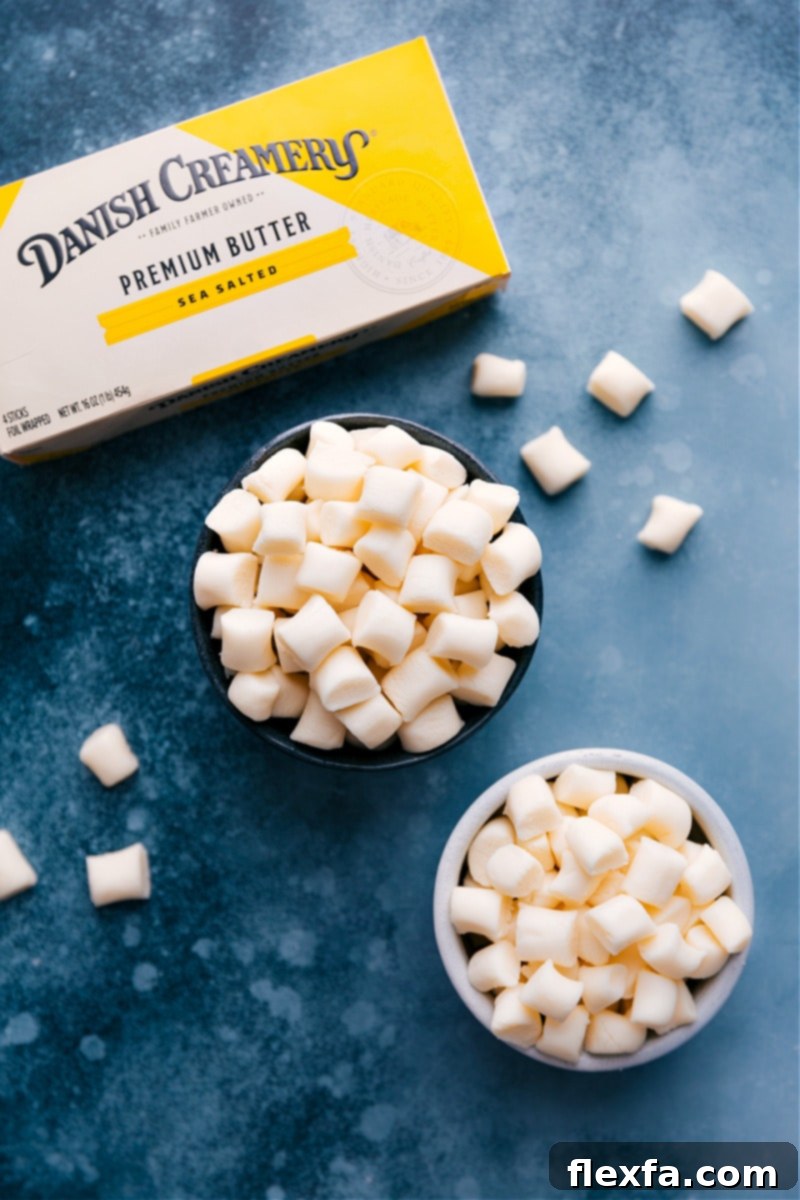
- Dry and Set: Carefully transfer the cut mints to your prepared sheet pan, arranging them in a single layer with a little space between each. Repeat the rolling and cutting process with the remaining dough portions until all your mints are shaped and on the pan. Leave the mints uncovered to dry overnight, or for a minimum of 10-12 hours. This drying time allows them to firm up slightly while retaining their delicious softness. Remember, these homemade mints are designed to be softer and creamier than commercial varieties, which is precisely what makes them so delectable!
Quick Tip for Peppermint Flavor
Always use peppermint extract, not just “mint” extract, for that classic flavor profile. Different brands of extract can have varying strengths, so it’s a good idea to taste a tiny bit of the dough after mixing (before drying) and add a little more extract if you prefer a stronger minty kick. I personally find McCormick’s® peppermint extract to be reliably excellent.
Tips For Success: Making Perfect Butter Mints Every Time
While this recipe is simple, a few expert tips can ensure your butter mints turn out absolutely perfect:
- Butter Temperature is Key: Ensure your butter is truly soft but not melted. If it’s too cold, it won’t cream properly, leading to lumpy dough. If it’s melted, the dough will be excessively sticky and difficult to work with. If you’re short on time, you can quickly soften butter by following this helpful guide.
- Add Powdered Sugar Gradually: Don’t dump all the powdered sugar in at once. Adding it a little at a time allows it to incorporate smoothly and helps you achieve the ideal dough consistency without overmixing.
- Adjust Dough Consistency as Needed: The weather and even the exact amount of powdered sugar can affect your dough.
- If the butter mint dough feels too dry or crumbly, add a tiny bit (1/2 teaspoon at a time) of heavy cream.
- If it’s too sticky and unmanageable, incorporate a little more powdered sugar (starting with a tablespoon, up to 1/4 cup total) until it reaches a soft, pliable, and non-sticky texture.
- Keep Dough Covered: While working with portions of the dough, keep the remaining dough covered with a damp kitchen towel. This prevents it from drying out and becoming crumbly.
- Sharp Knife for Clean Cuts: Use a very sharp knife to cut your rolled dough tubes into individual mints. This will give you clean, uniform edges rather than squished or uneven pieces.
Creative Variations for Your Butter Mints
One of the joys of making homemade butter mints is how easily you can customize them. Get creative and make this recipe truly your own!
- Color Them Beautiful: While we adore them in their classic pale, buttery hue, food coloring opens up a world of possibilities! Add a few drops for vibrant yellow Butter Mints, elegant pinks, festive greens, or any color that suits your mood or event theme.
- Perfect for Celebrations:
- For a baby shower, color the dough pink or blue to match the nursery theme.
- Hosting a gender reveal party? Make half the batch pink and the other half blue for a delightful and edible surprise!
- For Christmas, use red and green food coloring. For Easter, pastel shades. The options are endless!
- Switch Up the Flavor Profile: Peppermint is the traditional and beloved choice, but don’t be afraid to experiment! Consider these fun alternatives:
- Coconut Extract: For a tropical twist, replace peppermint with coconut extract.
- Almond Extract: A subtle, nutty flavor that pairs wonderfully with the creamy butter.
- Lemon or Orange Extract: For a bright, citrusy zing that’s incredibly refreshing.
- Spearmint Extract: A milder, sweeter alternative to peppermint if you prefer less intensity.
Just be mindful of the potency of different extracts and adjust the quantity to taste.
Storage Tips for Butter Mints
How Long Do Homemade Butter Mints Last?
Proper storage is key to keeping your homemade butter mints fresh, soft, and delicious for as long as possible. Here’s how to best store them:
- Room Temperature: Once fully dried, transfer your butter mints to an airtight container. Store them at room temperature, away from direct sunlight and heat, where they will stay fresh for 1 to 3 weeks. An airtight container also helps prevent them from getting crushed.
- Refrigeration: For extended freshness, store the mints in an airtight container in the refrigerator. They will remain fresh for up to 3 to 4 weeks. Bring them to room temperature before serving for the best melt-in-your-mouth experience.
- Signs of Expiration: Trust your senses! If your mints start to lose their vibrant peppermint smell, change color, or develop any off-flavors, it’s a good indication that they are no longer at their best and should be discarded.
- Freezing for Long-Term Storage: Butter mints freeze beautifully! To freeze them, first arrange the dried mints in a single layer on a baking tray and freeze until solid (this prevents them from sticking together). Once frozen, transfer them to a freezer-safe airtight container or a heavy-duty freezer bag. They can be stored in the freezer for up to 2 months. Thaw at room temperature before serving.
More Tasty Treats From Our Kitchen
If you loved making these easy butter mints, you’ll surely enjoy these other delightful recipes perfect for satisfying your sweet tooth or sharing with loved ones:
- Fudge Brownie Cookies with real hot fudge for an ultimate chocolate indulgence!
- Nutella Banana Bread with irresistible swirls of hazelnut spread for a decadent breakfast or snack.
- Chocolate Chip M&M Cookies baked to bakery-style perfection – chewy, soft, and loaded with M&Ms.
- Sparkling Raspberry Limeade made with fresh limes and real raspberries for a refreshing and vibrant drink.
- Homemade Turtle Candy – an incredibly simple recipe requiring only three ingredients for a classic treat!
Print Recipe
★
★
★
★
Butter Mints Recipe
Chelsea Lords
This Butter Mints recipe creates sweet, pepperminty confections with a creamy, melt-in-your-mouth texture. Easy to make without a candy thermometer, these homemade mints are a delightful alternative to store-bought options.
15 minutes
10 hours
10 hours 15 minutes
150 mints
Video Tutorial
Equipment
-
Sheet pan (15″ x 10″) lined with parchment paper
-
Stand mixer with whisk attachment; or a reliable hand mixer
Ingredients
- 1/2 cup unsalted butter at room temperature
- 3-3/4 cups powdered sugar (confectioners’ sugar, see note 1)
- 1 tablespoon heavy cream (do not substitute with milk, see note 2)
- 1 teaspoon vanilla extract
- 1/4 teaspoon peppermint extract (use extract, not oil, see note 3)
- 1/8 teaspoon salt
- Food coloring (optional, for festive colors)
Instructions
-
Prepare the Pan: Line a large sheet pan (approximately 15″ x 10″) with parchment paper and set it aside. This will prevent your mints from sticking as they dry.
-
Cream the Butter: In the bowl of a stand mixer fitted with a whisk attachment (or using a hand mixer), add the softened unsalted butter. Beat on low speed until it is smooth and creamy, without any lumps.
-
Mix Initial Ingredients: Add 1 cup of the powdered sugar, along with the heavy cream, vanilla extract, peppermint extract, and salt to the butter. Beat on low speed until all ingredients are just combined and smooth. Be sure to scrape down the sides of the bowl as needed to ensure everything is fully incorporated.
-
Add Remaining Powdered Sugar: Gradually add the rest of the powdered sugar, about 1 cup at a time, mixing at low-to-medium speed after each addition until smooth. Continue scraping down the sides of the bowl as the dough thickens and comes together.
-
Add Coloring (Optional) & Final Mix: Once all the powdered sugar is fully incorporated, you can add 2–3 drops of your desired food coloring. Increase the mixer speed to high and beat until a smooth, evenly colored dough forms, scraping the bowl as needed. Once the dough is smooth and cohesive, turn off the mixer.
-
Knead and Disc Shape: Sprinkle a handful of powdered sugar onto a clean, dry work surface. Transfer the mint dough to the counter and gently knead it a few times, shaping it into a thick disc. This helps ensure a uniform texture.
-
Portion and Roll: Use a sharp knife to cut the disc into six equal portions. Set one portion aside to work with immediately. Cover the remaining dough portions with a damp kitchen towel to prevent them from drying out. Roll the removed portion into a long, uniform tube shape, about 1/2-inch thick.
-
Cut Mints: Using your sharp knife, cut the rolled tube into 1/2-inch wide individual mints. Transfer these cut mints to the prepared sheet pan, arranging them in a single layer. Repeat this rolling and cutting process with the remaining dough portions until all the mints are shaped and on the pan.
-
Dry & Set: Let the mints sit uncovered on the sheet pan to dry overnight, or for approximately 10–12 hours. This crucial drying period allows them to develop a slightly firmer exterior while retaining their characteristic soft, creamy interior. Remember, these homemade mints will remain deliciously softer than most commercial varieties!
Recipe Notes
Note 1 (Powdered Sugar Adjustment): The exact amount of powdered sugar needed can vary based on factors like humidity and how densely the sugar is packed. If your mixture appears too dry and crumbly, gradually add a tiny bit more heavy cream (1/2 teaspoon at a time) until it reaches the right consistency. Conversely, if the dough feels too wet or sticky to handle, add a bit more powdered sugar (starting with 1 tablespoon, up to an additional 1/4 cup) until it’s pliable but not tacky.
Note 2 (Heavy Cream is Best): Unfortunately, lighter milk or half-and-half are not suitable substitutes for heavy cream in this recipe. Heavy cream’s higher fat content and thicker consistency are essential for achieving the rich, creamy texture and proper dough structure of these butter mints.
Note 3 (Peppermint Extract vs. Oil): For the best and most balanced peppermint flavor, it is crucial to use peppermint extract, not peppermint oil. Peppermint oil is highly concentrated and can easily result in an overpowering, almost medicinal taste. Extracts provide a smoother, more integrated flavor profile.
Storage: Store your finished butter mints in an airtight container at room temperature for up to 1-3 weeks. For extended freshness, they can be kept in the fridge for up to 4 weeks. For long-term storage, freeze them on a tray until solid, then transfer to an airtight freezer container for up to 2 months. Thaw at room temperature before enjoying.
Nutrition Information
Serving: 1 mint | Calories: 8kcal | Carbohydrates: 1g | Protein: 1g | Fat: 1g | Saturated Fat: 1g | Polyunsaturated Fat: 1g | Monounsaturated Fat: 1g | Trans Fat: 1g | Cholesterol: 2mg | Sodium: 6mg | Potassium: 1mg | Sugar: 1g | Vitamin A: 21IU | Vitamin C: 1mg | Calcium: 1mg | Iron: 1mg
Nutrition information is automatically calculated and should only be used as an approximation.
Enjoyed this recipe? Leave a comment below!