
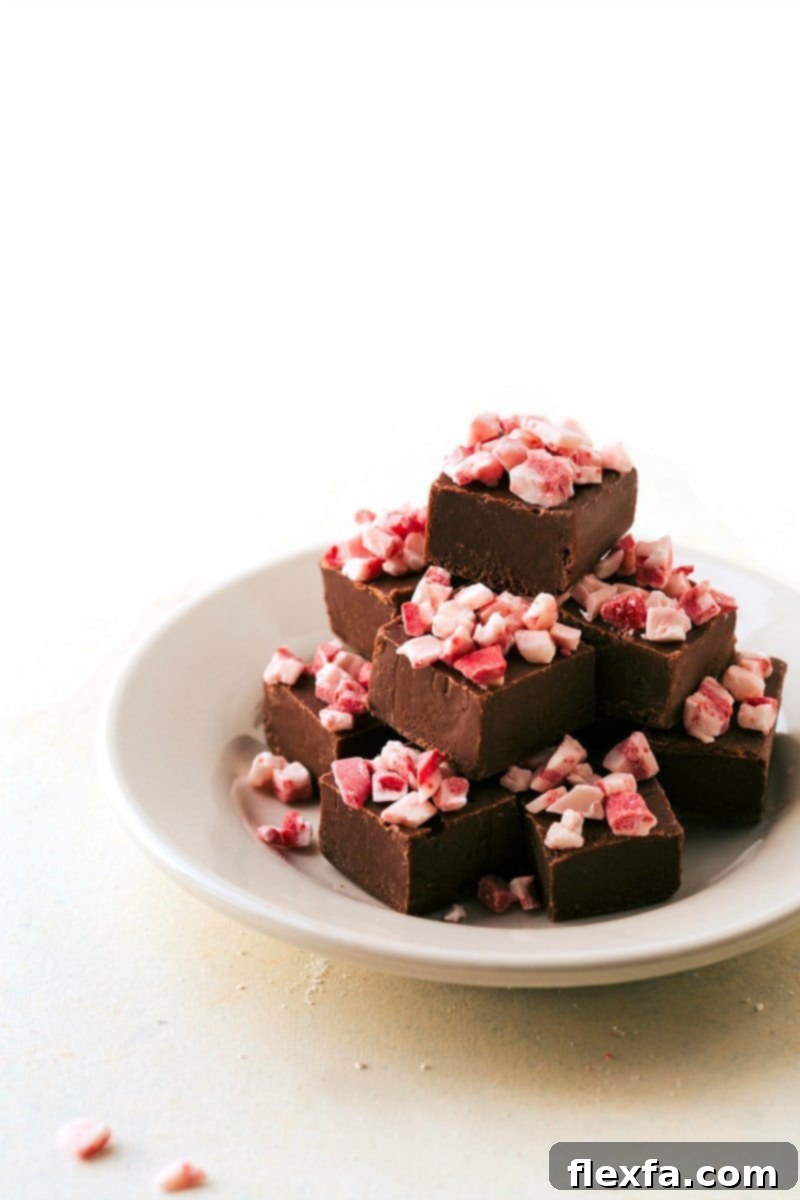
Unwrap the magic of the holiday season with four incredibly easy, quick, and foolproof Christmas treats! These delightful recipes are perfect for getting the whole family involved, especially the kids, and make wonderful homemade gifts or festive additions to your holiday table. Get ready to create lasting memories and enjoy irresistible sweets like Peppermint Bark Cookies, luscious Microwave Fudge, crunchy Toffee Cashew Clusters, and charming Rudolph Bites.

DELIGHTFUL PEPPERMINT BARK COOKIES
Peppermint Bark Cookies are a timeless holiday favorite, combining the satisfying crunch of chocolate cookies with the cool, refreshing burst of peppermint. This recipe takes a shortcut by using pre-made cookies, making it incredibly simple and fast, yet yielding a sophisticated treat that looks like it took hours. They’re ideal for holiday parties, cookie exchanges, or just a cozy evening by the fire. The vibrant colors and festive flavors truly embody the spirit of Christmas.
A Few Quick Tips for Perfect Peppermint Bark Cookies:
- For the ultimate flavor and a smooth, consistent melt, always opt for a **high-quality white chocolate**. Brands like Guittard or Ghirardelli are highly recommended for their superior taste and melting properties, ensuring your cookies look and taste professional. Cheaper chocolates can often seize or become grainy, which no one wants in a festive treat!
- To ensure these beautiful peppermint bark cookies are easily removed from your baking sheet without sticking or breaking, always **line your pan with parchment paper**. This simple step makes cleanup a breeze and preserves the integrity of your perfectly coated treats.
- Don’t be shy with the crushed candy canes! They not only add a wonderful texture and burst of peppermint flavor but also give these cookies their signature festive look.
Recommended Product Links to Elevate Your Baking:
- Grasshopper Cookies: The ideal base for this recipe, providing a minty chocolate foundation.
- Food Processor: Essential for efficiently crushing candy canes into fine, sprinkly bits.
- Peppermint Candy Canes: The iconic topping that adds both flavor and holiday cheer.

Print Recipe
Peppermint Bark Cookies
These festive Peppermint Cookies are a holiday showstopper! Crispy Grasshopper cookies are beautifully dipped in smooth white chocolate, then generously sprinkled with crushed candy canes, setting into a perfect, celebratory treat. They are incredibly easy to make, wonderfully delicious, and infused with an abundance of holiday cheer, making them a must-have for your seasonal festivities.
Equipment
- Blender or food processor
- Large sheet pan (15″ x 21″)
- Parchment paper
Ingredients
- 1 (10-ounce) package Grasshopper Cookies
- 1 (11-ounce) bag white chocolate chips (see Note 1)
- 2 teaspoons vegetable oil
- 1/2 teaspoon peppermint extract (optional, use peppermint, not mint)
- 7 full-sized candy canes
Instructions
- To begin, place the Grasshopper cookies in the fridge for a short period while you prepare the chocolate. Next, crush the candy canes thoroughly in a blender or food processor until you achieve fine crumbs. Finally, prepare a large sheet pan by lining it completely with parchment paper; this will ensure easy removal of your finished cookies.
- In a large, microwave-safe bowl, combine the white chocolate chips, vegetable oil, and peppermint extract. (Adding the extract will give an extra burst of peppermint flavor, perfect for holiday enthusiasts!) Stir all ingredients together until well mixed.
- Carefully melt the chocolate mixture in the microwave, using short bursts of 20 seconds. Between each burst, stir the chocolate for about 10–15 seconds to ensure even melting and to prevent burning. Remember, the residual heat will continue to melt the chocolate even after it’s out of the microwave.
- Patience is key here! Slowly melting the chocolate in these short intervals will guarantee a smooth, luxurious consistency without scorching it. For an even easier process, you can divide the white chocolate into two separate batches and melt them one at a time, reducing the risk of overheating.
- Once your chocolate is perfectly melted, retrieve the cookies from the freezer. Place one cookie at a time on a fork, holding it over the bowl of melted chocolate. Use a spoon to generously coat the entire cookie with chocolate, ensuring it’s evenly covered.
- Gently tap the fork against the side of the bowl to allow any excess chocolate to drip off. This step is crucial for achieving a neat and professional finish, preventing puddles of chocolate around your cookies.
- Carefully transfer each dipped cookie onto the prepared sheet pan, leaving a small space between them.
- Immediately after placing each cookie on the sheet pan, sprinkle a generous amount of the crushed candy canes over the wet chocolate. The candy cane pieces will adhere best while the chocolate is still soft. Repeat this process for all remaining cookies.
- For a fun visual variety, consider dipping just half of some cookies in the melted chocolate. This creates a charming, two-toned effect that adds an extra touch of festive appeal to your treat platter.
- Allow the dipped cookies to harden completely at room temperature. This can take some time, but it’s essential for the chocolate to set properly and the candy canes to firmly attach.
Recipe Notes
Note 1: For the best flavor and melting consistency, I highly recommend using high-quality white chocolate like Guittard or Ghirardelli. These brands melt beautifully and blend seamlessly with extracts. Lesser quality white chocolates are more prone to seizing or not melting smoothly, which can affect the final texture and appearance of your peppermint bark cookies.
Storage: To maintain their freshness, store any leftover Peppermint Bark Cookies in an airtight container at room temperature for up to one week. If you prefer them to last a little longer, they can be stored in the fridge. For best results and to prevent sticking, arrange them in a single layer or separate layers with parchment paper.
Nutrition
Nutrition information is automatically calculated, so should only be used as an approximation.
Loved this recipe? Share your thoughts below!
IRRESISTIBLE FOOLPROOF MICROWAVE FUDGE
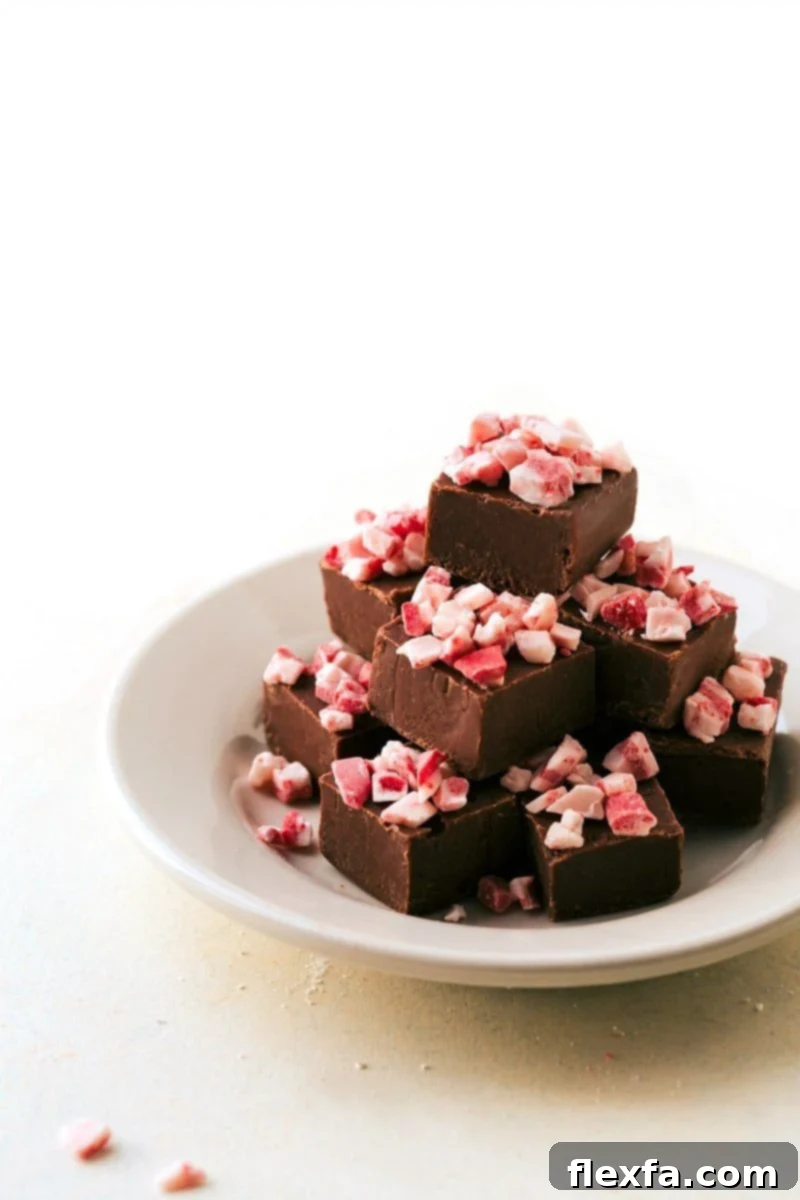
Craving rich, creamy fudge but short on time and patience? This Foolproof Microwave Fudge recipe is your holiday savior! It delivers all the decadent flavor and smooth texture of traditional fudge without the need for a candy thermometer or endless stirring. In just a few simple steps and a matter of minutes, you can have a batch of impressive, delicious fudge ready to chill, perfect for last-minute gifts, unexpected guests, or simply satisfying your sweet tooth. The versatility allows for classic chocolate or festive peppermint variations.
A Few Quick Tips for Foolproof Microwave Fudge:
- Always **use high-quality chocolate chips** for the best possible flavor and texture. My personal favorites are Ghirardelli® and Guittard® (this is not a sponsored endorsement, just genuine advice!). The superior quality of chocolate significantly impacts the richness and overall taste of your finished fudge. Skimping on chocolate quality here can result in a less satisfying product.
- To prevent the fudge mixture from burning, melt it in the microwave using short **30-second bursts**. Crucially, **stir the mixture for at least 20-25 seconds between each burst**. Remember that ingredients continue to cook and heat even after they’ve been removed from the microwave, so ample stirring allows the residual heat to finish the melting process without scorching the chocolate.
- For easy removal and a clean presentation, be sure to **line your baking pan** with parchment paper or aluminum foil. This simple preparatory step ensures your fudge lifts out effortlessly once set, making slicing and serving a breeze, and significantly cutting down on cleanup time.
Recommended Product Links:
- Andes Peppermint Crunch Chips: For a delightful, festive peppermint twist on your fudge.
Print Recipe
Foolproof Microwave Fudge
This Foolproof Microwave Fudge is the epitome of rich, creamy indulgence and is ridiculously easy to prepare, making it a perfect last-minute holiday dessert. Simply melt chocolate with butter and sweetened condensed milk, stir in your favorite flavor extract, and finish with a sprinkle of festive peppermint crunch. A quick chill is all it takes before you can slice and enjoy this delectable treat—absolutely no candy thermometer needed!
Equipment
- 8 x 8-inch baking pan
- Parchment paper
Ingredients
- 4 tablespoons salted butter, melted
- 1 (14-ounce) can sweetened condensed milk (see Note 1)
- 3 cups milk chocolate chips
- 1 teaspoon vanilla extract (or peppermint extract for a festive twist)
- 1 cup Andes peppermint crunch chips (or crushed peppermint candies)
Instructions
- To begin, line an 8×8 baking pan with parchment paper, allowing some overhang on the sides for easy removal, and set it aside. This preparation step ensures your fudge won’t stick and can be lifted out effortlessly.
- In a large, microwave-safe bowl, add the salted butter. Microwave it until completely melted, typically about 30-45 seconds, depending on your microwave’s power.
- Pour the entire can of sweetened condensed milk over the melted butter in the bowl. Whisk these two ingredients together thoroughly until they are smoothly combined, creating a rich base for your fudge.
- Add the milk chocolate chips to the butter and condensed milk mixture. Stir gently to begin combining everything.
- Microwave the mixture in short 15-second bursts. After each burst, stir the mixture vigorously for about 10 seconds. Continue this process until the chocolate chips are fully melted and the mixture is smooth and glossy. Be patient and stir well to prevent burning.
- Once the chocolate mixture is perfectly melted, remove it from the microwave and stir in your chosen extract (vanilla for classic flavor or peppermint for a holiday kick). Ensure the extract is fully incorporated.
- Carefully spoon the smooth fudge mixture into your prepared 8×8 pan. Use a spatula to spread and smooth the top evenly, creating a flat surface.
- Generously sprinkle the Andes peppermint crunch chips or crushed peppermint candies over the top of the warm fudge. This adds both visual appeal and a delightful crunch.
- Cover the pan tightly with plastic wrap or aluminum foil. Place it in the refrigerator for approximately 2–3 hours, or until the fudge is completely set and firm enough to slice.
Recipe Notes
Note 1: It is crucial to use **sweetened condensed milk** and not evaporated milk for this recipe. These two products are very different, and using evaporated milk will result in a fudge that won’t set correctly. Also, avoid using a lower-fat version of sweetened condensed milk, as the fat content is essential for the fudge to firm up properly.
Storage: Store any leftover microwave fudge in an airtight container to maintain its freshness. It will keep well in the refrigerator for up to two weeks. For longer storage, you can freeze the fudge for up to three months. If frozen, allow it to sit at room temperature for a few minutes before serving to achieve the best texture.
Nutrition
Nutrition information is automatically calculated, so should only be used as an approximation.
Loved this recipe? Share your thoughts below!

CRUNCHY TOFFEE CASHEW CLUSTERS
For those who adore a combination of salty and sweet, these Toffee Cashew Clusters are an absolute revelation. They’re incredibly addictive, offering a delightful crunch from the cashews and toffee bits, all enveloped in smooth, rich chocolate. These clusters are surprisingly simple to make, requiring minimal ingredients and effort, yet they look impressively gourmet. They are perfect for holiday entertaining, as thoughtful homemade gifts, or simply as a well-deserved treat for yourself. The contrasting textures and flavors create a truly irresistible experience.
A Few Quick Tips for Stellar Toffee Cashew Clusters:
- As with any chocolate-based treat, the key to exceptional flavor lies in the quality of your chocolate. Always **use high-quality chocolate chips or baking bars**. My top recommendations are Ghirardelli® and Guittard® (unaffiliated, just great quality!). Superior chocolate ensures a smoother melt and a richer taste for your toffee cashew clusters.
- For stress-free preparation and effortless cleanup, always **line your baking pan with parchment paper**. This simple step prevents the clusters from sticking and makes transferring them a breeze once they’ve set.
- While the recipe uses roasted and salted cashews, feel free to experiment with other nuts like almonds or pecans for a different flavor profile. Just make sure they are roasted to bring out their best flavor.
- Melting the chocolate over a double boiler (as suggested in the instructions) is ideal for an even, gentle melt, preventing scorching and ensuring a silky smooth coating for your clusters.
Recommended Product Links:
- Roasted and Salted Cashews: The foundational nut for these delightful clusters.
- Toffee Bits: Adds a buttery, crunchy sweetness that perfectly complements the chocolate and cashews.

Print Recipe
Toffee Cashew Clusters
These Toffee Cashew Clusters are an irresistible combination of crunchy, chocolatey, and utterly delightful! Roasted cashews and buttery toffee bits are generously coated in a luscious, smooth melted chocolate, then allowed to set into perfect bite-sized treats. They are incredibly easy to prepare and even easier to devour, making them an ideal indulgence for any occasion, especially during the festive holiday season.
Equipment
- Large sheet pan (15″ x 21″)
- Parchment paper
- Large saucepan (for double boiler)
- Heat-proof bowl (metal or glass)
Ingredients
- 16 ounces white baking chocolate, chopped (see Note 1)
- 14 ounces milk chocolate, chopped
- 4 cups roasted and salted cashews
- 1-1/4 cups toffee bits
- Vegetable oil (optional, to thin chocolate)
Instructions
- To begin, line a large sheet pan with parchment paper and set it aside. This will ensure your clusters don’t stick and are easy to remove once set.
- Roughly chop both the white and milk chocolate into small, uniform pieces using a serrated knife. This helps the chocolate melt more evenly. Place the chopped chocolate into the bottom of a metal or glass heat-proof bowl.
- Meanwhile, prepare a double boiler: fill a large saucepan with about an inch of water and bring it to a gentle simmer over low heat on the stovetop.
- Carefully place the bowl containing the chopped chocolates over the simmering water. Ensure that the bottom of the bowl does not touch the water directly, as this can cause the chocolate to overheat or seize. The steam from the simmering water will gently melt the chocolate.
- Continuously stir the chocolate as it gradually softens and melts. Once only a few small chunks of chocolate remain, remove the bowl from the heat. Continue stirring vigorously until all the chocolate is completely melted and beautifully smooth. The residual heat in the bowl will finish the melting process.
- If, after melting, your chocolate appears too thick for easy coating, you can add a few teaspoons of vegetable oil to thin it out. Add the oil slowly, one teaspoon at a time, stirring well after each addition until you achieve your desired consistency.
- Once the chocolate is perfectly smooth and thinned if necessary, add the roasted and salted cashews and the toffee bits to the bowl. Stir everything together thoroughly until the cashews and toffee are completely coated in the luscious chocolate.
- Using a tablespoon, drop small clusters of the chocolate-coated cashews and toffee onto your prepared sheet pan. Leave a little space between each cluster to prevent them from merging.
- Place the sheet pan in the refrigerator for 10–15 minutes, or until the clusters are completely set and firm. Once hardened, they are ready to enjoy! Store any remaining clusters in an airtight container to maintain their freshness.
Recipe Notes
Note 1: When preparing these clusters, it is essential to measure your chocolate carefully to ensure the correct proportions for melting and coating. For the best results and consistency, **use chocolate bars that you chop yourself rather than chocolate chips**. Chocolate chips contain stabilizers that prevent them from melting as smoothly as baking bars, which can affect the texture of your clusters.
Loved this recipe? Share your thoughts below!

ADORABLE RUDOLPH BITES
Bring a smile to every face this holiday season with these utterly adorable Rudolph Bites! These festive treats are not only incredibly cute but also fantastically easy to assemble, making them a perfect activity for little hands in the kitchen. Combining the classic flavors of peanut butter and chocolate with a playful reindeer design, they are guaranteed to be a hit at any holiday gathering, school party, or as a charming gift. Watch as miniature Reese’s Cups transform into everyone’s favorite red-nosed reindeer!
A Few Quick Tips for Crafting Perfect Rudolph Bites:
- While the recipe uses peanut butter to attach the features, you can also utilize melted chocolate or even frosting piped into a small bag. This provides an alternative adhesive, especially if you have allergies or want to experiment with different flavors for the “glue.” Ensure whatever adhesive you choose is thick enough to hold the pieces securely.
- Break the pretzel twists carefully to create the most realistic and sturdy antlers. Some pretzels may break imperfectly, but with a bit of practice, you’ll find the best way to achieve those perfect reindeer horns. It’s part of the fun!
- For extra visual appeal, consider chilling the Reese’s Cups slightly before assembly. This can make them firmer and easier to handle, preventing accidental squishing while pressing in the antlers and eyes.
Recommended Product Links:
- Red Hot Candies: An alternative for Rudolph’s bright red nose if mini M&M’s are unavailable.
- Mini M&Ms: The classic choice for that iconic red nose.
- Edible Candy Eyes: These are key to bringing your Rudolph Bites to life with charming expressions.
- Pretzel Twists: Used to create those distinctive reindeer antlers.

Print Recipe
Rudolph Bites
These Rudolph Bites are utterly adorable and as delicious as they are charming! Miniature Reese’s Peanut Butter Cups are ingeniously transformed into festive reindeer with the addition of crunchy pretzel antlers, whimsical candy eyes, and a bright red M&M nose held in place with a dab of peanut butter. They’re a fun, festive, and incredibly easy-to-make treat, perfect for holiday snacking and guaranteed to bring smiles to all ages!
Ingredients
- 3 to 4 tablespoons creamy peanut butter
- 20 Miniature Reese’s Cups, unwrapped
- 1 bag pretzel twists
- 20 Miniature Red M&M’s
- 40 candy eyeballs (2 per Rudolph)
Instructions
- To begin, carefully break the pretzel twists in half. Then, further break off smaller pieces to shape them into realistic-looking antlers. While many pretzels might break imperfectly at first, you’ll find it gets easier with practice to achieve the desired antler shape.
- Locate the softest spot on the side of each unwrapped Miniature Reese’s Cup. Gently press two prepared pretzel antlers into this spot on each Reese’s, ensuring they are securely placed.
- Next, spread a small amount of creamy peanut butter on the back of one miniature red M&M. Press this M&M firmly onto the front of the Reese’s Cup to create Rudolph’s iconic red nose.
- Spread a tiny bit more peanut butter on the back of two edible candy eyeballs. Carefully attach these above the red nose on each Reese’s Cup to give your Rudolph his expressive eyes.
- Continue to press and secure all the attached pieces (antlers, nose, and eyes) until they are firmly in place and not easily dislodged. Once all Rudolph Bites are assembled, they are ready to be enjoyed!
Recipe Notes
Storage: To keep your Rudolph Bites fresh and intact, store any leftovers in an airtight container at room temperature for 3–4 days. Alternatively, you can keep them in the fridge for up to a week. It’s important to keep them away from direct heat sources to prevent the chocolate from melting and the decorations from shifting.
Nutrition
Nutrition information is automatically calculated, so should only be used as an approximation.
Loved this recipe? Share your thoughts below!
EXPLORE MORE FESTIVE CHRISTMAS TREATS
If you’re still in the mood for more holiday baking inspiration or simply looking for additional delicious recipes to complete your festive spread, we’ve got you covered! Discover a variety of other delightful Christmas treats that are sure to bring joy to your family and friends. From classic cookies to more unique seasonal delights, there’s something for every sweet tooth. These recipes are all designed to be accessible and enjoyable, perfect for making your holiday season extra special.
- Peppermint Sugar Cookies: A classic holiday cookie with a refreshing minty twist.
- Microwave Fudge: Indulge in rich, creamy fudge made with just 5 simple ingredients.
- Candied Walnuts: Sweet and crunchy, these are perfect for snacking or adding to salads.
- Turtle Bark: A delightful blend of chocolate, caramel, and pecans in an easy-to-make bark.
- S’mores Fudge: All the campfire flavors you love, transformed into a decadent fudge.