

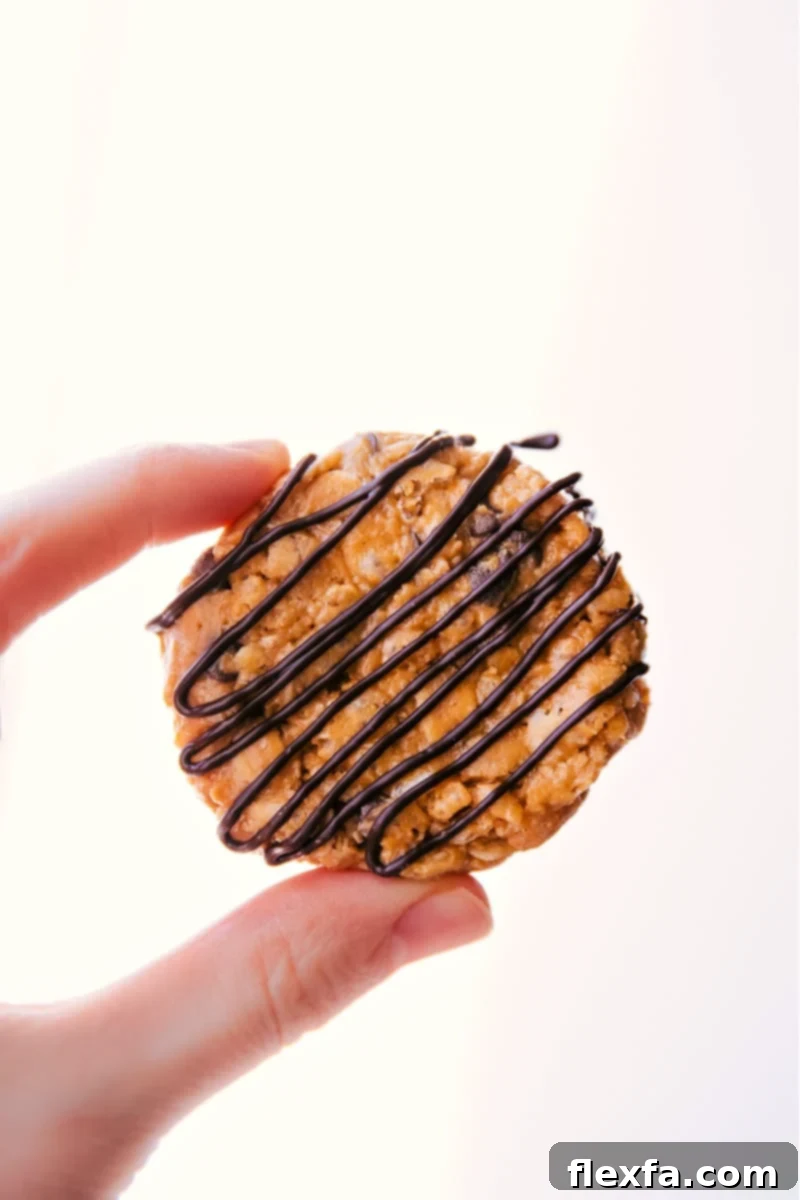
No-Bake Healthy Breakfast Cookies are a revelation for anyone seeking a quick, incredibly satisfying, and wholesome start to their day or a delightful pick-me-up. Crafted from just a handful of straightforward, everyday ingredients, these cookies promise a delightful texture and rich flavor without ever needing an oven. For an extra touch of indulgence that feels truly special, don’t forget that luscious chocolate drizzle!

author’s note
Cookies for Breakfast? Absolutely, and Always!
As a devoted sweet breakfast enthusiast, my mornings are often defined by the delightful promise of something delicious. Give me a stack of fluffy homemade pancakes, perfectly golden French toast, or crisp, airy banana waffles, and I’m instantly in my happy place. So, when the concept of “breakfast cookies” first entered my culinary radar, I knew it was a sweet destiny I had to embrace.
These No-Bake Healthy Breakfast Cookies have truly revolutionized my routine. They are an absolute lifesaver on those bustling mornings when time is of the essence, or when I’m preparing for an invigorating hike and need a quick, portable fuel source. Beyond breakfast, they’ve seamlessly integrated into my afternoons, becoming my go-to “pick-me-up” snack. Unlike many sugary treats, these cookies hit that sweet spot perfectly without leading to an inevitable sugar crash, keeping me energized and focused throughout the day.
What makes them even more appealing is their simplicity. This recipe relies entirely on common pantry staples, meaning no frantic last-minute trips to the store. And the best part? Absolutely no baking required! This means less time in the kitchen and more time enjoying your delicious creation.
The texture of these cookies is, quite simply, everything. Each bite delivers a harmonious blend of crunchy elements from the rice cereal, chewy goodness from the oats, a comforting nuttiness from the peanut butter, and just the right amount of sweetness. But if you truly want to elevate this experience to another level, a delicate drizzle of melted chocolate on top transforms them into an irresistible masterpiece. Trust me, once you add that chocolate, it’s game over – you’ll be completely hooked!
Essential No-Bake Healthy Breakfast Cookie Ingredients
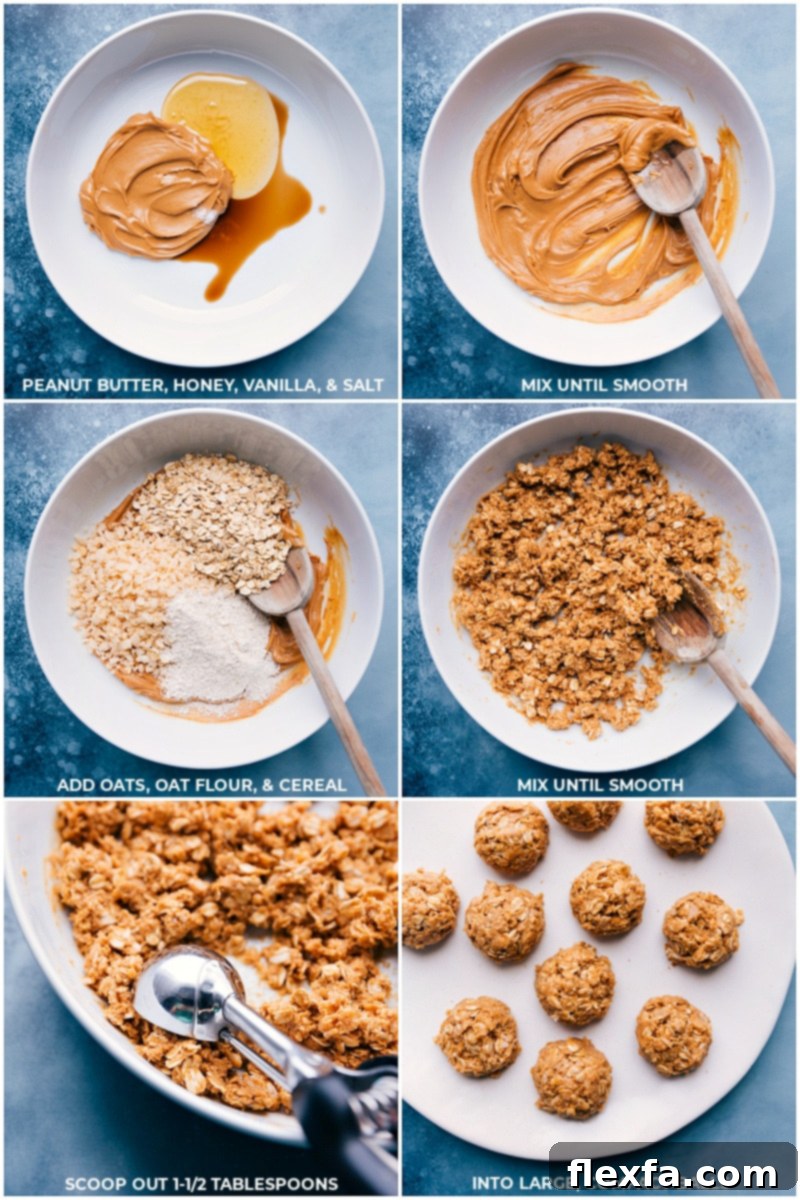
Crafting these delightful no-bake cookies is incredibly simple, relying on a few key ingredients you likely already have on hand. Each component plays a crucial role in achieving the perfect flavor and texture, so here’s a closer look at what you’ll need and why:
| Ingredient | Why It’s Key / Expert Tip |
|---|---|
| Peanut Butter | This is the binding agent and flavor base! Opt for a creamy, natural peanut butter that you genuinely love eating straight from the jar. A slow-roasted, lightly salted variety often delivers the best depth of flavor, making your cookies exceptionally tasty. Avoid overly sugary or oil-separated brands if possible, as it can affect texture. |
| Honey | Honey provides natural sweetness and acts as another crucial binder, ensuring all the ingredients stick together firmly. It also contributes to the cookies’ chewy texture. Maple syrup can be a good vegan alternative if needed, though it might slightly alter the flavor profile. |
| Vanilla Extract | A touch of vanilla extract is essential for boosting and enhancing all the other flavors, adding a warm, aromatic note that makes the cookies taste richer and more complex. Don’t skip it! |
| Salt | Just a pinch of salt is a secret weapon in sweet recipes. It doesn’t make the cookies salty but instead balances the sweetness and makes all the other flavors pop, preventing them from being one-dimensional. |
| Old-Fashioned Oats | These are non-negotiable for the best texture. Old-fashioned (rolled) oats provide a hearty chewiness that quick oats lack and hold their shape better than steel-cut oats, which are too tough for this no-bake recipe. They are also packed with fiber for sustained energy. |
| Crisp Rice Cereal | Think Rice Krispies® or any similar crispy rice cereal. This ingredient is your ticket to that wonderful, satisfying crunch within the chewy cookie. It adds a playful element to the texture that you won’t want to miss. |
| Oat Flour | Oat flour helps absorb moisture and contributes to the cookie’s structure and soft texture. The best part? You can easily make your own by blending old-fashioned oats in a blender or food processor until a fine flour forms. This ensures freshness and saves a trip to the store! |
Expert Tips for Perfect No-Bake Healthy Breakfast Cookies
Making these cookies is straightforward, but a few expert tips can ensure your batch turns out perfectly every time. These suggestions cover everything from adjusting consistency to enhancing flavor and streamlining the preparation process:
- Achieving the Perfect Consistency: The mixture’s consistency is crucial for forming perfect cookies. If your dough feels too sticky and hard to handle, gradually add a little more old-fashioned oats or oat flour until it reaches a manageable, firm texture. Conversely, if the mixture is too crumbly and won’t hold its shape, slowly incorporate a small amount more of your chosen nut butter or honey until it comes together. Humidity and the exact brand of peanut butter can affect this, so don’t hesitate to adjust!
- Effortless Customization with Basic Ingredients: This recipe is incredibly adaptable, making it simple to boost its nutritional profile or cater to specific dietary needs. Feel free to replace a portion of the oats or oat flour with nutritional powerhouses like ground flaxseed, chia seeds, protein powder (unflavored or vanilla works best), or hemp hearts. These additions can increase fiber, protein, and omega-3s without compromising flavor or texture significantly. Start with 1-2 tablespoons and adjust to your preference.
- Flavor Boost with Mix-ins: While a chocolate drizzle is fantastic, sometimes you want the flavor *inside* the cookie. Before shaping the mixture, fold in 2-3 tablespoons of your favorite small mix-ins. Excellent choices include mini chocolate chips, finely chopped nuts (like walnuts or pecans), dried cranberries, raisins, or even a sprinkle of shredded coconut. These additions infuse flavor and textural variety throughout each cookie.
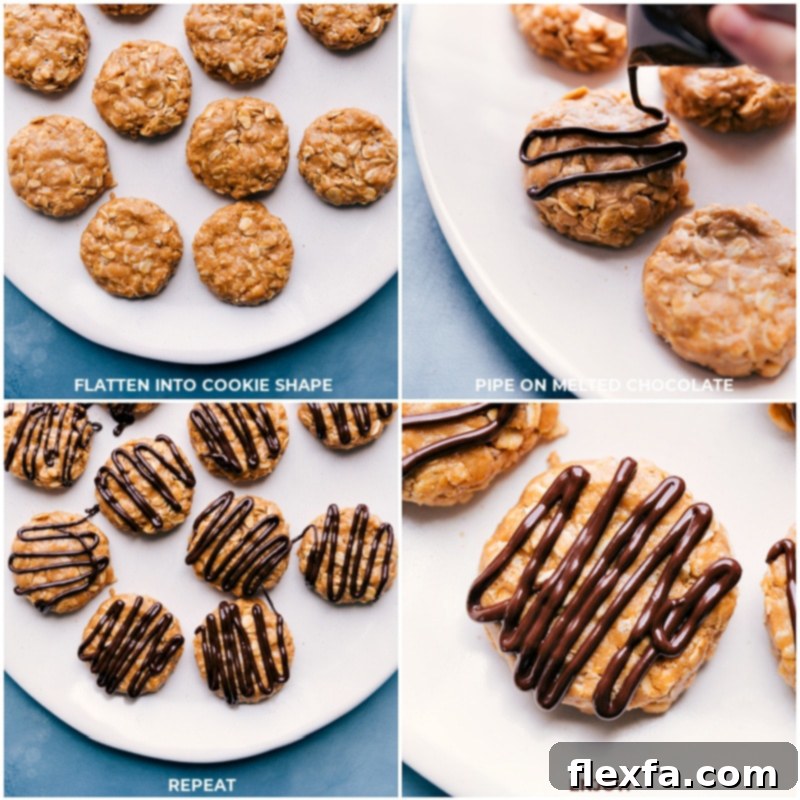
- Mastering Uniform Cookie Shapes: For perfectly uniform and consistently sized cookies, a cookie scoop (about 1.5 tablespoons in size) is your best friend. Use it to scoop out tightly packed balls of the mixture. Once scooped, gently flatten each ball between your palms to create a classic cookie disc shape. This method ensures even thickness for better eating and presentation.
- Melting Chocolate Like a Pro: If you’re opting for the glorious chocolate drizzle, proper melting is key. Use a microwave-safe bowl and heat the chocolate chips in short bursts, typically 10-15 seconds at a time. After each burst, remove the bowl and stir the chocolate thoroughly. This prevents burning and helps the chocolate melt smoothly and evenly. Continue until perfectly melted and glossy. Then, transfer to a small zip-top bag, snip a tiny corner, and drizzle away!
- Making Them Vegan: To make these cookies entirely vegan, simply swap the honey for an equal amount of pure maple syrup. Ensure your peanut butter is also vegan-friendly (most are, but always check labels). This simple substitution ensures everyone can enjoy these delicious treats!
Featured Comment
“I have made these a few times now. My boys love them. I have one with an egg allergy and it is so hard to find breakfast foods he can eat that are healthy. I left out one tablespoon of the honey and they are still sweet. Thanks so much for this recipe. It’s a family favorite.”
– Shelly
Storage Solutions for Your No-Bake Cookies
Keeping Your Breakfast Cookies Fresh
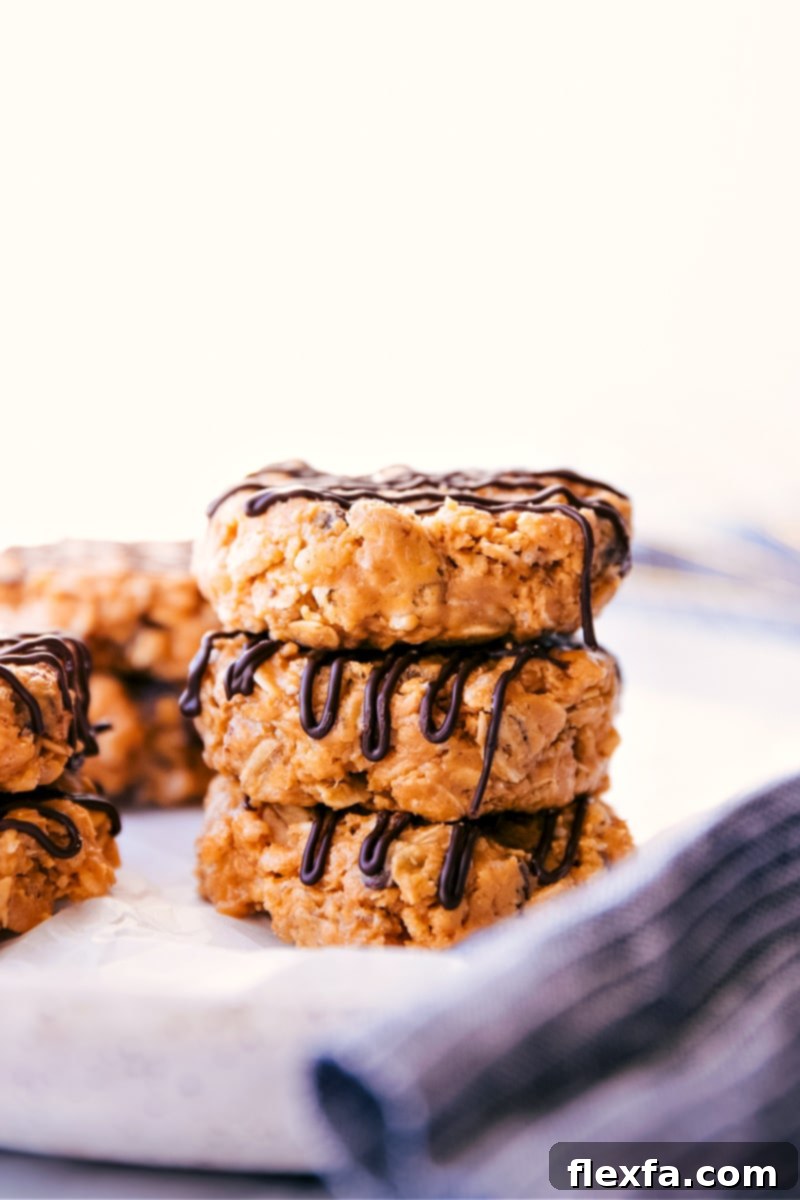
One of the many advantages of these no-bake healthy breakfast cookies is their excellent shelf life and freezer-friendliness, making them ideal for meal prepping throughout the week. Proper storage ensures they remain delicious and fresh for as long as possible:
- Refrigerator Storage: For immediate enjoyment or consumption within a few days, store your finished no-bake cookies in an airtight container in the refrigerator. This method helps maintain their firm texture and prevents them from becoming too soft, especially if your home is warm. They will stay fresh and delightful for 4-5 days when stored this way. I personally prefer keeping mine in the fridge, as the cool temperature enhances their chewiness and prevents any stickiness.
- Freezer Storage: If you’re looking to extend their freshness even further, or if you’ve made a large batch, these cookies freeze beautifully! Arrange the cooled cookies in a single layer on a parchment-lined baking sheet and flash freeze them for about an hour, or until solid. This prevents them from sticking together. Once solid, transfer the cookies to a freezer-safe airtight container or a heavy-duty freezer bag. They will keep well in the freezer for up to 3 months.
- Thawing Frozen Cookies: To enjoy a frozen cookie, simply take it out of the freezer and let it thaw at room temperature for 10-15 minutes. Alternatively, you can enjoy them straight from the freezer for a firmer, almost fudge-like treat!
Having a stash of these healthy breakfast cookies ready to go means you’re always prepared with a nutritious and satisfying option for busy mornings or unexpected hunger pangs.
Explore More Easy No-Bake Recipes:
Snacks
No-Bake Energy Bites (4 Ingredients)
Snacks
Granola Bars
Breakfast
Yogurt Parfait Recipe
Snacks
Trail Mix

Pin
No-Bake Healthy Breakfast Cookies
Chelsea Lords
These No-Bake Healthy Breakfast Cookies are the ultimate grab-and-go solution for busy mornings or as a wholesome, satisfying snack. Incredibly easy to prepare using everyday pantry ingredients, they offer a delightful chewiness and natural sweetness that can be enjoyed as is, or elevated with a decadent chocolate drizzle for an extra special touch.
20 minutes
20 minutes
11 cookies (1-1/2 tablespoon in size)
Video Overview
Watch this helpful video to guide you through the simple steps of making these delicious No-Bake Healthy Breakfast Cookies:
(Note: The original video embedded via AdThrive; this is a placeholder YouTube embed for demonstration.)
Equipment Needed
-
Sheet pan (15″ x 10″) – Essential for arranging your formed cookies.
-
Parchment paper – For easy release and cleanup, ensuring your cookies don’t stick.
-
Large mixing bowl
-
Microwave-safe bowl (for melting chocolate)
-
Spatula or sturdy spoon
-
Cookie scoop (1.5 tablespoons) – Recommended for consistent sizing.
Ingredients
- 1/2 cup creamy peanut butter (see note 1 for best selection)
- 2 tablespoons honey
- 1 teaspoon vanilla extract
- 1/4 teaspoon salt
- 1/2 cup crisp rice cereal (like Rice Krispies)
- 1/4 cup oat flour (or ground flax seeds; see note 2 for making your own oat flour)
- 1/2 cup old-fashioned oats (do NOT use quick or steel-cut oats)
- 3 tablespoons chocolate chips (milk or dark chocolate, for drizzling)
- Optional additions (see note 3 for ideas like raisins, nuts, or dried fruit)
Instructions
-
Begin by combining the wet ingredients and flavor enhancers. In a large, microwave-safe mixing bowl, add the creamy peanut butter, honey, vanilla extract, and salt. Microwave this mixture for 20-30 seconds on high power. This short burst of heat will soften the peanut butter and honey, making them much easier to combine. Stir vigorously with a sturdy spoon or spatula until all ingredients are thoroughly blended into a smooth, cohesive base.
Next, introduce your dry ingredients to the wet mixture. In the same bowl, add the crisp rice cereal, oat flour (or ground flaxseed), and old-fashioned oats. Stir everything together until the dry ingredients are completely coated and integrated with the wet base. This step might require a little effort at first, as the mixture can be quite stiff. Keep working at it until a uniform, somewhat firm “dough” forms. If you find the mixture is too wet or sticky, add a tiny bit more oat flour (about a teaspoon at a time) until it’s manageable. Conversely, if it seems too dry and crumbly, add an extra touch of peanut butter or honey to bring it together.
-
Optional Add-ins: If you’re incorporating any additional mix-ins, now is the time to fold them into your cookie dough. Add about 2 tablespoons of your chosen additions (such as mini chocolate chips, finely chopped nuts, or dried fruit) and stir gently until they are evenly distributed throughout the mixture. Ensure any larger add-ins are finely diced to maintain the cookie’s integrity.
-
Prepare a baking sheet by lining it with parchment paper; this will prevent sticking. Using a 1.5 tablespoon cookie scoop (roughly the size of a golf ball), scoop out portions of the cookie mixture. It’s important to tightly compress the mixture within the scoop to ensure the cookies hold their shape. Release each tightly packed ball onto your prepared parchment-lined sheet pan. Continue this process until all the mixture has been scooped.
Once you have a sheet full of uniform, compact balls, take one ball at a time and gently flatten it between your hands. Apply light, even pressure to create a classic cookie disc shape, about 1/2 to 3/4 inch thick. Repeat with the remaining balls until all your cookies are formed. Place the finished cookies in the refrigerator or freezer for about 15-20 minutes to firm up before the optional chocolate drizzle.
-
Optional Chocolate Drizzle: For that extra touch of deliciousness, melt 3 tablespoons of chocolate chips. Place the chocolate chips in a small, microwave-safe bowl. Microwave in short bursts of 10-15 seconds, stirring well after each burst. Continue until the chocolate is completely smooth and melted. Be careful not to overheat it, as chocolate can seize quickly.
Once melted, scrape the chocolate into a small plastic zip-top bag. Snip a tiny hole in one corner of the bag with scissors. Evenly drizzle the melted chocolate back and forth across the tops of all your formed cookies. Allow the chocolate to set and harden completely before serving or storing. You can speed this up by placing the sheet pan of drizzled cookies back into the refrigerator for 10-15 minutes.
Recipe Notes
Note 1: Selecting the Best Peanut Butter
The quality of your peanut butter significantly impacts the final taste and texture of these cookies. I highly recommend using a natural, creamy peanut butter that you truly enjoy eating by the spoonful. Look for brands that are slow-roasted and lightly salted, as these often offer a deeper, more robust flavor profile that will shine through in your cookies. Avoid “no-stir” peanut butter varieties that contain added oils and sugars, as they can alter the consistency and sweetness of the dough.
Note 2: Making Your Own Oat Flour
Making oat flour at home is incredibly easy and economical! Simply take some old-fashioned rolled oats and place them in a blender or food processor. Pulse them on high speed until they are ground into a fine, powdery consistency, similar to regular flour. It’s important to measure your oats *after* they have been blended into flour, not before, to ensure accurate quantities for the recipe.
Note 3: Creative Optional Add-ins
Feel free to personalize your breakfast cookies with a variety of delicious add-ins. Consider incorporating:
- Dried Fruit: Raisins, chopped dried cranberries, finely diced apricots, or even small pieces of dried cherries add a lovely burst of sweetness and chewiness.
- Nuts & Seeds: Finely chopped almonds, walnuts, pecans, or a sprinkle of sunflower or pumpkin seeds can enhance the nutty flavor and provide extra crunch and nutrients.
- Mini Chocolate Chips: While the drizzle is optional, mini chocolate chips can be folded directly into the dough for chocolate in every bite.
- Spices: A pinch of cinnamon, nutmeg, or a dash of pumpkin pie spice can add a warm, comforting aroma and flavor.
Aim for about 2-3 tablespoons of total add-ins to ensure they don’t overpower the cookie structure.
Nutritional Note: Please be aware that the provided nutrition information is an approximation and does not account for any optional chocolate drizzle or additional mix-ins you may choose to include in your cookies. These additions will alter the calorie, sugar, and fat content per serving.
Storage Best Practices: For optimal freshness, store your no-bake healthy breakfast cookies in an airtight container. They will remain fresh for 4-5 days when kept in the refrigerator (my preferred method for maintaining texture). For longer storage, you can freeze them in an airtight container or freezer bag for up to 3 months. Thaw at room temperature for a few minutes before enjoying.
Nutrition Facts (per serving)
Calories: 176kcal |
Carbohydrates: 24g |
Protein: 6g |
Fat: 7g |
Saturated Fat: 1g |
Sodium: 161mg |
Potassium: 144mg |
Fiber: 2g |
Sugar: 4g |
Vitamin A: 715IU |
Vitamin C: 7mg |
Calcium: 14mg |
Iron: 4mg
Nutrition information is automatically calculated and should only be used as an approximation. It does not include optional toppings or add-ins.
Loved this recipe? Leave a comment below and share your experience!
Your feedback helps others discover delicious and healthy meals.