
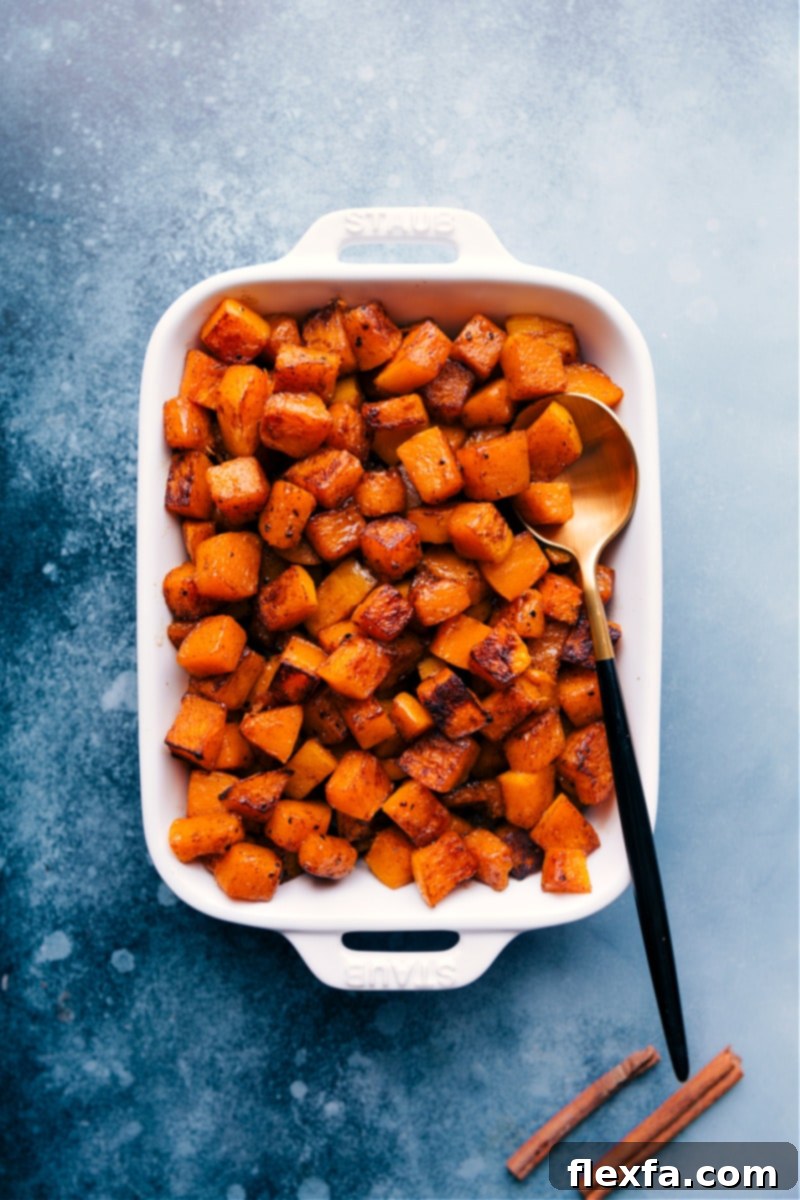
Roasted Butternut Squash is truly a culinary delight! With its beautifully caramelized, slightly crispy exteriors and incredibly tender, sweet interiors, this seasonal vegetable will captivate your taste buds from the very first bite. More than just a simple side dish, perfectly roasted butternut squash offers a versatile and nutritious addition to countless meals, especially as cooler weather arrives.
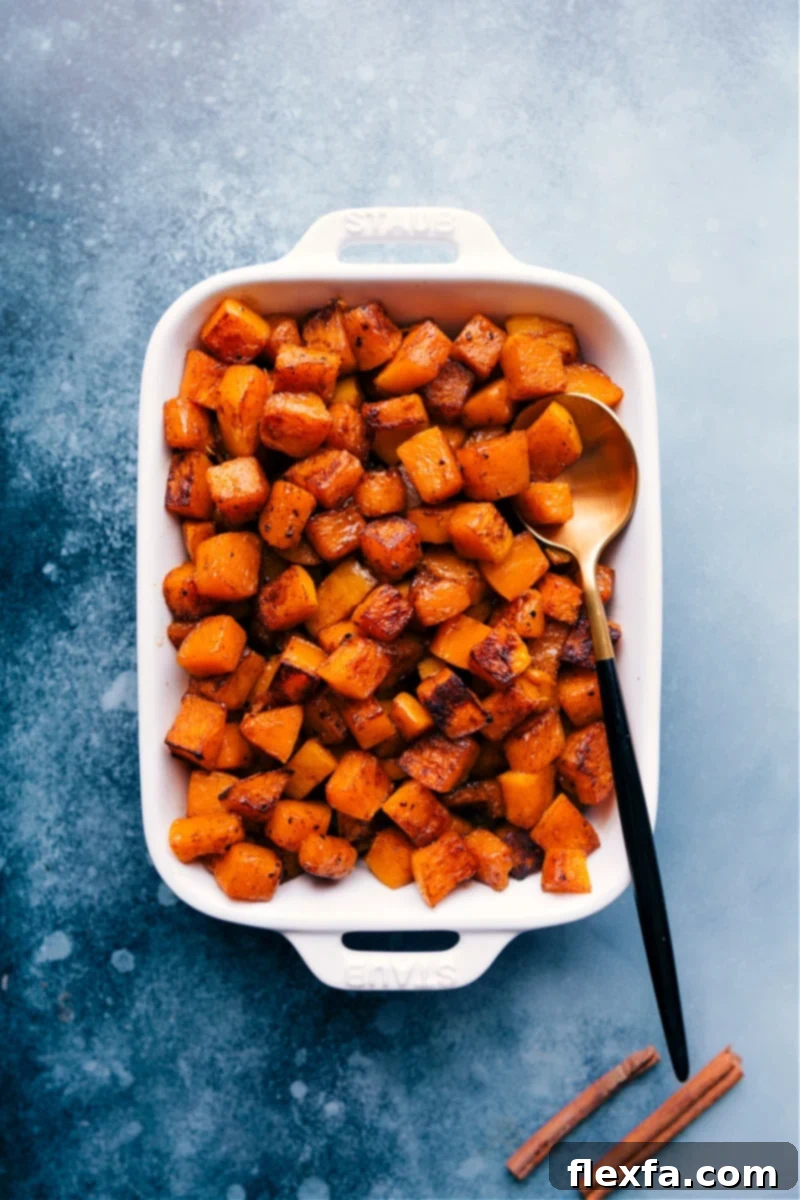

Author’s Note
Mastering Roasted Butternut Squash: My Top 3 Irresistible Methods!
The first time I experienced the magic of roasted butternut squash, I was utterly captivated. It was astonishing how such a humble vegetable could transform into something so sweet, buttery, and deeply flavorful with just the simple act of caramelization in a hot oven. Since that pivotal moment, roasted butternut squash has become an indispensable staple at our family dinners, especially during the autumn and winter months.
After years of perfecting various approaches, I’m thrilled to share my three absolute favorite ways to roast this incredible squash. Each method brings out a different facet of its natural goodness, ensuring there’s a perfect butternut squash experience for every palate and occasion.
One Butternut Squash, Endless Possibilities: Three Distinct Recipes!
Whether you’re seeking a subtle addition to a larger meal, a robust and flavorful side dish, or a surprisingly sweet treat, these three preparation styles have you covered:
- Basic Seasoning: This minimalist approach focuses on the pure, inherent sweetness and buttery flavor of the butternut squash. It’s ideal for incorporating into other recipes like salads, grain bowls, or soups, where its natural essence can shine without overpowering other ingredients. It’s also a fantastic clean-eating option.
- Savory Herb Seasoning: Elevate your roasted butternut squash with a blend of aromatic herbs and a touch of sweetness. This version adds a layer of complex flavor that makes it a hearty, stand-alone side dish, perfect for holiday meals like Thanksgiving or a comforting weeknight dinner.
- Sweet Cinnamon-Maple Recipe: Transform butternut squash into a dessert-like treat with warm cinnamon, rich maple syrup, and a hint of brown sugar. This sweet preparation is a delightful indulgence that can serve as a unique side, a healthy dessert alternative, or even a breakfast topping.
Each of these variations promises a delicious outcome, showcasing the versatility of this beloved gourd. Let’s dive into how you can achieve these mouth-watering results in your own kitchen!
Selecting the Perfect Butternut Squash: A Buyer’s Guide
Choosing the right butternut squash is the first step to a truly delicious roasted dish. A high-quality squash will deliver the best flavor and texture. Here’s what to look for when you’re at the grocery store or farmer’s market:
- Uniform Beige Color: Opt for a squash with a consistent, dull beige or tan color. A darker beige often indicates a riper, sweeter squash, which is exactly what you want for roasting. Avoid any with green patches, as this signifies immaturity and a less sweet flavor.
- Smooth, Matte Skin: The skin should be smooth and matte, not shiny. Shiny skin can suggest that the squash was picked too early. Inspect the surface for any cuts, soft spots, or blemishes, as these can be entry points for spoilage.
- Heavy for Its Size: Pick up a few squashes and feel their weight. A good butternut squash should feel surprisingly heavy for its size. This indicates a dense flesh with plenty of moisture, which translates to a richer flavor and better texture when cooked.
- Hollow Sound When Tapped: Gently tap the squash with your knuckle. A ripe, healthy butternut squash will produce a hollow sound, similar to tapping a ripe watermelon. This is another indicator of good density and readiness for consumption.
By following these simple tips, you can confidently select a butternut squash that will roast beautifully and offer exceptional flavor.
Storing Butternut Squash: Freshness & Longevity
Proper storage is key to maintaining the quality and extending the shelf life of your butternut squash, whether it’s whole, cut, or roasted.
Whole, Unpeeled Squash Storage
Keep whole, raw, unpeeled squash in a cool, dark, and dry place, such as a pantry or cellar. Stored correctly, it can last anywhere from 1 to 3 months, depending on its ripeness when purchased. Avoid storing it in the refrigerator, as the cold can actually degrade its quality faster.
Peeled and Chopped Squash Storage
Once peeled and chopped, butternut squash should be treated more like other fresh vegetables. Store it in an airtight container in the refrigerator for 1-3 days. For longer preservation, chopped squash freezes exceptionally well. Spread the cubes in a single layer on a parchment-lined baking sheet and freeze until solid. Once frozen, transfer them to an airtight freezer bag or container. This prevents clumping and allows you to use only what you need. Frozen raw butternut squash can last up to 3 months.
Signs of Spoilage: When to Discard
It’s important to know when your squash is no longer good to eat:
- Raw Squash: If the whole squash feels mushy, has noticeable white spots, mold, or an off-putting smell, it’s time to toss it.
- Roasted Squash: After roasting, discard any leftovers if they develop a slimy texture or an unusual smell. Cooked squash should be consumed within 4-5 days when stored in the refrigerator.
Essential Tools for Easy Butternut Squash Preparation
While roasting butternut squash is a straightforward process, the initial cutting can be quite challenging due to its hard skin and dense flesh. However, with the right tools, this task becomes much easier, safer, and more efficient. Here are some recommended items that will make your butternut squash prep a breeze:
- High-Quality Vegetable Peeler: While some prefer to cut off the skin with a knife, a sharp, sturdy vegetable peeler is far more efficient and safer for removing the tough outer layer of butternut squash. It glides smoothly around the curves, saving you time and effort. Look for one with a comfortable grip.
- Solid, Non-Slip Cutting Board: A large, heavy-duty cutting board is paramount when dealing with the firm texture of squash. A non-slip base is crucial to prevent the board from sliding during vigorous chopping, significantly enhancing safety.
- Sharp Chef’s Knife: A sharp knife is not only more effective but also safer than a dull one. It requires less force to cut through the squash, reducing the risk of slippage. A chef’s knife with a sturdy blade will be your best friend for halving and cubing the squash.
- Large Baking Sheet (15×21 inches or similar): This is perhaps one of the most important tools for achieving perfectly roasted squash. Using a generously sized baking sheet, or even two smaller ones, ensures that the squash cubes can be spread in a single layer without overcrowding. Overcrowding leads to steaming instead of roasting, resulting in soft, rather than beautifully caramelized, squash.
Investing in these basic kitchen tools will not only simplify your butternut squash preparations but also prove invaluable for a wide range of other cooking tasks.
Achieving Perfection: Expert Roasting Tips for Butternut Squash
Roasting butternut squash might seem simple, but a few key techniques can elevate your results from good to absolutely outstanding. Pay attention to these tips for that ideal caramelized exterior and tender interior every time:
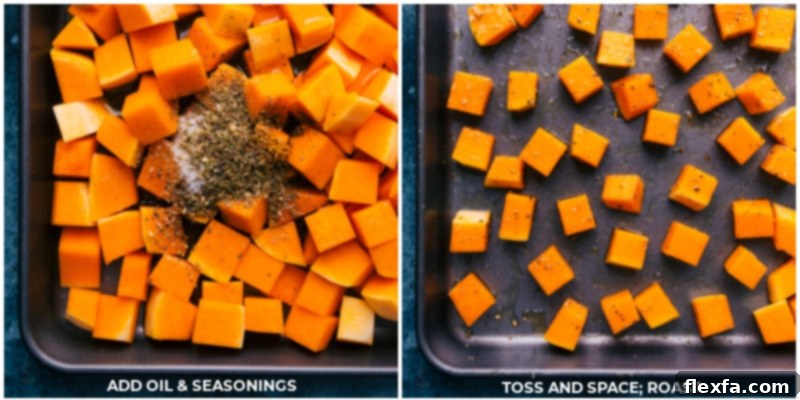
- Ensure Ample Space on the Baking Sheet: This is arguably the most critical tip. Always spread your butternut squash cubes in a single layer on a large baking sheet. If the squash pieces are too close together or overlap, they will release moisture and essentially steam rather than roast. Steaming prevents the desirable caramelization and crispy edges that define perfectly roasted vegetables. When in doubt, use two baking sheets.
- Toss Frequently for Even Caramelization: To ensure every side of your squash cubes gets beautifully browned and caramelized, make sure to toss them gently 2-3 times during the roasting process. This rotation exposes different surfaces to the direct heat of the oven, promoting even cooking and consistent texture.
- Taste and Adjust Seasoning: Before serving, always taste a roasted squash cube. This allows you to fine-tune the seasoning. Sometimes, after roasting, a little extra sprinkle of salt and pepper can truly bring out the flavors and make a big difference.
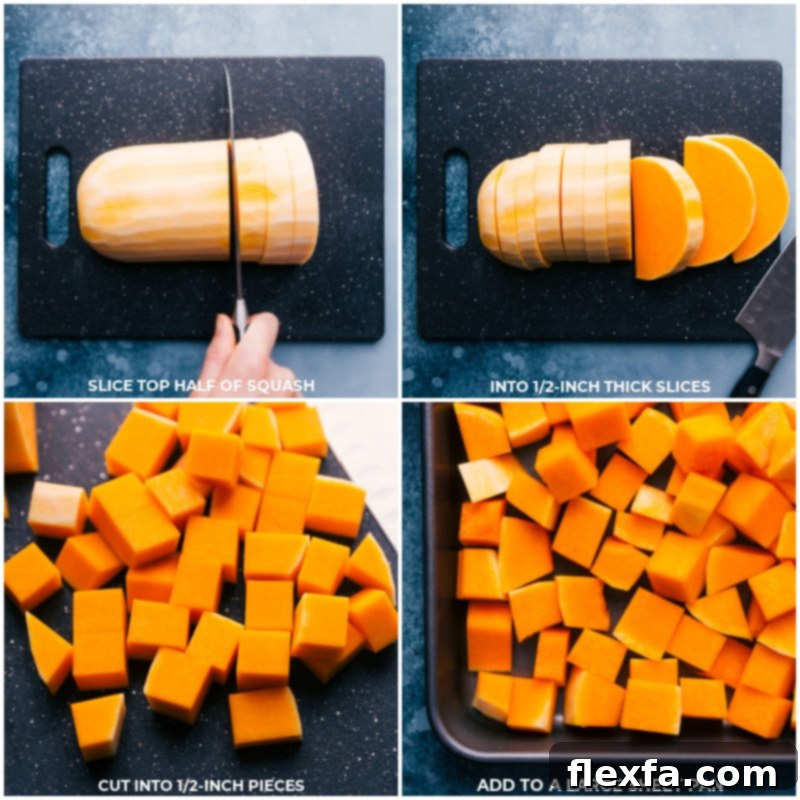
- Dice Evenly: Strive to cut your butternut squash into uniformly sized cubes, ideally around 1/2-inch. Evenly sized pieces will cook at the same rate, preventing some pieces from becoming mushy while others are still undercooked. While perfection isn’t necessary, consistency is key for optimal results.
- High Heat is Your Friend: Roasting at a high temperature (around 400-425°F or 200-220°C) is crucial for achieving that desired caramelization quickly. The high heat helps to dry out the surface of the squash and encourage browning, locking in moisture on the inside.
- Don’t Forget the Oil: A generous amount of olive oil (or melted coconut oil for the sweet version) helps conduct heat, preventing sticking and facilitating crisping. It also adds to the rich flavor.
By following these guidelines, you’ll consistently achieve perfectly roasted butternut squash that’s full of flavor and delightful texture.
Storage & Reheating Guide
Detailed Storage Instructions for Butternut Squash
- Whole Squash: Store whole, unpeeled butternut squash in a cool, dark, and dry place (like a pantry or cellar). It can last for 1-3 months, with proper ventilation helping to extend its life. Avoid refrigeration for whole squash.
- Cut Squash (Raw): Once peeled and cut, store raw butternut squash cubes in an airtight container in the refrigerator for 1-3 days. For extended storage, raw cubes can be frozen. Spread them in a single layer on a parchment-lined baking sheet and freeze until solid (about 2-4 hours). Then, transfer the frozen cubes to an airtight freezer bag or container. They will keep for up to 3 months. This method is great for meal prepping!
- Cooked Squash: Store leftover roasted butternut squash in an airtight container in the refrigerator for 4-5 days. To freeze cooked squash, follow the same method as freezing raw cut squash: spread on a baking sheet, freeze until solid, then transfer to a freezer-safe bag or container for up to 3 months.
Reheating Roasted Butternut Squash
Reheating roasted butternut squash properly helps maintain its texture and flavor:
- Oven Method: For the best results, reheat in a 350°F (175°C) oven for about 10-15 minutes, or until heated through and slightly crispy again. This helps restore some of its initial caramelization.
- Skillet Method: Heat a lightly oiled skillet over medium-low heat. Add the squash and cook, stirring occasionally, until warmed through. This can also help crisp up the edges.
- Microwave Method: For a quick reheat, place squash in a microwave-safe dish and microwave on high in 30-60 second intervals until hot. Be aware that the microwave may soften the texture more and reduce crispness.
Explore More Delicious Roasted Vegetable Recipes:
Side Dishes
Roasted Broccoli Recipe
Vegetables
Brown Sugar Roasted Carrots
Side Dishes
Roasted Sweet Potatoes
Side Dishes
Roasted Brussel Sprouts
Print Recipe
Roasted Butternut Squash
Chelsea Lords
30 minutes
35 minutes
1 hour
5 minutes
6
as a side
Video Overview (External Link)
Equipment
-
Large sheet pan (15″ x 21″) or 2 smaller ones
-
Sharp vegetable peeler
-
Sturdy, non-slip cutting board
-
Sharp chef’s knife
-
Large bowl for tossing
Ingredients
(Amounts listed are for one variation, serving 6 as a side. You will need one 2-lb squash per variation.)
- 8 cups (2 pounds) butternut squash peeled and cut into 1/2-inch cubes
- 2 tablespoons olive oil
- 3/4 teaspoon salt
- 1/4 teaspoon pepper
- fresh thyme optional, for garnish
- 8 cups (2 pounds) butternut squash peeled and cut into 1/2-inch cubes
- 1 tablespoon maple syrup see note 1
- 2 tablespoons olive oil
- 3/4 teaspoon salt
- 1/4 teaspoon pepper
- 1/4 teaspoon dried thyme
- 1 teaspoon Italian seasoning
- fresh thyme optional, for garnish
- 8 cups (2 pounds) butternut squash peeled and cut into 1/2-inch cubes
- 1-1/2 tablespoons melted coconut oil
- 1-1/2 tablespoons maple syrup
- 3/4 teaspoon salt
- 3/4 teaspoon ground cinnamon
- 1/4 teaspoon pepper
- 1 tablespoon light brown sugar optional, for added sweetness
Instructions
-
Prepare Your Oven and Pans: Preheat your oven to a crisp 425°F (220°C). Prepare an extra-large sheet pan (see Note 2 for recommendations) or two smaller sheet pans if needed. This is crucial for proper roasting.
-
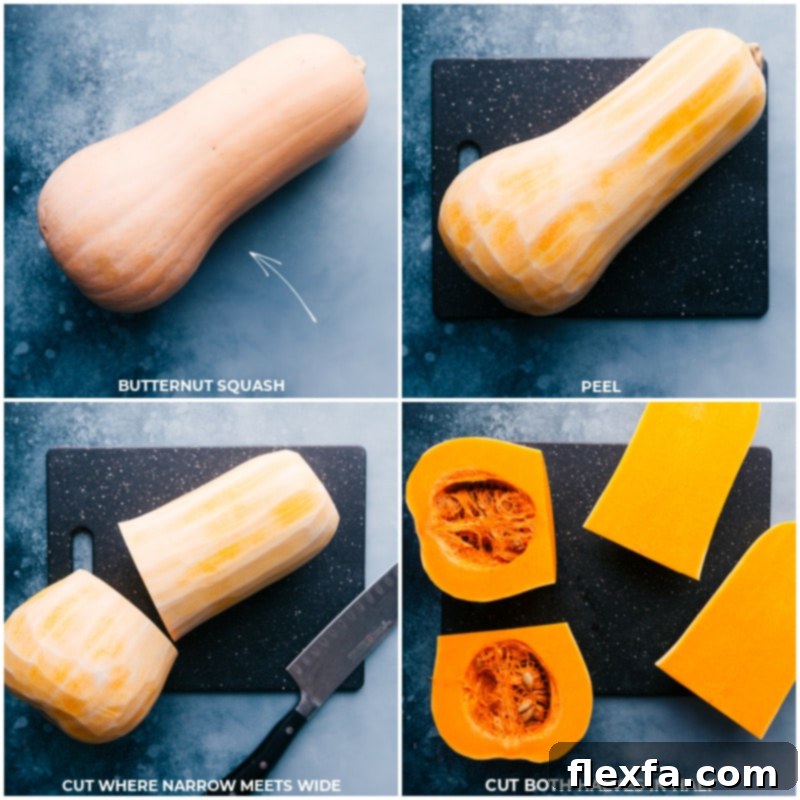
Wash and Peel the Squash: Rinse the butternut squash thoroughly under cold water to remove any dirt. Using a sharp vegetable peeler, carefully peel the entire squash, removing all of the tough outer skin. This step is much easier and safer with a good peeler.
-
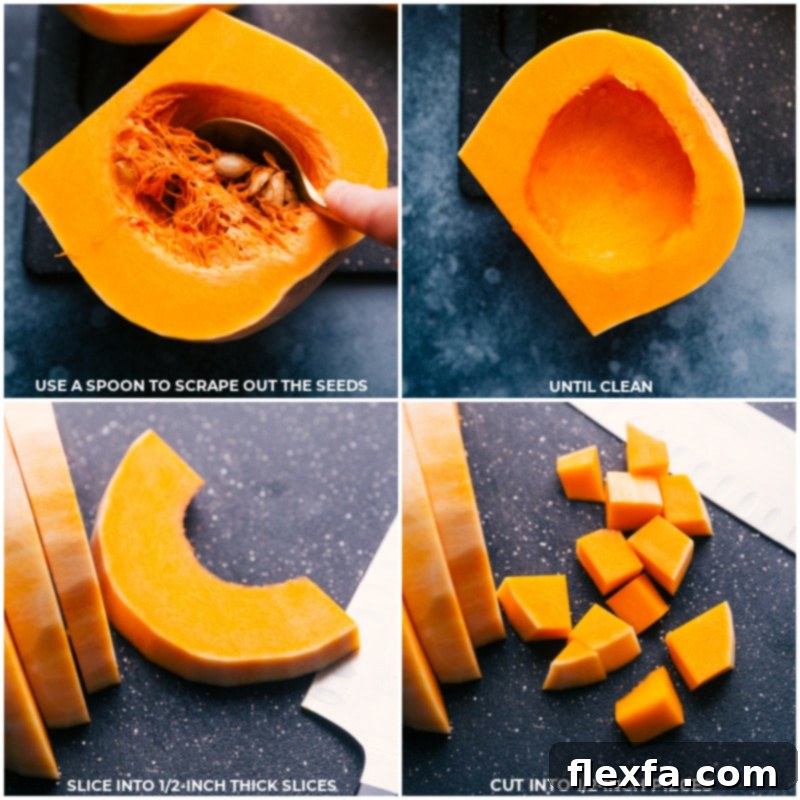
Cut and Deseed the Squash: Place the peeled squash on a sturdy, heavy-duty cutting board. Using a very sharp chef’s knife, trim off the top stem and about 1/4-inch from the bottom end. Carefully cut the squash in half crosswise, right where the slender “neck” meets the wider, bulbous base-end section. Then, cut each of these two sections in half again, lengthwise, creating four pieces. With a spoon, meticulously scrape out all the seeds and stringy fibrous parts from the hollow cavity. You can save these seeds for roasting later (check the FAQs for instructions!).
-
Cube the Squash Evenly: Lay each of the four squash halves cut-side down on your cutting board. Proceed to cut each half into uniform 1/2-inch slices. Then, take these half-moon shaped slices and cut them into approximately 1/2-inch cubes. The goal is to achieve pieces that are as even in size as possible to ensure they roast uniformly. Don’t worry if they aren’t perfectly square – consistency in size is what matters most for even cooking.
Roasting Instructions by Flavor Variation:
-
For Basic Roasted Butternut Squash: Place the squash cubes into a large bowl. Drizzle with olive oil and sprinkle generously with salt and pepper. Using your hands, toss everything together thoroughly until all the squash cubes are evenly coated. Spread the seasoned squash in a single, even layer on your prepared large sheet pan, ensuring there is plenty of space between pieces. Avoid overcrowding to prevent steaming.
-
For Savory Herb-Roasted Butternut Squash: In a large bowl, combine the squash cubes with maple syrup, olive oil, salt, pepper, dried thyme, and Italian seasoning. Toss vigorously with your hands to ensure every cube is thoroughly coated with the savory-sweet mixture. Arrange the seasoned squash in a single, even layer on your large sheet pan, leaving ample space for proper roasting and caramelization.
-
For Cinnamon-Maple Butternut Squash (Sweet): Add the squash cubes to a large bowl. Pour in the melted coconut oil, maple syrup, salt, ground cinnamon, and pepper. Toss with your hands until the squash is beautifully and uniformly coated. Spread the squash in a single, even layer on your large sheet pan, making sure pieces do not overlap to allow for optimal roasting.
General Roasting Method (for all variations):
-
First Roast: Place the sheet pan(s) with the seasoned squash into the preheated 425°F (220°C) oven. Roast for 15 minutes. The high heat initiates the browning process.
-
Second Roast: Carefully remove the pan from the oven. Using a spatula, gently flip and toss the squash cubes to expose different sides to the heat. Return the pan to the oven and continue roasting for another 10 minutes.
-
Final Roast & Doneness Check: Remove the pan once more, flip and toss the squash again. Return to the oven for a final 10–15 minutes, or until the squash is “crisp-tender” – meaning it’s beautifully caramelized on the outside and a fork easily pierces through the center with minimal resistance. Roasting times can vary slightly depending on the exact size of your cubes and your oven’s calibration, so always check for tenderness as you approach the end of the cooking time.
-
Optional Garnish & Final Adjustments: If desired, garnish the roasted squash with fresh thyme just before serving. For the Cinnamon-Maple Butternut Squash, taste it straight out of the oven. If your particular squash wasn’t very sweet to begin with, or if you simply prefer it sweeter, quickly toss the warm squash with the optional 1 tablespoon of light brown sugar until melted and incorporated. Serve immediately and enjoy the delightful flavors!
Recipe Notes
Note 2 – The Importance of Your Sheet Pan Size: The surface area of your baking sheet plays a significant role in the success of roasted vegetables. The more space the squash cubes have to spread out, the better they will roast and caramelize. When vegetables are crowded and overlap on a sheet pan, they release moisture and steam, resulting in a soft, rather than crispy, texture. I highly recommend a large 15×21 inch sheet pan for optimal results and quicker cooking times. If you don’t have one that large, use two smaller sheet pans to avoid overcrowding.
Nutrition Note: The provided nutrition information below is an approximation calculated for the basic roasted butternut squash recipe, without any additional optional garnishes or sugar.
Storage for Cooked Squash: Store any leftover cooked squash in an airtight container in the refrigerator for 4–5 days. For longer-term storage, cooked squash freezes beautifully. Simply spread the cooled squash in a single layer on a parchment-lined sheet pan and freeze until solid. Once frozen, transfer the cubes to an airtight freezer bag or container. It can be frozen for up to 3 months. Reheat using the oven or skillet method for best texture.
Nutrition Facts (Basic Recipe)
Nutrition information is automatically calculated, so should only be used as an approximation.
Love This Recipe? Share Your Thoughts Below!
Roasted Butternut Squash: Frequently Asked Questions
While the skin of butternut squash is technically edible once roasted, it tends to remain quite tough and fibrous, which can detract from the overall eating experience. For the best and most tender texture, and a truly enjoyable bite, it is highly recommended to peel the squash before cutting and roasting. A good vegetable peeler makes this task much simpler.
Cutting a butternut squash can be daunting due to its hard exterior. Here’s a step-by-step guide for a safe and efficient process:
- Wash and Peel: Begin by washing the squash under cold water. Then, using a sharp, sturdy vegetable peeler, carefully remove the entire tough outer skin. If you don’t have a reliable peeler, you can carefully cut the squash in half first, then use a sharp knife to slice off the skin.
- Trim the Ends: Place the squash on a stable, non-slip cutting board. Using a sharp chef’s knife, carefully trim off about 1/4-inch from both the top stem end and the bottom blossom end. This creates flat, stable surfaces.
- Slice into Sections: Locate where the slender neck of the squash meets its wider, bulbous base. Carefully slice the squash crosswise at this point to create two main sections. Then, cut each of these sections in half lengthwise, right down the middle. This should give you four pieces.
- Scoop Out Seeds: With a spoon, thoroughly scrape out all the seeds and stringy pulp from the hollow cavities of the bulbous sections.
- Dice into Cubes: Lay the squash pieces flat on your cutting board, cut-side down, for stability. Then, cut each half into uniform 1/2-inch slices. Stack a few slices at a time and cut them into 1/2-inch cubes. Aim for as consistent a size as possible to ensure even roasting.
Absolutely! Roasted butternut squash seeds are a delicious and nutritious snack, similar to pumpkin seeds. Here’s how to prepare them:
- Clean and Dry: After scooping out the seeds, thoroughly wash them under cold water to remove any remaining stringy pulp. Pat them very dry with a paper towel; excess moisture will hinder crisping.
- Preheat Oven & Prep Pan: Preheat your oven to a low 275°F (135°C). Line a small baking sheet with parchment paper to prevent sticking.
- Season: In a small bowl, toss about 1 cup of cleaned, dried seeds with 1 tablespoon of olive oil. Add a pinch of salt, and any desired spices. For a savory twist, try a dash of garlic powder or smoked paprika. For a sweet treat, a sprinkle of cinnamon or a tiny bit of brown sugar works wonders.
- Roast: Spread the seasoned seeds in a single layer on the prepared baking sheet. Bake for approximately 15-20 minutes, or until they are golden brown, fragrant, and start to “pop” slightly. Keep a close eye on them, as they can burn quickly.
- Cool and Enjoy: Remove from the oven and let them cool completely on the baking sheet before eating. They will become crispier as they cool. Enjoy them as a snack, or sprinkle over salads and soups!