
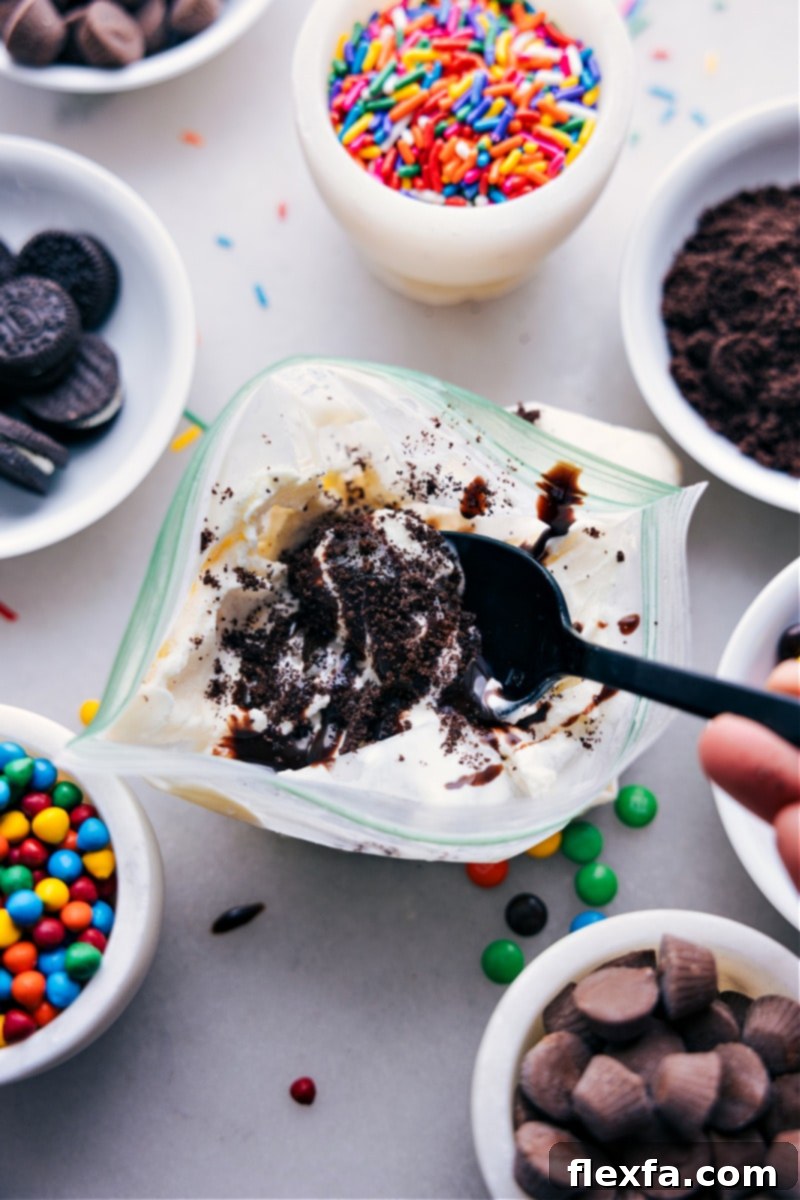
Ice Cream In A Bag is a revolutionary way to make homemade ice cream quickly and easily, without the need for any special machinery! This delightful method uses just a few simple ingredients, common kitchen supplies, ice, and rock salt to create a remarkably creamy and indulgent treat in mere minutes. It’s not just a recipe; it’s a fantastic, hands-on science experiment that’s as educational as it is delicious, making it an ideal activity for families and budding scientists of all ages.
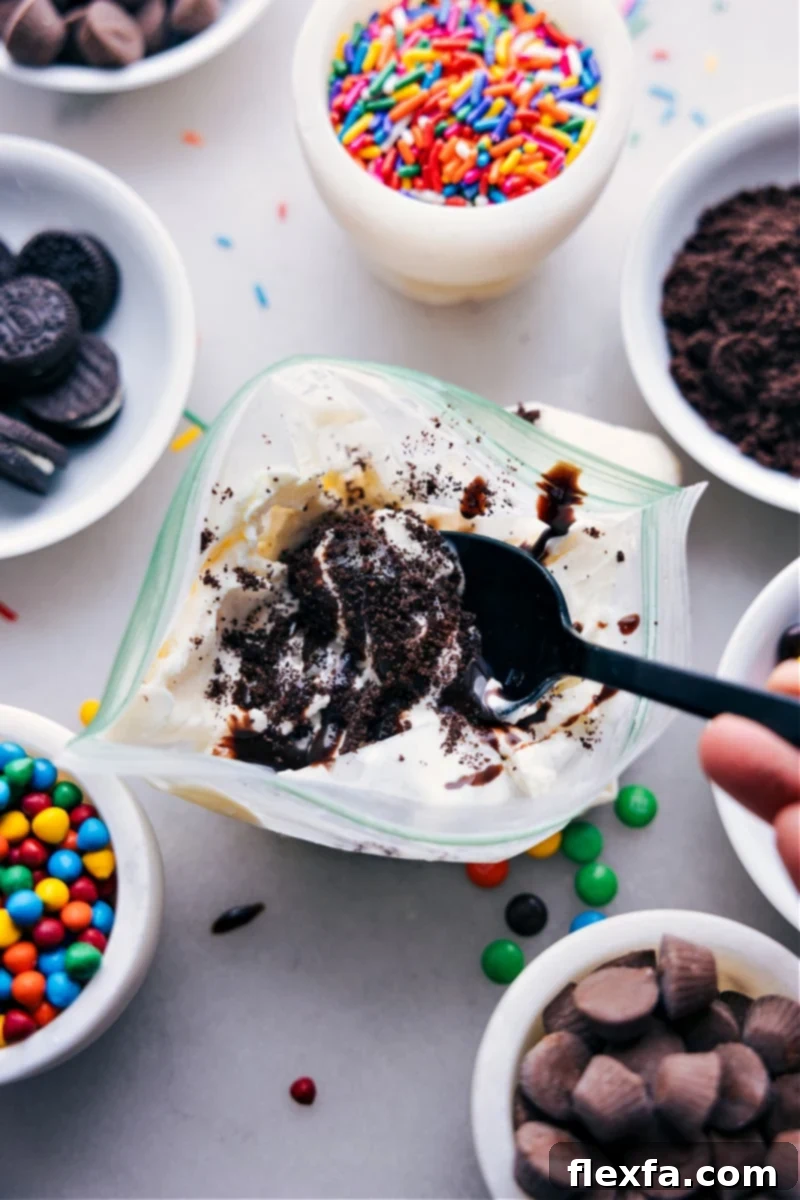
Experience the Magic: No Ice Cream Maker Needed!
Forget about bulky, expensive ice cream machines or the long, often tedious wait for your dessert to freeze. This innovative “Ice Cream In A Bag” technique allows you to bypass all the fuss, delivering a delightful frozen treat almost instantly. It’s perfect for impromptu dessert cravings, a quick project with children, or even a fun, interactive lesson in the kitchen or classroom. The beauty of this recipe lies in its simplicity and accessibility; anyone can achieve smooth, creamy results with minimal effort and readily available items.
I fondly recall making this exact recipe in science class during my school years. The excitement of watching liquid ingredients transform into a frozen dessert right before my eyes was truly captivating and left a lasting impression. That memory is precisely why I was so eager to share this fun, engaging activity with my own kids. Beyond its educational value, the resulting ice cream is incredibly smooth, wonderfully creamy, and surprisingly easy to customize to everyone’s preferences. Whether you’re a purist who loves classic vanilla or chocolate, or an adventurer who enjoys mixing in crushed cookies, swirls of caramel, or fresh berries, this recipe is a versatile canvas for your culinary imagination.
And let’s not forget the endless possibilities for toppings! Once your homemade ice cream reaches that perfect thick, creamy consistency, it’s time to unleash your creativity. Pile on a colorful array of sprinkles, a generous dollop of homemade whipped cream, a decadent drizzle of hot fudge, or any other sweet embellishments your heart desires. This dessert isn’t just a treat; it’s an experience, from the moment you start shaking to the very last spoonful of your personalized creation.
The Science Behind the Deliciousness: How Does Ice Cream In A Bag Work?
Making Ice Cream in a Bag isn’t just a delicious endeavor; it’s a fascinating display of basic chemistry and physics! This clever method relies on two key scientific principles to transform liquid ingredients into solid, creamy ice cream:
- Freezing Point Depression: The Role of Rock Salt: When rock salt (or any salt) is added to ice, it dramatically lowers the freezing point of the water. Pure water freezes at 32°F (0°C). However, when salt dissolves in the thin layer of water that forms on the surface of ice, it disrupts the formation of ice crystals, requiring an even colder temperature for the water to freeze. This means the ice-salt mixture can reach temperatures well below freezing, sometimes as low as 0°F (-18°C) or even colder. This super-cold environment is crucial for freezing your ice cream mixture rapidly.
- Efficient Heat Transfer: Freezing in Motion: The warm, liquid ice cream mixture, contained in a smaller bag, is surrounded by this intensely cold ice and rock salt brine in a larger bag. Heat naturally flows from a warmer object to a colder one. In this case, the heat from your ice cream mix quickly transfers to the much colder ice-salt mixture. As you shake the bags, you continuously expose fresh surfaces of the ice cream mixture to the cold environment, accelerating the heat transfer process. This constant movement not only speeds up freezing but also helps prevent large ice crystals from forming, which is key to achieving that desirable smooth and creamy ice cream texture, akin to traditional churning.
The vigorous shaking ensures that the ice cream mix freezes evenly and develops its soft, delectable texture, typically achieving soft-serve consistency in just 5 to 10 minutes. For those who prefer a firmer ice cream, you can place the sealed bag (or transfer the contents to a container) in a conventional freezer for an additional 20-30 minutes. However, be cautious not to freeze it for too long, as it can become excessively hard and lose its enjoyable creamy quality.
Essential Supplies for Your Ice Cream Adventure
Gathering the right supplies is key to a smooth and successful ice cream-making experience. Here’s what you’ll need:
- Gallon-sized Resealable Bag (Large Bag): This sturdy bag will house the ice and rock salt mixture. It’s imperative that this bag is completely leak-proof and seals very tightly. A robust, freezer-grade bag is recommended to prevent any messy leaks of salty water onto your ice cream mix. Double-bagging can be a wise precaution, especially with younger children.
- Pint or Quart-sized Resealable Bag (Small Bag): This smaller bag will contain your liquid ice cream mixture. Like the large bag, it must be leak-proof and seal perfectly. Any breach could result in salty ice cream – a regrettable culinary mishap! Ensure you press out as much air as possible before sealing to maximize contact with the cold ice.
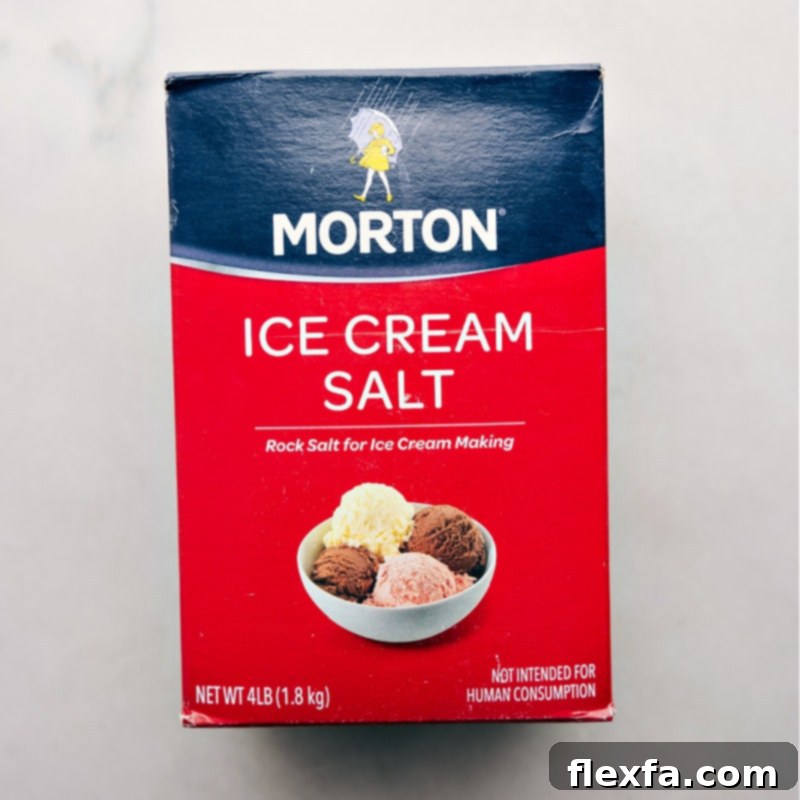
- Rock Salt (Ice Cream Salt): This is a non-negotiable ingredient. Standard table salt will not achieve the same dramatic temperature drop. Rock salt, characterized by its larger crystals, dissolves slower and creates a colder brine, crucial for rapidly freezing the ice cream. You can usually find it in the spice aisle of larger grocery stores, sometimes labeled as “ice cream salt,” often on the bottom shelves near other specialty salts.
- Ice: Lots of it! Ice is the primary cooling agent. While large cubes will work, crushed ice is highly recommended. Crushed ice has a greater surface area, which allows it to cool the mixture faster and more evenly, leading to a quicker and more consistent freeze.
Simple Ingredients for Delicious Results
The beauty of homemade ice cream in a bag lies in its minimal, everyday ingredients:
- Half-and-Half or Heavy Cream: This forms the base of your ice cream. Heavy cream (also known as whipping cream) will yield a significantly richer, creamier, and more decadent ice cream due to its higher fat content. If you’re looking for a slightly lighter option, half-and-half can be used, though the final texture may be less dense and a bit icier. Ensure your dairy product is well-chilled before starting for optimal results. You can even make your own half-and-half by combining equal parts whole milk and heavy cream.
- Granulated Sugar: Sweetness is key in ice cream! The amount of sugar can be adjusted to your preference, but remember that flavors tend to taste milder when frozen. It’s often beneficial to err on the side of slightly sweeter in the liquid mixture than you might initially think.
- Vanilla Extract: A cornerstone of classic vanilla ice cream. Always opt for pure vanilla extract for the best and most authentic flavor. Imitation vanilla can leave an artificial aftertaste that detracts from the homemade quality.
- A Pinch of Fine Sea Salt: While rock salt is used for freezing, a small amount of fine salt in the ice cream mixture itself is crucial. It doesn’t make the ice cream salty, but rather acts as a flavor enhancer, helping all the other sweet flavors truly pop and preventing the ice cream from tasting flat.
Creative Variations & Flavor Combinations
Unleash your inner chef with these exciting flavor ideas for your Ice Cream In A Bag:
Ice Cream In A Bag Flavor Ideas
- Rich Chocolate: For a classic chocolate treat, simply mix in 2 tablespoons of hot fudge sauce or high-quality chocolate syrup with your other ice cream ingredients. You can also experiment with cocoa powder, but a liquid syrup often blends more smoothly. Alternatively, swap out chocolate for a delightful caramel sauce swirl!
- Refreshing Mint Chip: Add a few drops of peppermint extract to the base mixture for a cool, refreshing flavor. Then, stir in a handful of mini chocolate chips (or finely chopped chocolate bars) at the very end to create a delicious mint chocolate chip experience.
- Fruity Berry Swirl: Mash up some fresh strawberries, raspberries, or blueberries and gently fold them into your finished vanilla ice cream for a vibrant and fresh fruit swirl.
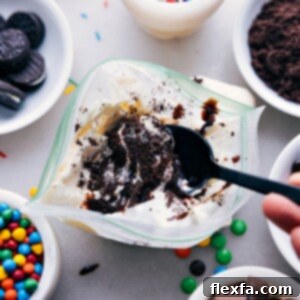
- Cookie Monster: Crush your favorite cookies, such as Oreos, chocolate chip cookies, or even peanut butter cookies, and mix them in after the ice cream has formed.
- Peanut Butter Perfection: Swirl in a tablespoon or two of creamy peanut butter for a nutty, rich flavor, or add chopped peanut butter cups for extra texture.
- Tropical Delight: A splash of coconut extract and some shredded coconut can transport you to an island paradise.
- Coffee Kick: Dissolve a small amount of instant coffee or espresso powder into your liquid base for a subtle yet satisfying coffee-flavored ice cream.
Mastering the Technique: How To Make Ice Cream In A Bag (Expert Tips)
While the process is straightforward, these tips will ensure your ice cream turns out perfectly every time:
- Seal Both Bags Tightly and Expel Air: This is perhaps the most critical step to prevent disaster. Ensure both the small bag containing the ice cream mixture and the larger bag containing the ice and salt are sealed absolutely airtight. Crucially, try to squeeze out as much air as possible from both bags before sealing. This prevents the salty water from leaking into your delicious ice cream and ensures maximum contact between the cold ice and the mixture for efficient freezing.
- Shake Vigorously and Constantly Move the Ice: The magic happens with motion! Shake the bags continuously and with enthusiasm. This vigorous movement not only ensures the heat transfer is constant and uniform but also helps to incorporate air, which contributes to a lighter, creamier texture. Make sure to redistribute the ice and salt frequently around the smaller bag to maintain even cooling. Don’t just shake up and down; try rotating, side-to-side, and even gentle tossing.
- Protect Your Hands: Wear Oven Mitts or Wrap in a Towel: The ice-salt mixture gets incredibly cold, reaching temperatures that can be uncomfortable or even painful for bare hands. To protect yourself from the extreme cold and allow for longer, more effective shaking, always wear thick oven mitts, winter gloves, or wrap the entire large bag in a kitchen towel. This insulation will not only keep your hands warm but also slightly slow down the melting of the ice, giving you more time to shake.
- Chill Your Serving Bowls: For an extra touch of indulgence and to slow down melting, place your serving bowls in the freezer for about 15-20 minutes before you plan to scoop out the ice cream. This will keep your homemade treat colder for longer, allowing you to savor every creamy spoonful.
- Work in Batches (for more servings): This recipe is designed for a single serving. If you’re making ice cream for a crowd, it’s best to prepare individual small bags of ice cream mix and shake them simultaneously in separate large ice-salt bags. This ensures everyone gets a fresh, perfectly churned batch.
More Easy & Delightful Dessert Recipes
If you loved the simplicity and fun of making ice cream in a bag, you’ll surely enjoy these other effortless dessert ideas that require minimal fuss but deliver maximum flavor:
- Chocolate Chip Cookie Icebox Cake: An incredibly easy, no-bake dessert made with just four simple ingredients, perfect for a quick cool treat.
- Mint Oreo Truffles: Decadent, bite-sized treats crafted from mint Oreos, cream cheese, and a chocolate coating—ideal for parties.
- No-Bake Cookies: The classic combination of chocolate and peanut butter in a quick, stovetop cookie that’s ready in minutes.
- Buncha Crunch: Recreate your favorite candy bar at home with this simple three-ingredient recipe.
- Sugar Cookie Fruit Pizzas: Vibrant and fresh, these “pizzas” use store-bought sugar cookies as a base, topped with cream cheese frosting and colorful fruits.
Print Recipe
Ice Cream In A Bag
Chelsea Lords
Homemade Ice Cream in a Bag is a quick, fun way to make creamy ice cream—no machines, no waiting! Just everyday ingredients, rock salt, ice, and a little shake magic!
5 minutes
10 minutes
15 minutes
1 ice cream (recipe can be scaled up easily!)
Video
A video tutorial for this recipe would typically appear here, guiding you through each step visually.
Equipment
- 1 Gallon-sized Resealable Plastic Bag
- 1 Sandwich-sized Resealable Plastic Bag
Ingredients
- 1/3 cup rock salt (also called ice cream salt; see note 1)
- Ice (crushed or cubed)
- 1/2 cup heavy cream or half-and-half (see note 2)
- 1 tablespoon granulated sugar
- 1/2 teaspoon vanilla extract
- 1/8 teaspoon salt (fine sea salt recommended for flavor)
- 2 tablespoons chocolate syrup (optional, for chocolate ice cream)
- Toppings as desired (see note 3)
Instructions
-
Prepare any toppings you’ll be using and set them aside. You’ll want to enjoy the ice cream quickly once it’s ready! Also, consider chilling your serving bowl(s) in the freezer to ensure they are nice and cold.
-
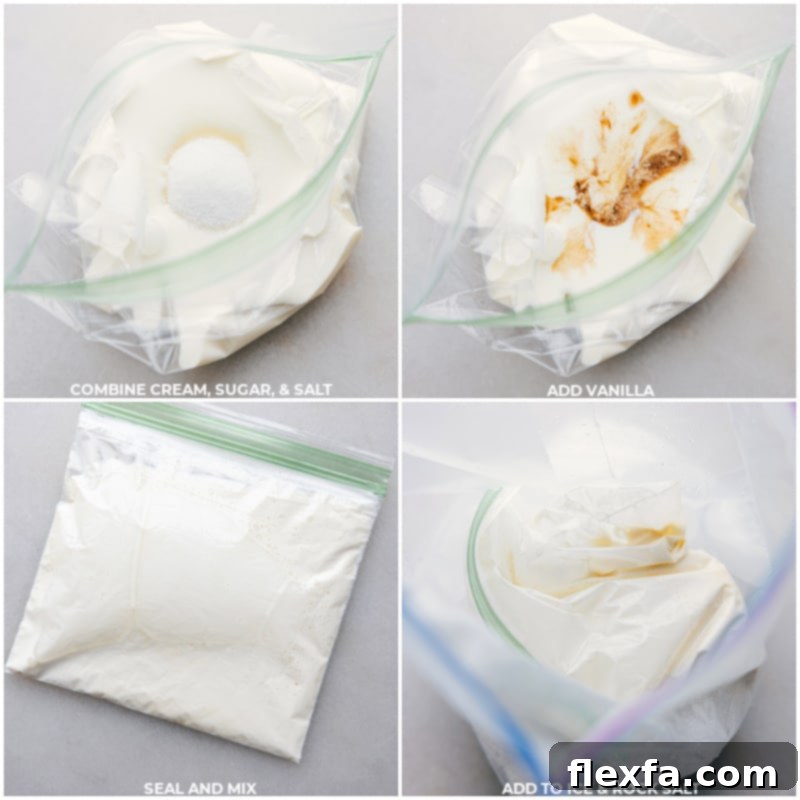
Carefully combine the heavy cream (or half-and-half), granulated sugar, vanilla extract, and a pinch of salt into the smaller resealable plastic bag. If you’re making chocolate ice cream, add the chocolate syrup at this stage. Seal the bag tightly, pressing out as much air as possible. Gently smoosh the bag to mix and combine all the ingredients thoroughly. Set this bag aside.
-
Fill the gallon-sized plastic bag approximately halfway with crushed ice. Add the rock salt to the ice. Close the gallon bag and shake or smoosh it around to distribute the rock salt evenly among the ice cubes.
-
Place the smaller bag containing the ice cream mixture inside the larger bag with the ice and rock salt. Seal the gallon bag once more, again removing as much air as possible. To protect your hands from the extreme cold, wrap the entire bag in a kitchen towel or put on oven mitts. Now, vigorously shake or gently toss the bag for 5 to 10 minutes. Continue shaking until the ice cream mixture reaches a soft-serve consistency.
-
Once your ice cream is ready, carefully remove the smaller bag from the larger bag. Be sure to wipe off any salty water from the exterior of the small bag to prevent it from contaminating your ice cream. Squeeze the fresh ice cream directly into your chilled bowl(s). Add your desired toppings and enjoy immediately! Remember, homemade ice cream melts faster than store-bought varieties, so eat quickly!
Recipe Notes
Note 1: Rock Salt: Rock salt, often labeled as ice cream salt, is essential for this recipe. Its larger crystal size and chemical properties allow it to significantly lower the freezing point of water, creating the extremely cold environment needed to freeze your ice cream rapidly. It can typically be found in the spice aisle of major grocery stores, often on lower shelves.
Note 2: Cream Choice: For the richest, most luxurious, and creamiest ice cream, heavy cream is your best choice due to its higher fat content. If you prefer a lighter dessert, half-and-half can be used, but be aware that the resulting ice cream will have a slightly less creamy and potentially icier texture. Always ensure your dairy product is thoroughly chilled before you begin the process for optimal freezing. You can create your own half-and-half by mixing equal parts whole milk and heavy cream.
Note 3: Topping Ideas: Get creative with your toppings! Some popular choices include crushed chocolate sandwich cookies (like Oreos), crushed toffee bits, warm hot fudge sauce, mini chocolate chips, colorful sprinkles, fresh fruit, whipped cream, or a drizzle of caramel. The possibilities are endless!
Nutrition Note: The provided nutrition information is calculated for 1 serving of plain vanilla ice cream without any additional toppings or flavorings. Please note that adding mix-ins or toppings will alter the nutritional values.
Storage: If you have any leftovers (which is unlikely with such a delicious treat!), transfer the ice cream to an airtight container and place it in the freezer. For the best texture and flavor, it is recommended to consume homemade ice cream within a few days, as it can become harder and icier over time.
Nutrition
Serving:
1serving
|
Calories:
457kcal
|
Carbohydrates:
16g
|
Protein:
3g
|
Fat:
43g
|
Saturated Fat:
27g
|
Polyunsaturated Fat:
2g
|
Monounsaturated Fat:
11g
|
Cholesterol:
134mg
|
Sodium:
32mg
|
Potassium:
116mg
|
Sugar:
16g
|
Vitamin A:
1749IU
|
Vitamin C:
1mg
|
Calcium:
79mg
|
Iron:
0.1mg
Nutrition information is automatically calculated and should only be used as an approximation. Values may vary based on specific ingredients and brands used.
Loved this recipe? Share your thoughts below!