
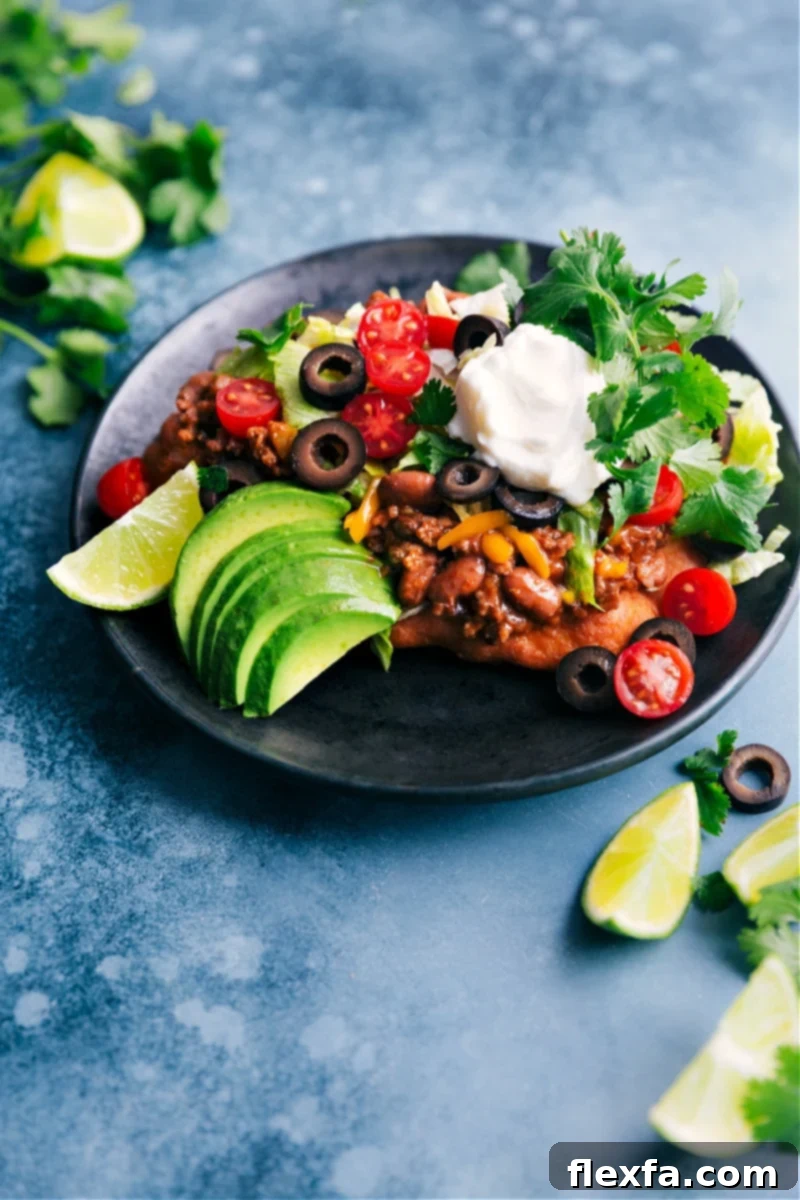
Experience the ultimate comfort food with this authentic Navajo Taco Recipe, featuring light and crispy homemade Fry Bread generously topped with perfectly seasoned ground beef, savory chili beans, fresh crisp lettuce, ripe tomatoes, sharp cheddar cheese, and a dollop of cool sour cream. This complete meal-in-one is a family favorite that brings the vibrant flavors of the American Southwest straight to your kitchen.
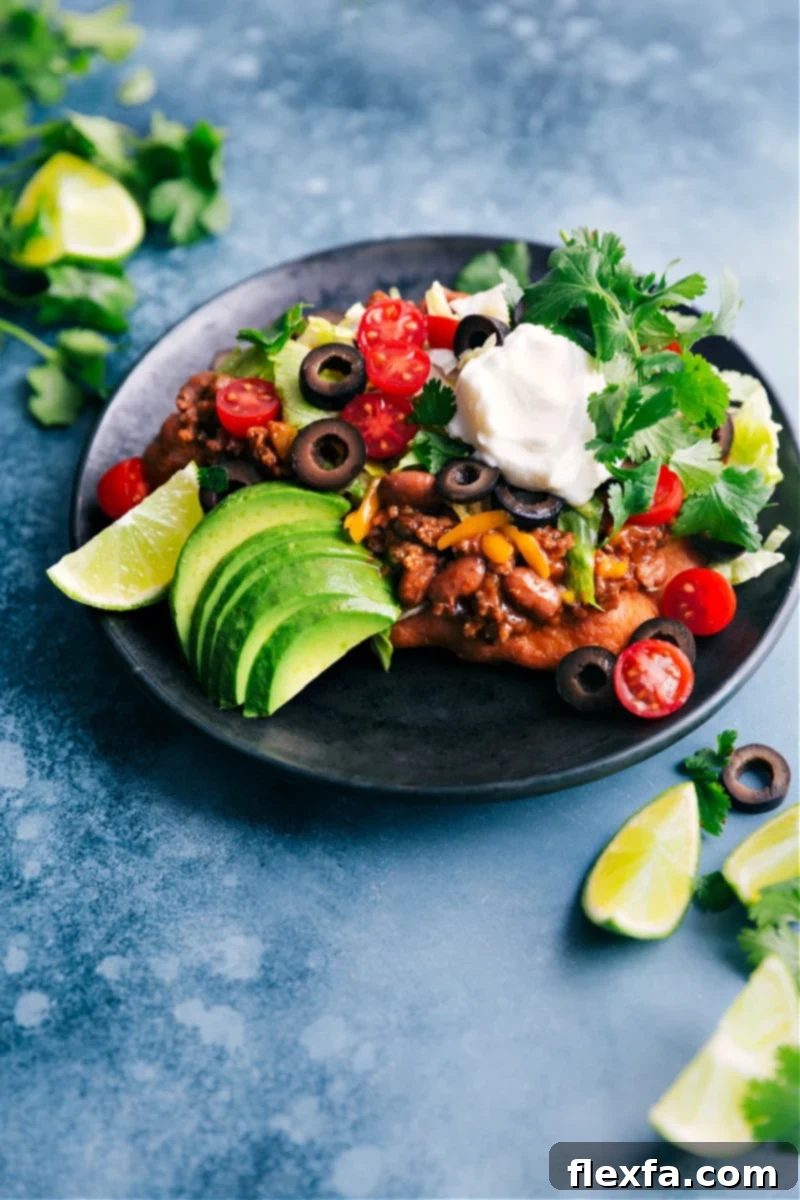

From the Author
Mastering the Art of Fry Bread for Unforgettable Navajo Tacos!
Growing up in northern Utah, fry bread was a culinary chameleon in my household. Depending on the toppings, it transformed from a sweet treat into a savory meal. Drizzled with honey butter, it became what we affectionately called a “scone.” But piled high with richly seasoned ground beef, hearty beans, and melted cheese, it was undoubtedly the beloved Navajo taco.
For years, I pursued that elusive perfect texture from my childhood memories: a fry bread with irresistibly crisp edges and a wonderfully chewy, tender middle. After countless attempts and many batches of dough, I finally discovered the secrets that make all the difference. These simple yet crucial techniques are what elevate good fry bread to great fry bread, forming the ideal foundation for truly exceptional Navajo Tacos:
- Allow the Dough to Rest: Instead of a full yeast rise, simply let the dough relax while your oil heats. This brief resting period is key for developing a tender crumb and making the dough easy to shape without overworking it.
- Maintain Consistent Oil Temperature: Frying at a steady 350°F is critical for even browning and a perfectly cooked interior. Too cold, and the bread becomes greasy; too hot, and it burns before cooking through.
- Handle the Dough Lightly: Minimal kneading and gentle handling prevent the dough from becoming tough, ensuring your fry bread remains light, airy, and exquisitely tender.
Now, with this one versatile recipe, I can recreate both cherished memories: fluffy sweet scones for a delightful breakfast or brunch, and the satisfying, flavor-packed Navajo Tacos for an unforgettable dinner. It’s truly the best of both worlds!
Quick Tip: Understanding Fry Bread
Fry bread, also widely known as Navajo Bread, is a traditional flatbread deeply rooted in the culinary heritage of Native American communities across the American Southwest. This beloved bread is characterized by its light, airy texture and golden, crispy exterior, achieved through deep-frying. While many regional variations exist, my adaptation offers a simple yet incredibly flavorful version. Think of it as a thicker, more pillowy tortilla, transformed into a crispy delight. It serves as the perfect base, whether for sweet applications or, as in this recipe, for savory, loaded tacos. Its unique texture is what truly sets Navajo Tacos apart from other taco variations.
What Makes the Perfect Navajo Taco?
Crafting these exceptional Navajo Tacos is a delightful process, broken down into three key components. Each element plays a crucial role in building the layers of flavor and texture that define this iconic dish:
- The Legendary Fry Bread: The foundation of our taco, offering a unique crisp-chewy texture.
- The Savory Meat & Bean Mixture: A robust, seasoned filling that delivers hearty flavor.
- Your Favorite Toppings: Fresh, vibrant additions that add crunch, creaminess, and a burst of freshness.
Let’s delve deeper into each component, exploring how to achieve perfection in every bite of your homemade Navajo Tacos.
1. The Art of Homemade Fry Bread
Without a doubt, the homemade fry bread is the undisputed star of these Navajo Tacos. It’s my absolute favorite part – a remarkably flavorful bread with an unparalleled texture that’s surprisingly easy to achieve using common pantry staples. Here are essential tips for making the best fry bread that will serve as the perfect vessel for your taco fillings:
- Yeast for Flavor, Not for Rise: This fry bread recipe does include a small amount of yeast, but don’t expect a lengthy proofing period. The yeast contributes immensely to the depth of flavor and tender texture, but we only allow the dough to rest briefly. This resting period is crucial for relaxing the gluten, making the dough pliable and easy to shape, rather than achieving a significant rise. Remember, less handling is best to keep the dough tender and light.
- Embrace the “Rough” Dough: Your dough might appear a bit shaggy and sticky, and that’s perfectly normal and desired! This texture helps create that characteristic chewy interior. If it feels excessively sticky and unmanageable, you can add a tiny bit more flour, a tablespoon at a time. Conversely, if it seems too dry, a splash of milk will help. Environmental factors like humidity and even how you measure your flour can influence dough consistency, so don’t hesitate to make slight adjustments.
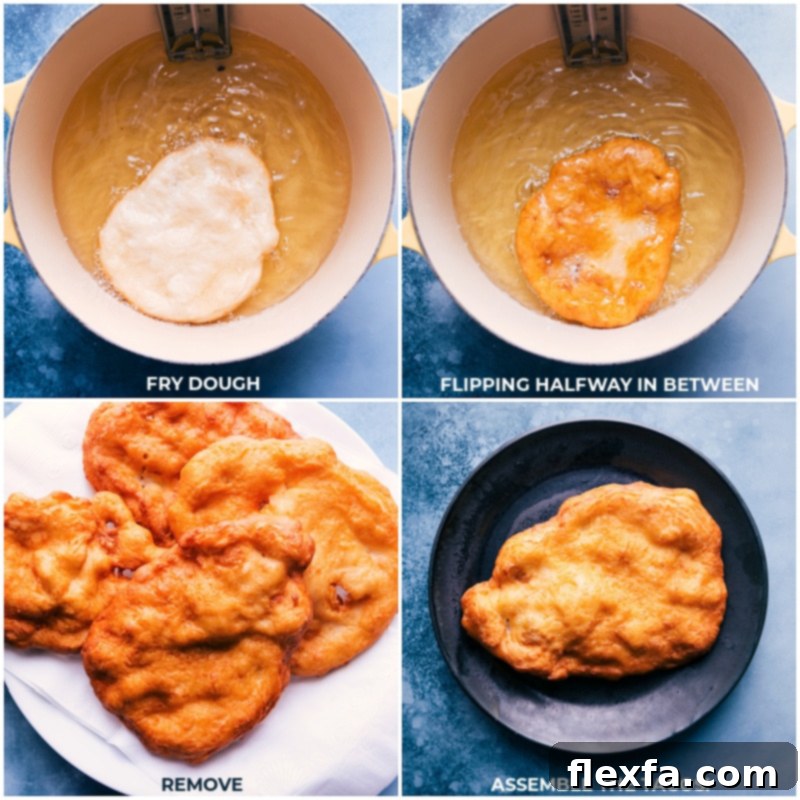
- Temperature Control is King for Frying: For consistently golden-brown and perfectly cooked fry bread, a heavy-bottomed pot, ideally cast iron, is highly recommended. Cast iron excels at retaining and distributing heat evenly, which is vital for frying. Equip your pot with a reliable kitchen thermometer to diligently monitor the oil temperature, aiming for a steady 350°F (175°C). If the oil is too cool, the bread will absorb too much oil and become greasy. If it’s too hot, the exterior will brown too quickly, leaving the interior raw or undercooked. Precision here ensures that signature crisp-on-the-outside, soft-on-the-inside texture.
2. Crafting the Flavorful Meat and Bean Mixture
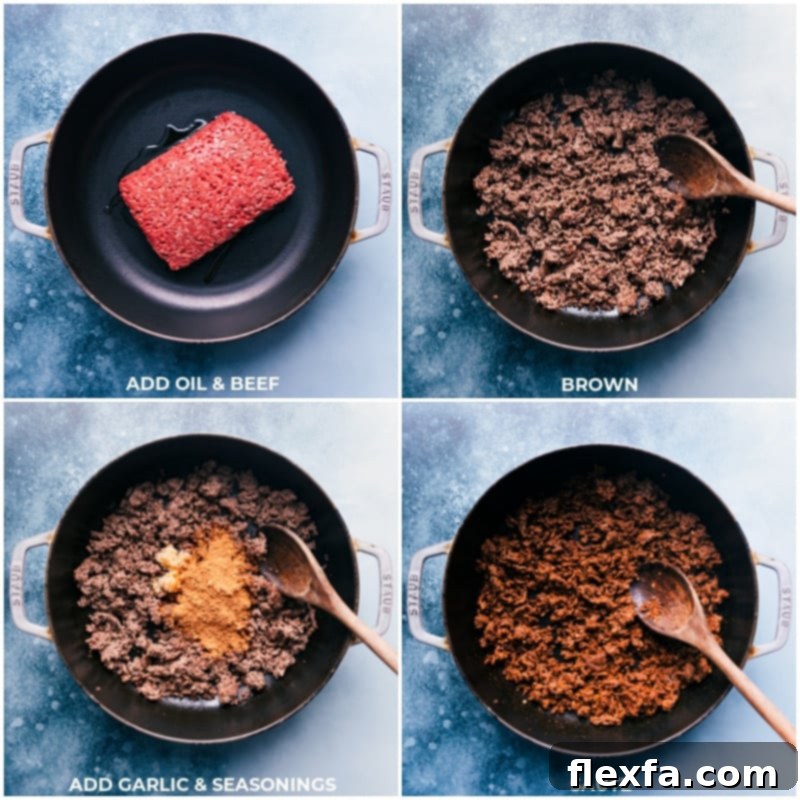
Once your fry bread dough is resting, it’s time to prepare the savory heart of your Navajo Tacos: the chili-style meat and bean mixture. This robust filling brings a depth of flavor and satisfying texture that complements the crispy fry bread beautifully. If you happen to have leftover Crockpot Chili, you’re already halfway there – simply warm it up and spoon it over your fresh fry bread for an incredibly quick and delicious dinner! (Indeed, few things can compare to Navajo Tacos topped with a rich, hearty chili!)
However, if you’re starting from scratch, fret not! This meat and bean mixture comes together rapidly and is designed to be as straightforward as possible without compromising on flavor. We achieve this efficiency and taste through two powerhouse ingredients:
- Quality Taco Seasoning Packet: A good taco seasoning blend is your secret weapon for instant flavor. These packets can vary significantly in spice level and overall taste, so choose wisely. I personally recommend McCormick® or Old El Paso® mild taco seasoning packets for a balanced, family-friendly flavor. If you prefer to control the ingredients and customize the spice, a homemade taco seasoning blend is an excellent alternative (refer to the “Quick Tip” box below for my favorite recipe!).
- Chili Beans for Added Zest: Look for chili beans in the canned bean aisle of your grocery store. These are typically pinto beans suspended in a mildly spiced chili sauce, offering a fantastic flavor boost and creamy texture without extra effort. They are sometimes labeled as “ranch-style beans” in certain regions. If chili beans are unavailable, a can of undrained pinto beans (or even black beans) will work as a good substitute, though you might want to add a pinch more chili powder or cumin to compensate for the seasoned sauce.
Quick Tip: Homemade Taco Seasoning
For those who prefer to craft their own spice blend for this Navajo Taco recipe, here’s a simple yet incredibly flavorful taco seasoning blend:
- 1 tablespoon ground chili powder (I prefer McCormick for a mild, vibrant chili flavor)
- 1 teaspoon EACH: ground cumin, paprika
- 1/2 teaspoon EACH: onion powder, garlic powder, dried oregano, fine sea salt, and black pepper
Combine all ingredients thoroughly. This blend can be stored in an airtight container for future use and provides a customizable, fresh flavor to your meat mixture.
3. Essential and Optional Navajo Taco Toppings
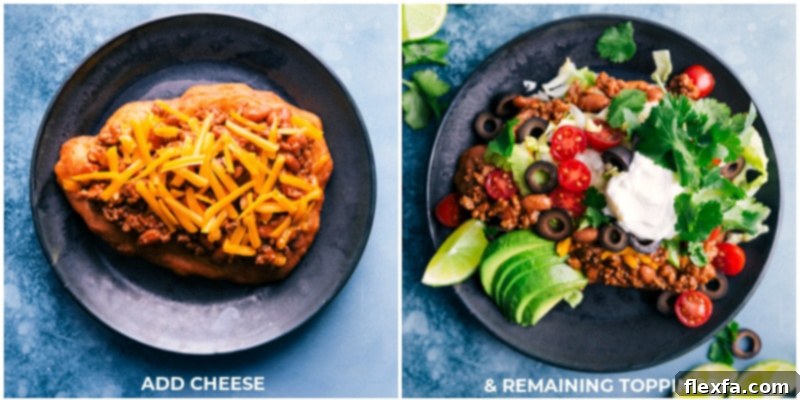
The beauty of Navajo Tacos lies in their versatility, especially when it comes to toppings. While the fry bread and meat mixture form a perfect base, the choice of fresh, vibrant toppings allows you to customize each taco to your liking, adding crunch, creaminess, and a burst of flavor. Here are some fantastic options to consider:
- Shredded iceberg lettuce: Provides a refreshing crunch and color contrast.
- Fresh tomatoes: Whether halved cherry tomatoes, chopped Roma tomatoes, or a quick homemade pico de gallo, they add juicy sweetness.
- Sliced black olives: A classic taco topping that offers a mild, briny note.
- Homemade or store-bought guacamole: Adds rich creaminess and healthy fats.
- Cool and tangy sour cream: Essential for balancing the rich flavors of the meat (regular or fat-free options work equally well).
- Extra picante sauce or zesty salsa: For those who crave an extra kick of spice and moisture.
- Fresh lime wedges: A squeeze of fresh lime juice brightens all the flavors.
- Freshly chopped cilantro: Adds an aromatic, herbaceous note that’s characteristic of Southwestern cuisine.
- Shredded sharp Cheddar cheese or a vibrant Mexican cheese blend: For that irresistible melty, cheesy goodness.
Feel free to mix and match these toppings to create your ideal Navajo Taco experience!
Navajo Taco Recipe Variations to Explore
While the classic Navajo Taco is utterly delicious, there are many ways to customize this recipe to suit different tastes, dietary preferences, or even simply to make it even easier on a busy weeknight. Here are some popular variations:
- Navajo Tacos with Shredded Beef: For a truly decadent twist, replace the ground beef with slow-cooked shredded beef. My favorite shortcut is a package of Del Real Foods® Del Real Slow Cooked Beef Barbacoa. This incredibly tender, pre-cooked beef is conveniently available in the refrigerated section of most grocery stores. Simply warm it according to package directions, and spoon it directly onto your fresh fry bread. The rich, savory flavor of barbacoa takes these tacos to an entirely new level!
- Easy Weeknight Navajo Tacos: If you’re short on time or prefer a quicker alternative to making fry bread from scratch, this variation is a lifesaver. Instead of preparing the yeast dough, use store-bought refrigerated biscuit dough. Separate the biscuits, flatten each one slightly, and then fry them just as you would the homemade fry bread. The result is a surprisingly delicious, fluffy fried bread that cuts down significantly on prep time, making Navajo Tacos a fast and easy dinner option.
- Lower Fat Navajo Tacos: To reduce the fat content without sacrificing flavor, substitute lean ground beef with ground turkey. Ground turkey is a fantastic lean protein alternative. To ensure your turkey mixture still has that deep, beefy flavor, incorporate 2 teaspoons of beef bouillon powder or paste into the cooking process. This simple trick adds back the rich umami notes often missed when switching from beef to turkey, creating a lighter but equally delicious taco filling.
Transform Leftovers into a Zesty Taco Salad!
One of the many benefits of making a delicious meal like Navajo Tacos is the potential for incredible leftovers! If you find yourself with extra meat and bean filling, don’t let it go to waste. Repurpose it into a vibrant and satisfying taco salad that’s perfect for lunch the next day or a lighter dinner. To create this delightful salad:
Start with a generous bed of finely chopped romaine lettuce as your base. Spoon the warmed leftover meat and bean filling over the crisp greens. Then, load up your salad with an array of fresh, colorful additions: creamy diced avocado, sweet corn kernels, juicy cherry tomatoes, sliced black olives, and a sprinkle of fresh cilantro. Finish with a refreshing squeeze of fresh lime juice to brighten all the flavors. For the ultimate dressing, drizzle it all with this incredible Copycat Cafe Rio Creamy Tomatillo Dressing – it ties all the flavors together beautifully and makes for a truly irresistible meal!
Storage Tips and Make-Ahead Notes for Navajo Tacos
Storing and Enjoying Your Navajo Tacos
To fully appreciate the unique textures of this dish, it’s best to enjoy your Navajo Tacos promptly after assembly. Once the warm meat and taco toppings are placed on the freshly fried bread, the fry bread will quickly begin to absorb moisture and lose its desirable crispness. For the ultimate experience, serve them immediately after frying the bread and loading the toppings.
However, the individual components can be stored effectively: The savory meat and bean filling is quite robust for meal prepping. It will remain fresh and flavorful for 5-7 days when stored in an airtight container in the refrigerator. This makes it a perfect make-ahead component for busy weeknights. Unfortunately, fry bread is a delicate item that doesn’t store well after frying. Its crispy-chewy texture is at its peak immediately after being cooked, and reheating often results in a tougher, less pleasant texture. Therefore, it’s always best to fry the bread just before serving.
Make Ahead Fry Bread Dough: For convenience, you can prepare the fry bread dough in advance. Simply follow the initial steps for making the dough, then tightly cover it and chill it in the refrigerator until you’re ready to fry. While the dough is best used the same day it’s made for optimal texture and freshness, preparing it a few hours ahead can save time during dinner prep.
More Delightful Ground Beef Recipes to Try:
Dinner
Classic Ground Beef Stroganoff
Dinner
Quick Ground Beef Ramen
Dinner
Baked Ground Beef Tacos
Pasta And Pizza
Creamy Beef and Shells
Saved
Pin
⭐
⭐
⭐
⭐
The Best Homemade Navajo Taco Recipe
Chelsea Lords
40 minutes
10 minutes
50 minutes
8 servings (1 taco per serving)
Video Tutorial
Essential Equipment
-
Large Frying Pan
-
Heavy-Bottomed Pot or Large Cast-Iron Pot (for deep frying)
-
Kitchen Thermometer (for monitoring oil temperature)
Ingredients
- 1 tablespoon olive oil
- 1 pound lean ground beef (93/7 recommended)
- 2 teaspoons minced garlic
- 1 (1-ounce) packet taco seasoning (see Recipe Note 1, or use homemade blend)
- 1/2 cup mild picante sauce (or your favorite salsa)
- 1 (16-ounce) can chili beans (undrained, see Recipe Note 2)
- Assorted Toppings (as desired, see Recipe Note 3 for suggestions)
- 2 tablespoons unsalted butter (melted and cooled)
- 2-1/3 cup all-purpose flour
- 2 teaspoons granulated sugar
- 2 teaspoons baking powder (ensure it’s baking powder, not baking soda!)
- 1/2 teaspoon instant yeast
- 1/2 teaspoon salt
- 1 cup milk (whole milk is recommended for richness, see Recipe Note 4)
- 1 tablespoon vegetable oil (plus additional for deep frying)
Step-by-Step Instructions
Part 1: Preparing the Fry Bread Dough
-
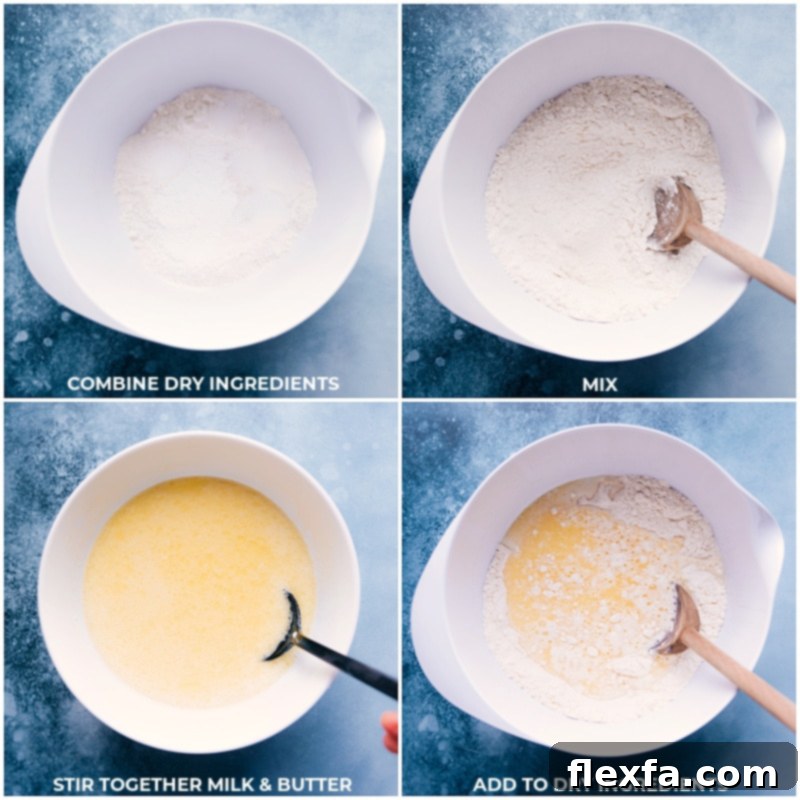
Begin by preparing the fry bread dough first, allowing it time to rest while you prepare the taco filling. In a small bowl, melt the unsalted butter in the microwave. Set it aside to cool completely to room temperature (it’s crucial it’s not hot, as this can affect the yeast). Separately, gently warm the milk in the microwave until it’s just lukewarm – it should feel comfortably warm to the touch, not hot (refer to Recipe Note 4 for testing milk temperature). Combine the cooled melted butter and the warmed milk, and set this liquid mixture aside. In a large mixing bowl, add the all-purpose flour, granulated sugar, baking powder, instant yeast, and salt. Whisk these dry ingredients together thoroughly until well combined. Gradually pour the milk and butter mixture into the dry ingredients. Use a wooden spoon to stir until the dough just comes together, forming a shaggy mass.
-
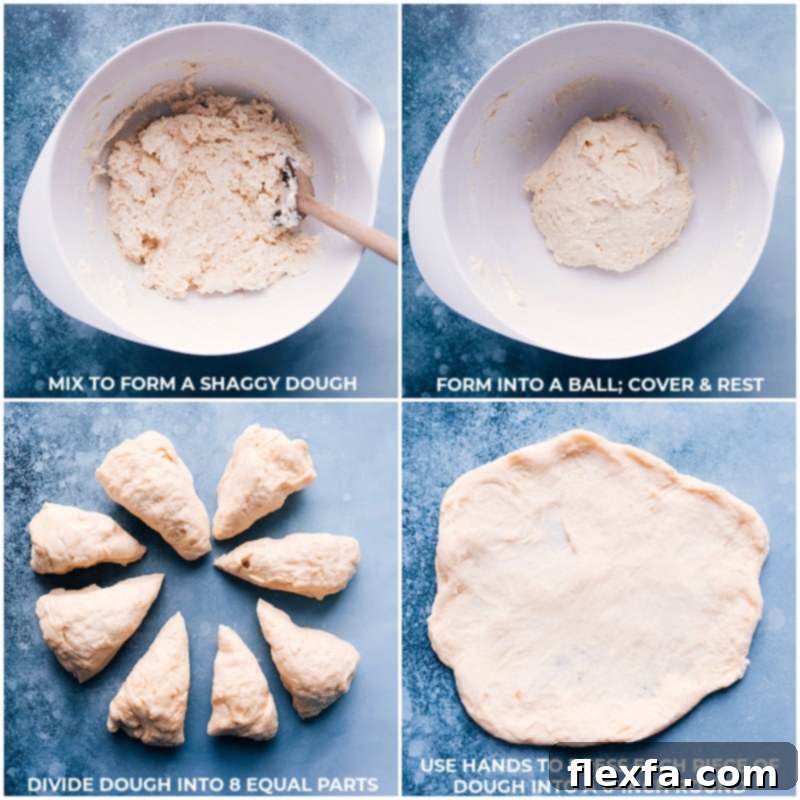
At this stage, the dough should appear quite rough, shaggy, and noticeably sticky, yet still manageable enough to work with. If it’s excessively sticky and hard to handle, lightly dust your hands with a tiny bit of flour. Gently knead the dough a few times to form it into a loose ball, being careful not to overwork it – minimal handling is key for tender fry bread. Drizzle 1 tablespoon of vegetable oil into the bottom of the mixing bowl. Turn the dough ball over in the oil to coat it evenly. Cover the bowl with a damp kitchen towel. Allow the dough to rest at room temperature until your meat filling is ready. This resting period isn’t for a full yeast rise; rather, it allows the gluten in the dough to relax, making it much easier to shape later.
Part 2: Preparing the Meat & Frying the Bread
-
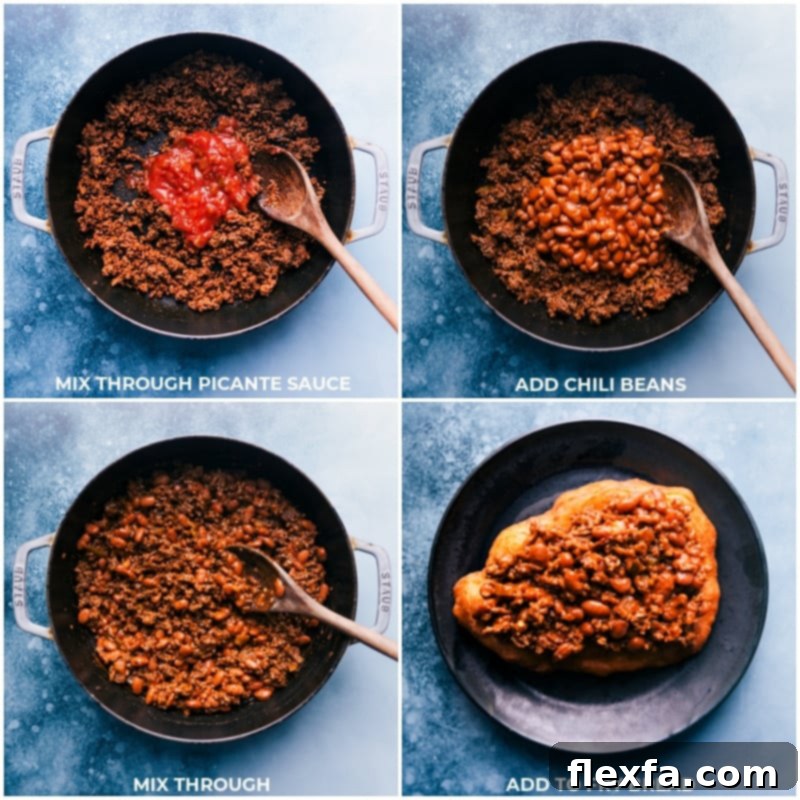
While the dough is resting, prepare the meat and bean mixture. Heat the olive oil in a large frying pan over high heat. Once the oil is shimmering, add the lean ground beef. Allow the beef to sear and brown undisturbed for a few minutes to develop a rich crust, then begin to crumble it with a wooden spoon, breaking it into smaller pieces and browning it thoroughly. Once the beef is fully browned, reduce the heat to medium. Add the taco seasoning mix and minced garlic to the pan. Stir continuously for about 1 minute, or until the mixture becomes very fragrant. Pour in the mild picante sauce (or salsa), making sure to scrape the bottom of the pan to release any flavorful browned bits. Stir until the sauce is fully incorporated, then add the chili beans, including their liquid. Stir everything together and cook until the beans are heated through. Reduce the heat to low and let the mixture simmer gently, stirring occasionally, while you prepare the fry bread.
-
Now it’s time to fry the bread. Pour about 1 inch of vegetable oil into a large, heavy-bottomed pot, ideally a cast-iron pot, for even heat distribution. Heat the oil to 350°F (175°C), using a kitchen thermometer to monitor the temperature accurately. Once the oil is heated, divide the rested dough into 8 equal portions. A simple way to do this is to cut the dough ball in half, then halve each half again to get four large triangle pieces. Cut each of these triangles into two smaller pieces, resulting in 8 equal portions. Lightly flour your hands. Take one piece of dough at a time (keeping the remaining portions covered with the damp towel to prevent them from drying out). Gently work the dough with your hands, pressing and stretching it outward to form a thin, 5-to-6-inch circle. Avoid using a rolling pin or flattening it on a table, as the rustic, hand-shaped texture is part of its charm. The goal is a thin piece of dough – the thinner it is, the crisper and lighter your fry bread will be. Be careful not to tear the dough as you stretch it.
-
Carefully drop only one piece of shaped dough into the preheated oil at a time to avoid overcrowding the pot, which can lower the oil temperature. Fry the dough until it turns a beautiful golden brown, which typically takes about 30 seconds to 1 minute per side. If you’re not using a cast-iron pot, it might take a bit longer due to less consistent heat. Use two forks or a pair of tongs to flip the dough halfway through cooking. Once golden and puffed, use a large slotted spoon to carefully remove the fry bread from the oil. Transfer it immediately to a plate lined with paper towels to drain any excess oil. Repeat this process with the remaining dough portions, ensuring the oil temperature stays consistent between batches.
-
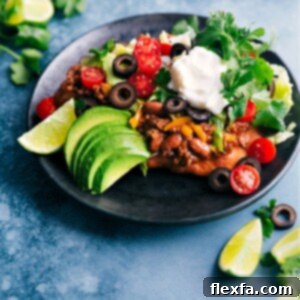
Arrange the freshly fried bread on individual plates. Top each piece with equal amounts of the warm, seasoned meat and bean filling. Now, it’s time for the best part – adding your favorite toppings! Pile on shredded iceberg lettuce, juicy halved cherry tomatoes (or chopped Roma tomatoes), thinly sliced black olives, creamy guacamole, a generous dollop of sour cream, a sprinkle of fresh cilantro, and a squeeze of fresh lime juice. Feel free to add shredded sharp Cheddar cheese or a Mexican cheese blend. Serve and enjoy your homemade Navajo Tacos immediately for the ultimate flavor and texture experience!
Helpful Recipe Notes
Note 2: About Chili Beans: Chili beans are typically pinto beans seasoned in a mild chili-spiked sauce and can be found alongside other canned beans at most grocery stores. They are sometimes referred to as “ranch-style beans.” If you cannot locate chili beans, a can of undrained pinto beans (or even black beans) makes a suitable substitute. For extra flavor, consider adding a pinch of chili powder or cumin to plain beans.
Note 3: Suggested Toppings for Navajo Tacos: Customize your tacos with a variety of fresh and flavorful toppings. Popular choices include: shredded iceberg lettuce for crunch, juicy halved cherry tomatoes or chopped Roma tomatoes, thinly sliced black olives, creamy fresh guacamole, a dollop of sour cream, fragrant fresh cilantro, and a refreshing squeeze of fresh lime juice. Don’t forget shredded sharp Cheddar cheese or a vibrant Mexican cheese blend for melty goodness!
Note 4: Testing Milk Temperature for Yeast: When warming milk for the dough, it’s essential to get the temperature just right for the yeast. To test, drizzle a few drops of the warmed milk onto the inside of your wrist. It should feel comfortably warm, similar to bathwater. If it feels hot, it’s too hot and will kill the yeast, preventing the dough from activating. If it feels cold, the yeast will remain dormant. Aim for lukewarm.
Storage Best Practices: For optimal enjoyment, assemble and serve your Navajo Tacos immediately after frying the bread. The meat and bean filling, however, stores beautifully. Keep it in an airtight container in the refrigerator for 5–7 days. The fry bread itself is best enjoyed fresh; it tends to become tough and soggy when stored and reheated.
Nutritional Information
Nutrition information is automatically calculated, so should only be used as an approximation.
Love this recipe? Share your thoughts below!