
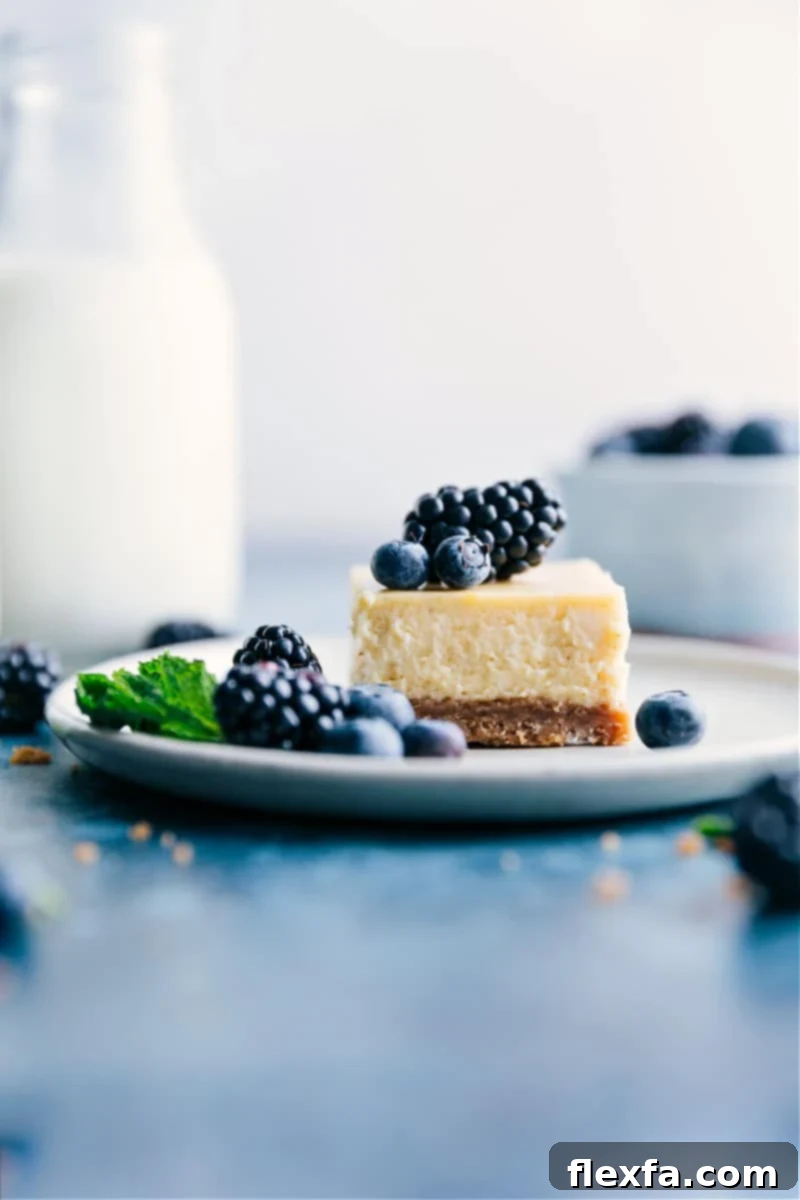
Irresistibly Creamy Cheesecake Bars with a Perfect Graham Cracker Crust
Prepare to fall in love with these Cheesecake Bars – a truly irresistible dessert that combines a smooth, rich, and tangy vanilla cheesecake filling with a thick, buttery graham cracker crust. Whether you top them with vibrant fresh berries, a sweet berry sauce, or a drizzle of decadent caramel, these bars are guaranteed to be a crowd-pleaser. They strike the perfect balance between classic elegance and effortless preparation, making them an ideal treat for any occasion, from casual gatherings to special celebrations.
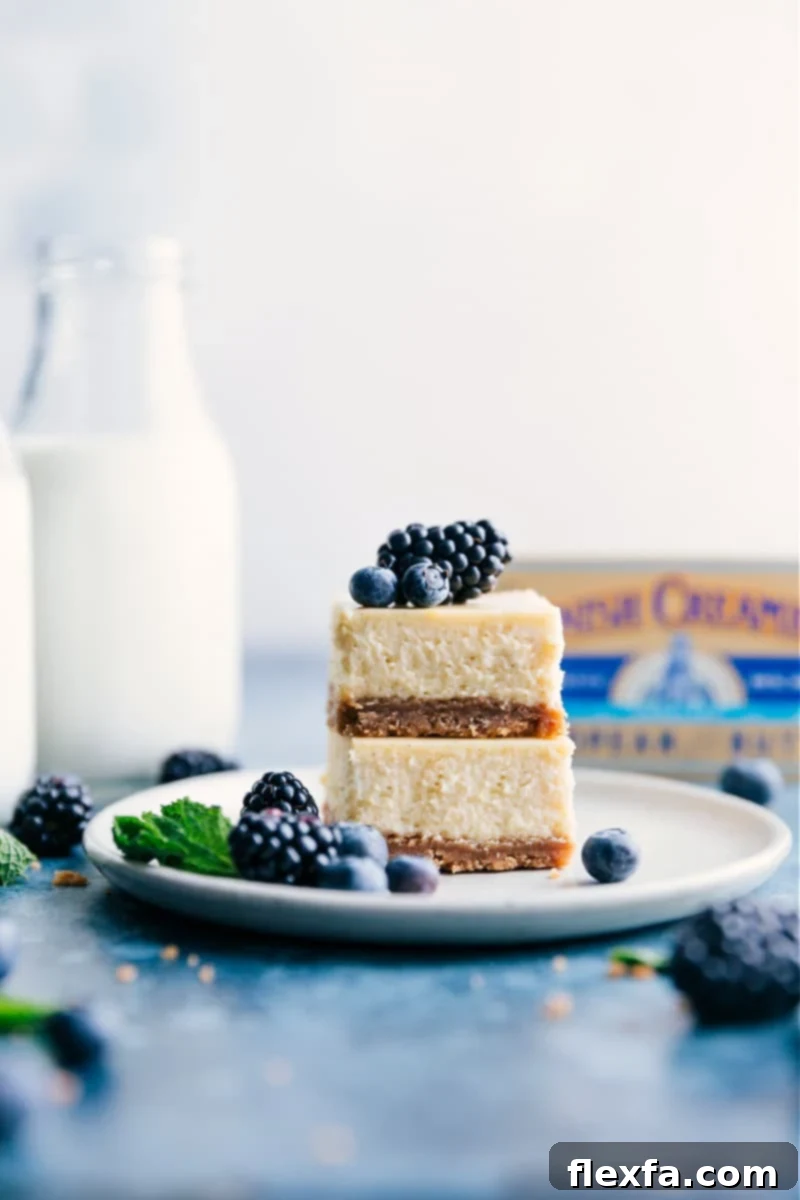

Author’s Note
You Won’t Believe How Effortless and Delicious These Cheesecake Bars Are!
As someone who has passionately experimented with countless cheesecake-inspired creations, from innovative Twix cheesecake bars to delightful lemon cheesecake cookies, there’s one recipe I consistently return to: these classic vanilla cheesecake bars. They hold a special place in my heart, evoking fond memories of the bakery-style cheesecake squares I used to enjoy as a childhood treat.
What sets these apart is their wonderfully thick texture, delightful tang, and just the right amount of sweetness that never overwhelms. My quest to perfect this recipe began after a friend brought over a store-bought cheesecake, and I was immediately reminded of how much more superior homemade tastes. The difference is truly remarkable – homemade cheesecake offers a creamier consistency, a richer flavor profile, and that irresistible, buttery graham cracker crust? It’s simply beyond compare.
Every time a fresh batch of these cheesecake bars emerges from my kitchen, it’s not long before someone is eagerly asking for the recipe, often before they’ve even finished their first slice! Their universal appeal and relative ease of preparation make them a staple in my dessert repertoire, and I’m thrilled to share this tried-and-true recipe with you.
Essential Ingredients for Flawless Cheesecake Bars
Crafting these delectable cheesecake bars requires a few key ingredients, each playing a vital role in achieving that perfect taste and texture. Here’s a detailed look at what you’ll need and some helpful tips for each component:
| Ingredient | Why It Works & Pro Tip |
|---|---|
| Graham Crackers | These form the foundation of our irresistible crust. For an equally delicious alternative, digestive biscuits or vanilla wafers work wonderfully. Ensure you process them into very fine crumbs to create a uniformly sturdy and buttery crust that holds together perfectly. |
| Butter | Melted butter binds the graham cracker crumbs together, creating a rich and flavorful base. Always melt the butter and allow it to cool slightly before mixing. Adding hot butter can make the crust greasy and prevent it from setting properly. |
| Cream Cheese | The star of the show! For the signature creamy texture and rich flavor, always opt for full-fat, brick-style cream cheese. Avoid whipped or low-fat versions, as they contain more water and will significantly alter the cheesecake’s consistency, leading to a runny or grainy filling. Crucially, ensure it’s at room temperature before mixing to achieve a perfectly smooth, lump-free batter. |
| Sugar | Granulated sugar provides the ideal sweetness, complementing the cream cheese’s tang without overpowering it. It also contributes to the filling’s smooth texture. |
| Flour | Just a touch of all-purpose flour acts as a stabilizer for the cheesecake filling. It helps prevent cracking during baking and cooling, ensuring your bars come out beautifully smooth on top. |
| Sour Cream | Sour cream adds an extra layer of luxurious creaminess and enhances the tangy flavor that’s characteristic of a great cheesecake. If sour cream isn’t available, full-fat Greek yogurt can be used as a suitable substitute. Remember to bring it to room temperature as well. |
| Lemon Zest & Juice | While optional, I highly recommend including fresh lemon zest and juice. They provide a bright, zesty lift that beautifully balances the richness of the cream cheese. For a pure, unadulterated vanilla flavor, you can omit them. |
| Eggs | Eggs are essential for structure and binding the filling. Like cream cheese, using room temperature eggs is key. They incorporate more easily into the batter, ensuring a silky-smooth consistency without overmixing, which can introduce too much air. |
| Vanilla Extract | For the best flavor, use high-quality pure vanilla extract or, for an even richer and more pronounced vanilla note, vanilla bean paste. This enhances the overall sweetness and depth of the cheesecake. |
Expert Tips for Cheesecake Bar Perfection
Achieving perfectly smooth, crack-free cheesecake bars is simpler than you think with these crucial tips:
- Ensure Room Temperature Ingredients: This is arguably the most important tip. Cold cream cheese will lead to a lumpy batter that’s impossible to smooth out, and cold eggs won’t emulsify properly. Take your cream cheese, eggs, and sour cream out of the fridge at least an hour (or up to two hours) before you plan to bake. They should be soft to the touch.
- Avoid Overmixing the Batter: Overmixing introduces too much air into the cheesecake batter. This air will cause the cheesecake to puff up significantly in the oven, only to collapse and crack dramatically as it cools. Mix only until the ingredients are just combined and smooth.
- Mix Slowly and Consistently: When you do mix, use a hand mixer on low speed and always stir in one consistent direction. This minimizes air incorporation while ensuring thorough blending. Stop as soon as the batter is smooth; resist the urge to keep beating it.
- Cool Gradually After Baking: Rapid changes in temperature are a primary cause of cracks in cheesecake. Once baked, turn off the oven and prop the oven door open slightly, allowing the cheesecake bars to cool gradually inside the warm oven for about 30 minutes. This gentle cooling transition helps prevent cracks. Then, transfer to a wire rack for room temperature cooling before chilling.
- Chill Completely: Patience is a virtue when it comes to cheesecake! Chilling your cheesecake bars fully in the refrigerator for at least 6-8 hours (or preferably overnight) is non-negotiable. This allows the filling to firm up properly, intensifying its flavor and ensuring clean, beautiful slices. Chilling too soon at a cold temperature without the gradual oven cool-down can also cause cracks.
Featured Comment
“These were so good! I am cheesecake OBSESSED so these were exactly what I was looking for!”
– Eden
Storage and Freezing Instructions
- Refrigerator Storage: Once completely chilled, store your cheesecake bars in an airtight container in the refrigerator for up to 5 days. Ensure they are covered to prevent them from drying out or absorbing other food odors.
- Freezing for Longer Enjoyment: Cheesecake bars freeze beautifully! For best results, wrap individual bars tightly in plastic wrap, then place them in a freezer-safe, airtight container or heavy-duty freezer bag. They can be frozen for 2–3 months. Freezing individual portions makes it easy to grab one whenever a craving strikes!
- Thawing Instructions: To enjoy frozen cheesecake bars, simply transfer them to the refrigerator overnight to thaw slowly. For optimal texture and flavor, let them sit at room temperature for about 20–30 minutes before serving.
More Delectable Dessert Recipes:
Desserts
Mini Fruit Tarts Recipe
Desserts
The BEST Lemon Bars Recipe
Desserts
Carmelitas (My Favorite Dessert!)
Desserts
Chocolate Cheesecake

Print Recipe
Classic Vanilla Cheesecake Bars
Chelsea Lords
20
40
8
9
16 bars
Video

Watch a video demonstration of this recipe on the original blog post for visual guidance!
Equipment
-
8 x 8-inch baking pan
-
Parchment paper
-
Hand mixer
-
Large mixing bowls
-
Rubber spatula
Ingredients
- Cooking spray
- 1-1/4 cups graham cracker crumbs
- 5 tablespoons unsalted butter melted and cooled slightly
- 1/3 cup light brown sugar lightly packed
- 1/4 teaspoon salt
- 2 (8-ounce) packages cream cheese full-fat, softened to room temperature
- 1 cup granulated sugar
- 2 tablespoons all-purpose flour
- 1/4 cup sour cream full-fat, room temperature
- 3 large eggs room temperature
- 1 tablespoon pure vanilla extract or 1-1/2 teaspoons vanilla bean paste
- 1 large lemon zest and juice, optional but recommended for brightness
- 1/4 teaspoon salt
- Berry sauce optional, recipe provided in notes
- Toppings as desired fresh berries, caramel, etc. (see “Topping Ideas” section below)
Instructions
-
Prepare for Baking: Preheat your oven to 375°F (190°C) and ensure the oven rack is positioned in the middle. Line an 8×8-inch baking pan with parchment paper, leaving a generous overhang on two sides to easily lift the bars out later. Lightly spray the parchment paper with cooking spray. Melt the butter for the crust and set it aside to cool to room temperature. If using, zest the lemon to get 1 teaspoon of zest, then juice it for 1 teaspoon of lemon juice; set both aside. Using a food processor or a sturdy bag and rolling pin, finely crush your graham crackers until no large chunks remain.
-
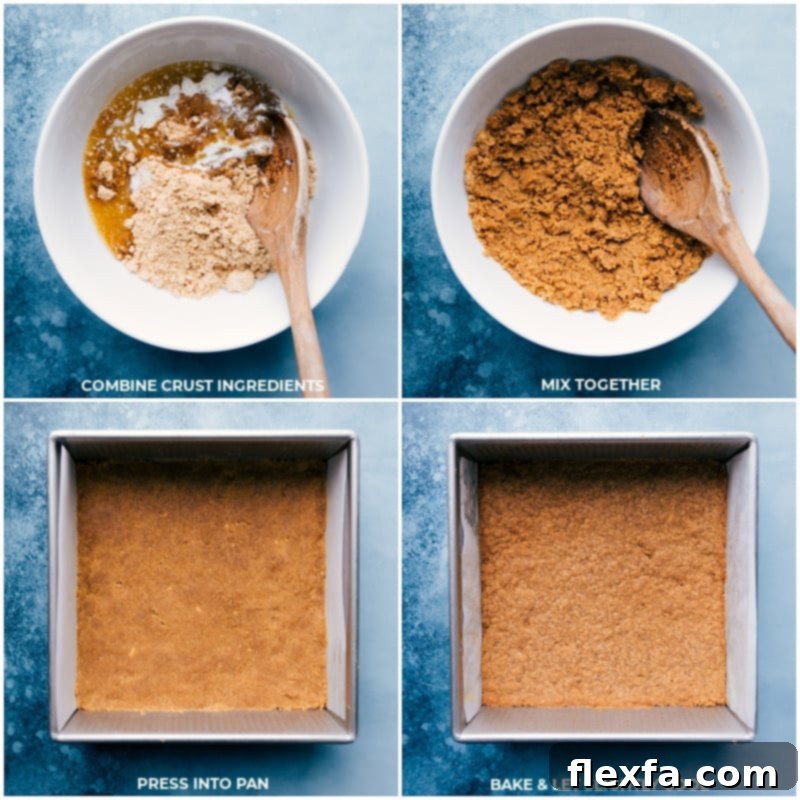
Make the Crust: In a medium bowl, combine the finely crushed graham cracker crumbs, the slightly cooled melted butter, light brown sugar, and salt. Stir vigorously with a spoon or spatula until all ingredients are thoroughly combined and the mixture resembles wet sand. Press this crust mixture firmly and evenly into the prepared baking pan. For a perfectly compact crust, use the bottom of a flat measuring cup or a glass to compress it. Bake the crust for 10 minutes, then remove it from the oven and set it aside to cool while you prepare the filling. Immediately reduce the oven temperature to 325°F (160°C).
-
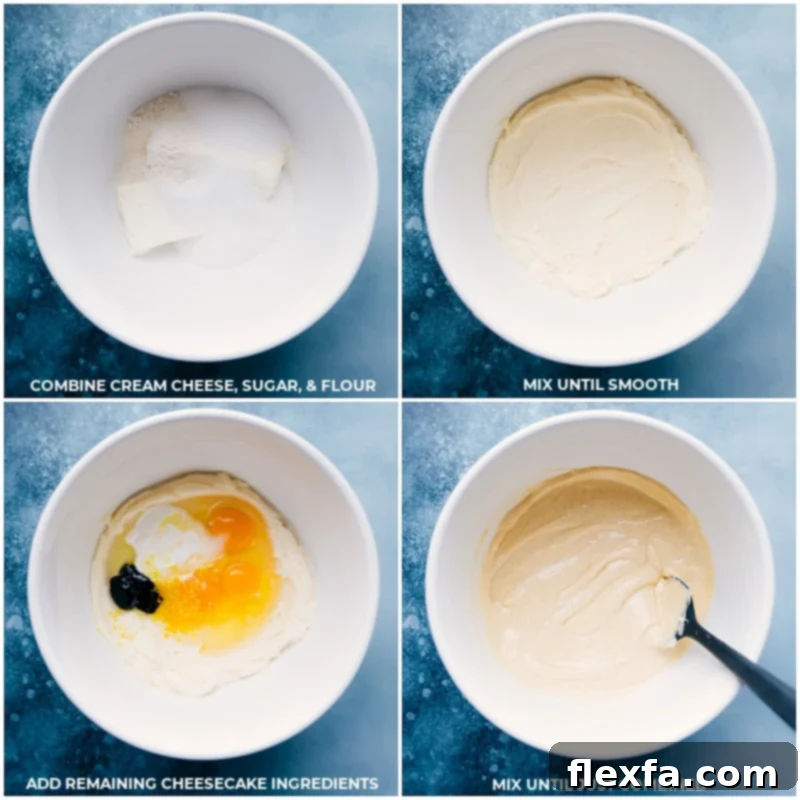
Prepare the Filling: In a large mixing bowl, combine the room temperature full-fat cream cheese, granulated sugar, and all-purpose flour. Using a hand mixer on medium speed, beat the mixture until it is completely smooth and creamy, which should take about 1-2 minutes. Make sure to beat in a consistent circle, going in the same direction, to minimize air incorporation. Use a rubber spatula to scrape down the sides and bottom of the bowl frequently to ensure everything is well combined. Next, add in the room temperature sour cream, eggs, pure vanilla extract (or vanilla bean paste), 1 teaspoon of lemon zest, 1 teaspoon of lemon juice (if using), and salt. Beat again on low speed, mixing just until the ingredients are combined and the batter is smooth. Be very careful not to overmix at this stage; overmixing is the enemy of a crack-free cheesecake! Continue mixing in a constant circle, in the same direction, until no streaks remain.
-
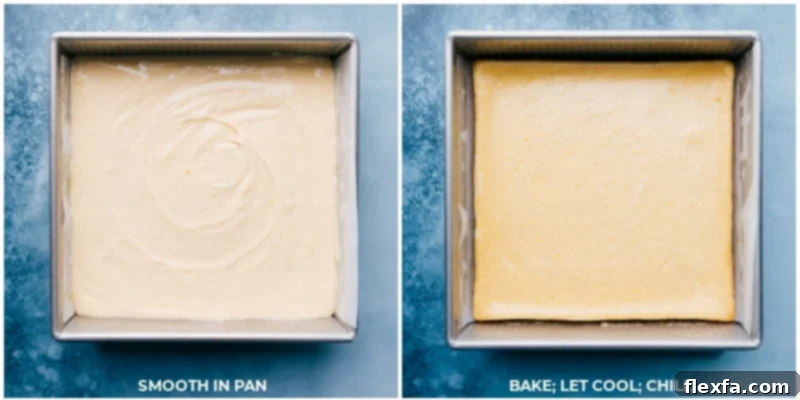
Bake and Cool: Gently scrape every last bit of the smooth cheesecake batter onto the slightly cooled graham cracker crust in the prepared pan. Use your spatula to carefully smooth the top of the filling into an even layer. Bake the cheesecake bars for 37–43 minutes at 325°F (160°C). The cheesecake is done when the edges appear set and lightly golden, but the very center still has a slight jiggle when you gently shake the pan. Remember, the cheesecake will continue to cook and set as it cools. Once baked, turn off the oven, open the oven door a few inches, and allow the cheesecake to cool inside the open oven for 30 minutes. This slow, gradual reduction in temperature is crucial for preventing cracks. After 30 minutes, carefully transfer the Cheesecake Bars from the oven to a wire cooling rack to cool completely at room temperature for at least 1 hour. Finally, once completely cooled, cover the pan tightly with plastic wrap and refrigerate until the bars are thoroughly chilled, ideally for 6–8 hours or even overnight.
-
Slice and Serve: Once the cheesecake bars are fully chilled, use the parchment paper overhang to carefully lift the entire slab out of the baking pan and transfer it to a clean cutting board. Cut the cheesecake into desired squares or rectangles. To achieve perfectly clean slices, run a sharp knife under hot water for a few seconds, wipe it dry, make one slice, and then repeat this process for each subsequent slice. Serve your delicious cheesecake bars immediately with your choice of toppings (like the berry sauce below or fresh berries), or refrigerate them without toppings until you are ready to serve.
Recipe Notes
This vibrant berry sauce is the perfect accompaniment to your cheesecake bars, adding a burst of fresh, tangy sweetness.
- Ingredients:
- 2 (16-ounce) packages frozen triple berry medley, slightly thawed
- 1 tablespoon freshly squeezed lemon juice
- 3/4 cup granulated sugar
- Pour just over two-thirds of each bag of your slightly thawed frozen berries into a medium pot. Reserve the remaining berries in a small bowl and store them in the fridge. These will be added later for texture.
- To the pot with berries, add the lemon juice and granulated sugar. Bring the mixture to a very gentle boil over medium heat, stirring occasionally. Continue to cook the berries until they become wonderfully syrupy and slightly thickened, which should take approximately 4–6 minutes. Remove the pot from the heat and allow the berries to cool slightly before transferring them to a blender. Blend until you achieve a smooth puree.
- For a silky-smooth sauce, pass the berry puree through a fine-mesh strainer set over a clean bowl. Use the back of a wooden spoon or a spatula to press the mixture through the strainer, ensuring you extract all the liquid and pulp. You should be left with only seeds in the strainer, which you can discard.
- When you are ready to serve this delectable sauce over your Cheesecake Bars, stir in the reserved whole or larger berry pieces into the smooth sauce. Spoon it generously right on top of the bars. For the best presentation and texture, top the bars just before serving. If you prepare the berry sauce in advance, store it separately from the cheesecake bars in an airtight container in the fridge.
Note 2: Topping Ideas: For more detailed and creative topping suggestions, please refer to the dedicated “Cheesecake Bars Topping Ideas” section below this recipe card!
Nutrition Note: Please be aware that the nutritional information provided is calculated for the Cheesecake Bars themselves and does not include any of the optional toppings. Toppings will add to the overall caloric and nutritional values.
Additional Storage Reminder: While your cheesecake bars are quite resilient, they should not sit at room temperature for more than 2 hours. After this time, any leftovers should be promptly refrigerated to maintain freshness and safety. For freezing, remember to wrap bars tightly in plastic wrap and then place them in an airtight container for optimal preservation over 2–3 months. Thaw overnight in the fridge and allow to sit at room temperature for 20-30 minutes before serving for the best experience.
Nutrition
Nutrition information is automatically calculated, so should only be used as an approximation.
Elevate Your Cheesecake Bars: Creative Topping Ideas
While these cheesecake bars are absolutely delightful on their own, a carefully chosen topping can transform them into an even more spectacular dessert. Here are some of my favorite ideas to inspire you:
- Crushed Cookies or Candy: For an extra layer of texture and flavor, sprinkle crushed Oreos, chocolate chip cookies, or your favorite candy bar pieces over the chilled bars. This adds a fun crunch and a familiar sweetness.
- Fresh Berries with Whipped Cream: A classic for a reason! Arrange a vibrant medley of fresh strawberries, blueberries, raspberries, or blackberries on top. For an ultimate indulgence, add a dollop of light and airy homemade whipped cream. The tartness of the berries perfectly complements the creamy cheesecake.
- Homemade Berry Sauce: As detailed in the recipe card notes, our simple homemade berry sauce is a fantastic choice. Its smooth texture and intense berry flavor provide a sophisticated touch. You can also experiment with other fruit sauces like blueberry syrup or cherry compote.
- Tangy Lemon Topping: Enhance the existing subtle lemon notes by adding a layer of bright and tangy lemon curd. Pair it with fresh blueberries or blackberries for a truly refreshing dessert that sings with citrusy zest.
- Rich Chocolate or Caramel Sauce: For those who love a deeper, richer flavor profile, a drizzle of warm chocolate fudge sauce or a gooey caramel sauce adds incredible depth. A sprinkle of sea salt with the caramel can elevate it even further.
- Toasted Coconut Flakes: For a tropical twist, lightly toast some shredded coconut flakes and sprinkle them generously over the cheesecake. This adds a lovely aroma and chewy texture.
- Chopped Nuts: Toasted pecans, walnuts, or almonds can add a satisfying crunch and nutty flavor, especially when paired with caramel or chocolate.
- Citrus Glaze: A simple glaze made from powdered sugar and a squeeze of fresh orange or lime juice can add a delicate sweetness and a hint of extra citrus zing.
- Chocolate Shavings or Curls: A sprinkle of elegant chocolate shavings or curls instantly makes your cheesecake bars look more sophisticated and adds a subtle chocolate flavor without overpowering the vanilla.
Don’t be afraid to get creative with your toppings! The simple vanilla base of these cheesecake bars makes them an incredibly versatile canvas for your culinary imagination. Choose your favorites or mix and match to create a dessert that’s uniquely yours!
Frequently Asked Questions (FAQ) About Cheesecake Bars
Here are answers to some common questions you might have when making these delightful cheesecake bars:
Q1: Can I make these cheesecake bars ahead of time?
Absolutely! Cheesecake bars are an excellent make-ahead dessert. In fact, they require at least 6-8 hours of chilling, so preparing them the day before you plan to serve is ideal. This allows the flavors to meld beautifully and the texture to set perfectly. Store them covered in the refrigerator until ready to serve.
Q2: Why did my cheesecake bars crack?
Cracks in cheesecake are a common issue, often caused by sudden temperature changes or overmixing.
- Overmixing: Incorporating too much air into the batter can cause the cheesecake to puff up too much during baking, then collapse and crack as it cools. Mix only until just combined.
- Sudden Temperature Changes: Taking the cheesecake directly from a hot oven to a cold counter can shock it, leading to cracks. Always follow the gradual cooling process by leaving it in the turned-off oven with the door ajar.
- Overbaking: An overbaked cheesecake becomes too dry and will crack. Look for edges that are set with a slight jiggle in the center.
Even if your cheesecake cracks, it will still taste delicious, especially once covered with toppings!
Q3: How do I know when the cream cheese is truly at room temperature?
Room temperature cream cheese should feel soft and yielding when gently pressed. If it’s cold, it will feel firm and difficult to mix smoothly, leading to lumps. For best results, take cream cheese out of the refrigerator at least 1-2 hours before you start baking. If you’re short on time, you can unwrap the cream cheese, cut it into smaller cubes, and spread them on a plate for faster softening (about 30 minutes). You can also gently warm it in a microwave for 10-15 seconds, being careful not to melt it.
Q4: Can I use a different type of crust?
Yes, while the graham cracker crust is a classic and highly recommended, you can certainly experiment! You could use crushed vanilla wafers, digestive biscuits, shortbread cookies, or even chocolate cookies for a different flavor profile. The key is to ensure the crumbs are fine and mixed with enough melted butter and sugar to form a firm, cohesive base.
Q5: What’s the best way to cut clean slices?
Achieving clean, sharp slices is easy with a simple trick: use a sharp, thin-bladed knife. For each slice, run the knife under very hot water for a few seconds, then wipe it completely dry with a clean towel. Make your cut, then repeat the hot water and drying process before the next slice. This prevents the cheesecake from sticking to the knife and ensures beautiful, clean edges.
A Final Word on Your Perfect Dessert
These Irresistibly Creamy Cheesecake Bars are more than just a dessert; they are a celebration of classic flavors and simple pleasures. With their luscious texture, balanced sweetness, and sturdy, buttery crust, they truly stand out. Whether you’re a seasoned baker or just starting, this recipe offers a foolproof path to creating an impressive treat that everyone will adore. Don’t hesitate to make them your own with creative toppings and share the joy of homemade goodness. Happy baking!