
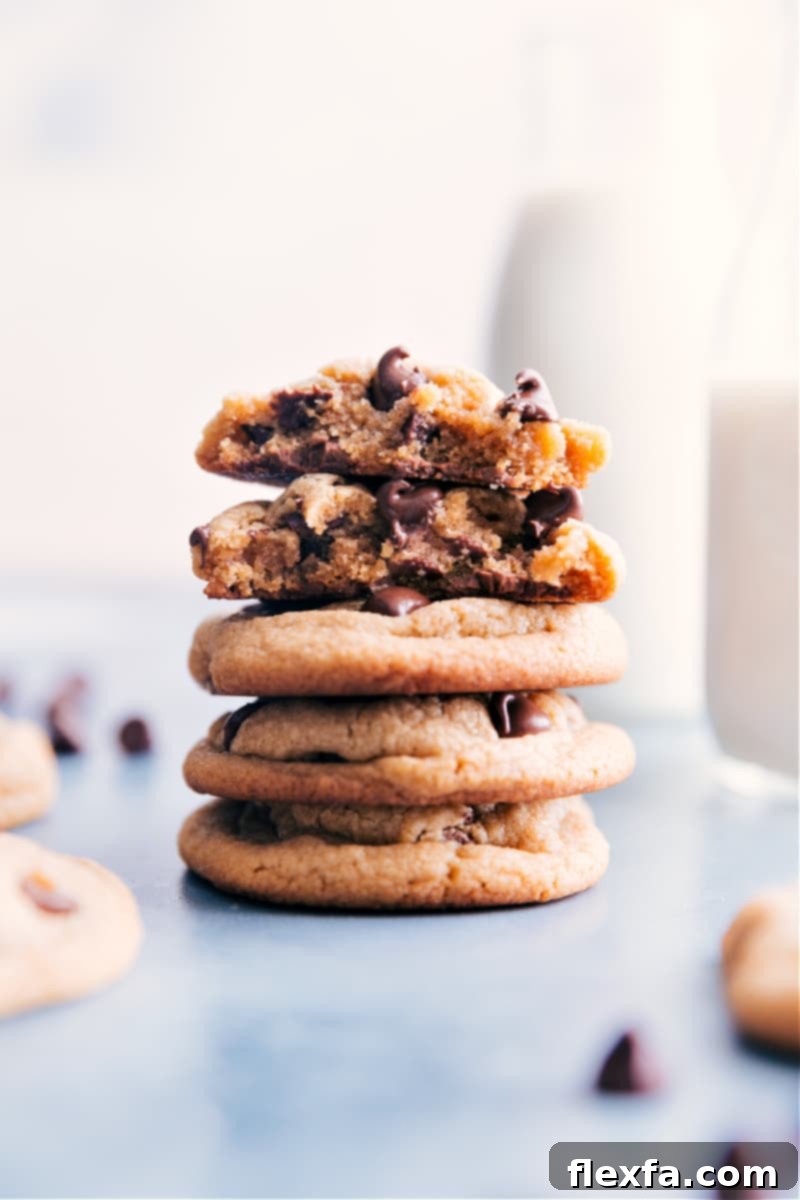
Indulge in Perfection: Soft & Chewy Peanut Butter Chocolate Chip Cookies
Prepare to fall in love with these utterly delightful **Peanut Butter Chocolate Chip Cookies**. Each bite offers a symphony of flavors and textures – a gloriously thick, exquisitely soft, and wonderfully chewy center, beautifully complemented by subtly crisp edges. Packed with an abundance of rich chocolate, these cookies are pure bliss for every sweet tooth, perfect for any occasion.
Sometimes, a classic plain peanut butter cookie just doesn’t quite hit the spot. That’s where the magic of chocolate chips comes in! Elevate your cookie game by combining the beloved nutty flavor with melty chocolate goodness. Or, for a fun twist, try our Chocolate Peanut Butter Chip Cookies, where rich chocolate takes center stage, studded with creamy peanut butter chips. When it comes to cookies, there’s truly an endless world of delicious possibilities to explore, and these are a fantastic starting point!
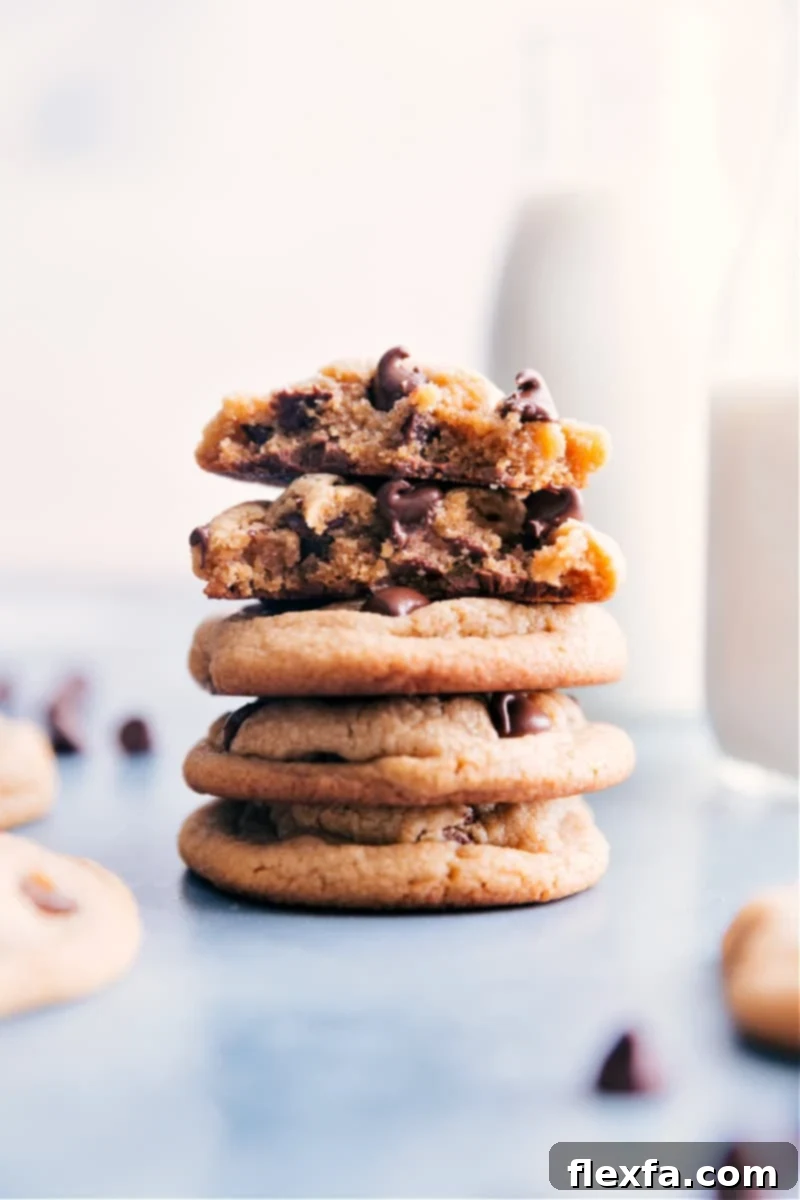
Effortless Baking: Easy Peanut Butter Chocolate Chip Cookies
Yes, you read that right – these are truly easy cookies that anyone can master! Forget the hassle of lugging out your heavy stand mixer or even a hand mixer. This recipe is specifically designed for simplicity, requiring just **one large bowl** and a basic **whisk** or sturdy wooden **spoon**. It’s the perfect recipe for beginners who want impressive results or seasoned bakers looking for a quick, no-fuss dessert without compromising on quality or flavor.
Our goal was to create a recipe that delivers maximum flavor and an exceptional texture with minimal effort. These cookies are renowned for their undeniable thickness, incredible softness, and satisfying chewiness, all while offering the quintessential balance of creamy, savory peanut butter and decadent, sweet chocolate. They’re ideal for a spontaneous baking session, a quick weeknight treat, or when you need a crowd-pleasing dessert for parties and holidays without the stress of complicated steps.
Creative Cookie Variations to Try
While the classic Peanut Butter Chocolate Chip Cookie is undeniably fantastic on its own, it’s always fun to experiment and customize your baking! Here are some inspiring ideas to put your own spin on this beloved recipe, adapting it to different tastes or dietary needs:
- For a **healthier spin**, consider incorporating wholesome ingredients like honey and oats, while strategically reducing the overall sugar content. Our Healthy Breakfast Cookies recipe offers a fantastic starting point for this approach, allowing you to enjoy a delicious treat that doubles as a nutritious start to your day.
- To make these **Peanut Butter Chocolate Chip Cookies vegan-friendly**, explore options like our No-Bake Healthy Breakfast Cookies recipe. You can easily adapt it by replacing honey with agave syrup, opting for a vegan crispy rice cereal, and ensuring you use high-quality vegan chocolate chips for that irresistible melty goodness.
- Craving **peanut butter chocolate chip cookies without flour**? Our flourless Monster Cookies are a brilliant and equally delicious alternative. They deliver all the robust flavor and satisfying texture you love, minus the gluten, making them perfect for those with gluten sensitivities or simply looking for a different kind of chewy cookie.
- Transform them into hearty **Peanut Butter Oatmeal Chocolate Chip Cookies** by trying our Trail Mix Cookies recipe. This delightful version often includes textural additions like chopped peanuts and, of course, a generous amount of peanut butter chips, adding an extra layer of nutty flavor and a wholesome chewiness that makes them incredibly satisfying.
- Alternatively, flip the script entirely and make rich **Chocolate Cookies with peanut butter chips.** This offers a deep, intense cocoa-rich base that contrasts beautifully with the creamy, salty-sweet burst of peanut butter chips, creating a different but equally compelling flavor profile for chocolate lovers.
Secrets to Achieving Perfectly Soft and Moist Cookies
Achieving that coveted soft and moist cookie texture, with a delightful chew, is an art form, but one that is easily mastered with a few key techniques and carefully selected ingredients. The ultimate secret lies primarily in the moisture content of your dough and how it’s handled during the baking process. The more moisture retained in the cookie during baking, the chewier and softer the final result will be.
Understanding Key Ingredients for Optimal Moisture:
- **Strategic Use of Eggs:** For this particular recipe, we strategically use **two large eggs** instead of just one. Eggs contribute significant moisture to the dough and also act as a crucial binder, creating a richer, more tender crumb. Beyond moisture, eggs add essential structure and help trap air during mixing, which contributes to a lighter, more delicate texture in the finished cookie.
- **The Magic of Brown Sugar:** An entire cup of brown sugar plays a pivotal role in these cookies. Unlike granulated sugar, brown sugar contains molasses, which is naturally hygroscopic (it attracts and retains moisture). This molasses has an inherent moisture content (approximately 10% water), not only adding a deeper, caramel-like flavor but also significantly contributing to the unparalleled chewiness and overall moisture of the cookies.
- **Balanced Flour Ratio:** We employ a slightly reduced amount of all-purpose flour compared to some traditional cookie recipes. This deliberate adjustment helps prevent the cookies from becoming dry, dense, or overly cake-like. By using just the right amount, we ensure they remain wonderfully soft, tender, and moist throughout.
The Critical Art of Underbaking:
Perhaps the most critical technique for guaranteeing soft and moist cookies is to **ever-so-slightly underbake them**. This might feel counterintuitive to some bakers, but it’s essential. When you remove these Peanut Butter Chocolate Chip Cookies from the oven, their centers might still appear a bit soft, slightly gooey, or even a little undone. This is perfectly normal and, in fact, desired! They will continue to “bake” and set on the hot sheet pan from residual heat as they cool. If you wait until the edges are deeply golden brown and the center looks fully set in the oven, you’ve almost certainly overbaked them.
Overbaking is the arch-nemesis of a soft, chewy cookie. It aggressively drives out essential moisture, leading to a hard, dry, crumbly, and often brittle texture once cooled. Trust the process and your oven: pull them out when they look just barely set, and let the residual heat do the rest of the work outside the oven. This ensures they remain perfectly tender, delightfully chewy, and burst with flavor.
Troubleshooting: Why Are My Peanut Butter Cookies Gritty?
A gritty cookie texture can be quite disappointing, making what should be a smooth, melt-in-your-mouth experience feel unpleasant. Fortunately, this issue is usually easily preventable once you understand the common culprits:
- **Old or Hard Brown Sugar:** This is by far the most common reason for gritty cookies. If your brown sugar has dried out and formed hard clumps, it simply won’t fully dissolve into the dough during the mixing process or during baking. This results in tiny, undissolved sugar crystals that create a distinct gritty sensation on your palate. Always ensure your brown sugar is fresh, soft, and lightly packed. If it has hardened, try softening it before use (e.g., by placing a slice of bread or a damp paper towel in its airtight container overnight).
- **Insufficient Dough Chilling Time:** Chilling the dough isn’t just about preventing excessive spreading; it also serves a vital purpose in allowing the ingredients, especially the sugar crystals, to fully hydrate and dissolve into the fats and liquids within the dough. If the dough isn’t chilled long enough, these sugar crystals may not have sufficient time to integrate completely, leading to grittiness in the baked cookies.
- **Adding Sugars to Hot Melted Butter:** This is a crucial mistake that many bakers inadvertently make. If your melted butter is still warm or hot when you combine it with the sugars, it will immediately begin to dissolve them too quickly and unevenly. This can lead to a greasy cookie texture and, more importantly, incomplete sugar dissolution, contributing to grittiness. It is absolutely imperative to **let the melted butter cool completely to room temperature** before mixing it with the sugars. This allows for a proper emulsion to form and ensures the sugars dissolve smoothly and evenly during the subsequent mixing process, resulting in a perfectly smooth dough.
While this recipe emphasizes ease and accessibility, paying close attention to these details – especially regarding butter temperature and adequate chilling – is key to achieving that perfectly smooth, melt-in-your-mouth texture that makes these cookies truly exceptional.
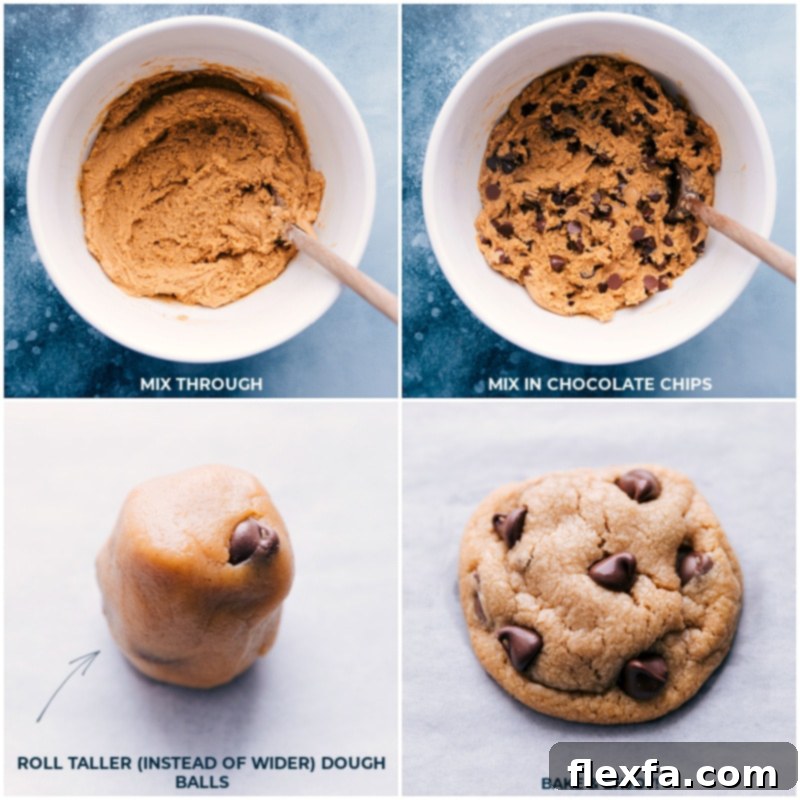
Mastering the Dough: Key Steps to Make Peanut Butter Chocolate Chip Cookies
Crafting the perfect cookie dough is the fundamental first step to achieving those irresistible soft, thick, and chewy results. Here are the essential steps and expert tips for preparing your peanut butter chocolate chip cookie dough effectively:
- **Ensure Room Temperature Eggs:** This tip, though often overlooked, makes a significant difference in the final texture of your cookies. Room temperature eggs disperse much more evenly into your batter, leading to a smoother, more homogenous dough. This even distribution helps create a lighter, more tender crumb because the eggs effectively trap air during mixing, which contributes to the cookie’s rise and overall delicate texture. Plan ahead and take your eggs out of the fridge at least 30 minutes before you start baking.
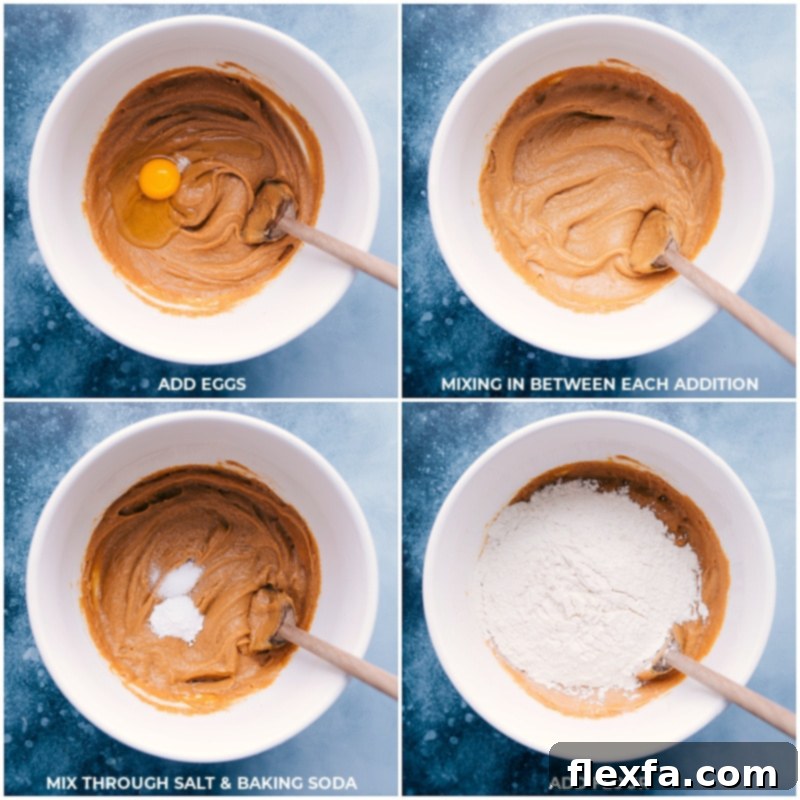
- **Add Eggs One at a Time with Thorough Mixing:** Resist the urge to dump both eggs into the bowl simultaneously. Instead, add each egg individually, mixing thoroughly until it is fully incorporated into the mixture before introducing the next. This methodical approach ensures that the eggs are perfectly emulsified with the fats (butter and peanut butter) already present in the recipe, creating a stable and uniform dough structure. Proper emulsification is key to preventing a greasy or crumbly texture and achieving a wonderfully consistent cookie every time.
- **Crucial Dough Chilling:** Since this recipe begins with melted butter, chilling the dough is a non-negotiable step. This crucial resting period allows the melted butter to re-solidify within the dough, which in turn significantly prevents the cookies from spreading too much and becoming thin in the oven. Chilling also gives the flavors a chance to meld and develop more deeply, resulting in a richer, more complex taste. Most importantly, it helps achieve that ideal thick, chewy, and soft cookie texture you’re aiming for. Do not skip this important step; it’s fundamental for the cookie’s structure and flavor.
Baking Perfection: How to Bake Peanut Butter Chocolate Chip Cookies
The actual baking process is just as vital as the dough preparation. Follow these precise guidelines to ensure your peanut butter chocolate chip cookies come out perfectly baked every single time, with that desired soft, chewy texture:
- **Bake on a Silicone Liner (Silpat) or Parchment Paper:** For consistently baked cookies with an ideal texture and easy release, a silicone baking mat (like a Silpat) is highly recommended. These liners promote even heat distribution across the bottom of the cookies, prevent sticking, and ensure the bottoms don’t become overly crispy or burnt. If you don’t have a Silpat, high-quality parchment paper is an excellent next-best alternative, offering similar benefits. Avoid baking directly on an unlined sheet pan, as this can lead to uneven cooking and sticking.
- **Utilize a Food Scale for Flour Accuracy:** While measuring cups are commonly used, they can lead to significant variations in flour measurement due to packing differences. This inconsistency is often the primary culprit when cookies don’t turn out as expected. A food scale provides unparalleled accuracy, eliminating guesswork. For this recipe, precisely **310 grams of all-purpose flour** is the ideal amount to achieve the desired thick and chewy texture. A food scale also helps you create perfectly even-sized cookie dough balls (aim for 40 grams each), ensuring uniform baking and consistent results across your entire batch. Eyeballing portions can unfortunately lead to some cookies being overbaked while others are underbaked due to size discrepancies.
- **Bake at a Precise 325°F (162°C):** This specific oven temperature is absolutely critical for these peanut butter chocolate chip cookies. While many cookie recipes call for 350°F (176°C), a slightly lower and more gentle temperature of 325°F (162°C) is key to achieving their signature soft and moist texture with crisp edges. The lower heat allows the cookies to bake more gently and evenly, preventing the edges from browning too quickly before the center has a chance to set properly. Missing this crucial temperature detail can make a huge difference in the final softness and chewiness of your cookies.
- **Avoid Overcrowding Your Baking Sheet:** Always ensure you leave ample space (about 2 inches) between each cookie dough ball on the baking sheet. Overcrowding can lead to uneven baking, as steam gets trapped and heat circulation is hindered, resulting in cookies that merge into one giant, flat, and undercooked mass. Bake in batches if necessary, to give each cookie enough room to expand and cook properly.
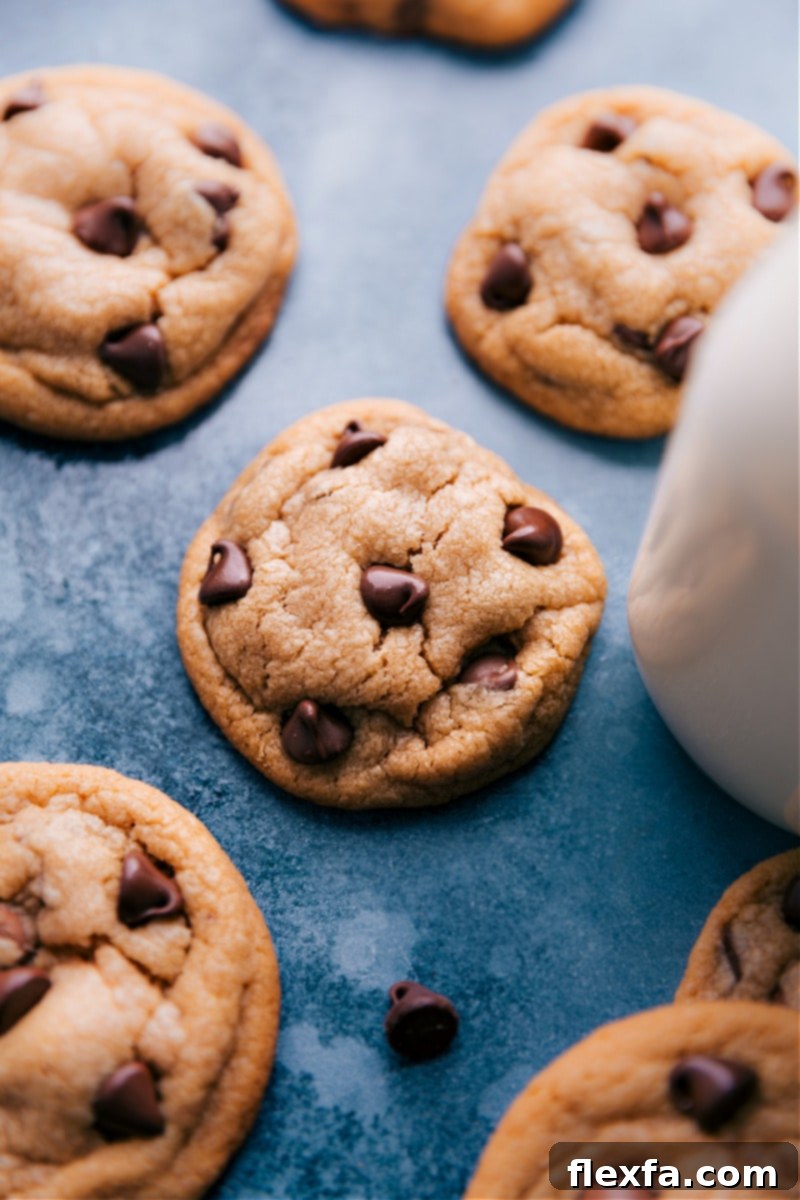
Optimal Storage & Freezing Tips for Your Cookies
Ensuring your delicious cookies stay fresh and enjoyable for as long as possible is simple with these effective storage and freezing guidelines. Proper storage helps maintain their delightful texture and flavor.
These baked Peanut Butter Chocolate Chip Cookies will remain wonderfully fresh and soft for **3-4 days** when stored at room temperature. For optimal freshness and to prevent them from drying out, always place them in an airtight container once they have completely cooled. This helps to lock in their moisture and maintain their delightful chewiness.
For longer-term storage, the best approach is to **freeze the raw cookie dough**. Simply scoop your prepared dough into individual balls, much like you would for baking, and arrange them on a sheet pan lined with parchment paper. Freeze them until they are completely solid, which typically takes a few hours. Once frozen solid, transfer the dough balls to a freezer-safe airtight container or heavy-duty freezer bag. They can be stored this way for **up to 3 months**, ensuring you have fresh-baked cookies available whenever a craving strikes.
To bake from frozen, there’s no need to thaw the dough! Just place the frozen dough balls directly onto a prepared baking sheet and bake according to the recipe instructions, adding an extra minute or two to the baking time. Keep a close eye on them until the edges are lightly golden and the center appears softly set. This method allows for the convenience of freshly baked cookies on demand, with minimal effort and without compromising on taste or texture.
Creative Uses for Leftover Peanut Butter
Got extra peanut butter after baking these delightful cookies? Don’t let that precious jar go to waste! Peanut butter is incredibly versatile and can be used in a myriad of delicious sweet and savory recipes. Here are some tasty ideas to put that leftover jar to good use, ensuring no peanut butter goes unloved:
- **Peanut Butter Rice Krispie Treats**: A nostalgic childhood treat elevated with creamy peanut butter and a luscious chocolate topping. Perfectly chewy and incredibly simple to make, these no-bake delights are always a hit with both kids and adults.
- **Chocolate Peanut Butter Pie**: Indulge in a rich, creamy, and decadent pie featuring the ultimate flavor combination of chocolate and peanut butter, all nestled in a delightful Oreo cookie crust. This show-stopping dessert is surprisingly easy to assemble.
- **Chocolate Peanut Butter Breakfast Cookies**: Enjoy the flavors you love in a wholesome, convenient, and entirely no-bake breakfast option. These quick and easy cookies are packed with energy, perfect for busy mornings when you need a grab-and-go meal.
- **Edible Peanut Butter Cookie Dough**: Craving raw cookie dough but worried about safety? This specially crafted, safe-to-eat version, made with heat-treated flour, lets you enjoy all the deliciousness of raw peanut butter cookie dough without any concerns.
- **Peanut Butter Granola**: Elevate your breakfast or snack game with homemade peanut butter granola, studded with chocolate chips for an extra touch of sweetness. It’s perfect sprinkled over yogurt, milk, or simply enjoyed by the handful as a satisfying snack.
Peanut Butter Chocolate Chip Cookies
Chelsea Lords
20 minutes
10 minutes
30 minutes
1 hour
40 cookies
Equipment
-
Large sheet pan (15″ x 21″)
-
Silicone baking mat or parchment paper
-
Cooling rack
Ingredients
- 16 tablespoons unsalted butter melted, this is 1 cup or 2 sticks
- 1 cup brown sugar light or dark, lightly packed, see note 1
- 1 cup granulated sugar
- 1 cup creamy peanut butter see note 2
- 1 teaspoon vanilla extract
- 2 large eggs
- 1 teaspoon baking soda see note 3
- 1/2 teaspoon salt
- 2-1/3 cups all-purpose flour see note 4 (310 grams recommended for accuracy)
- 2 cups chocolate chips milk chocolate or semi-sweet—whichever you prefer
Instructions
-
Line a large sheet pan with a silicone liner (or parchment paper) and set aside. This ensures non-stick baking and promotes more even heat distribution for perfectly cooked cookie bottoms.
-
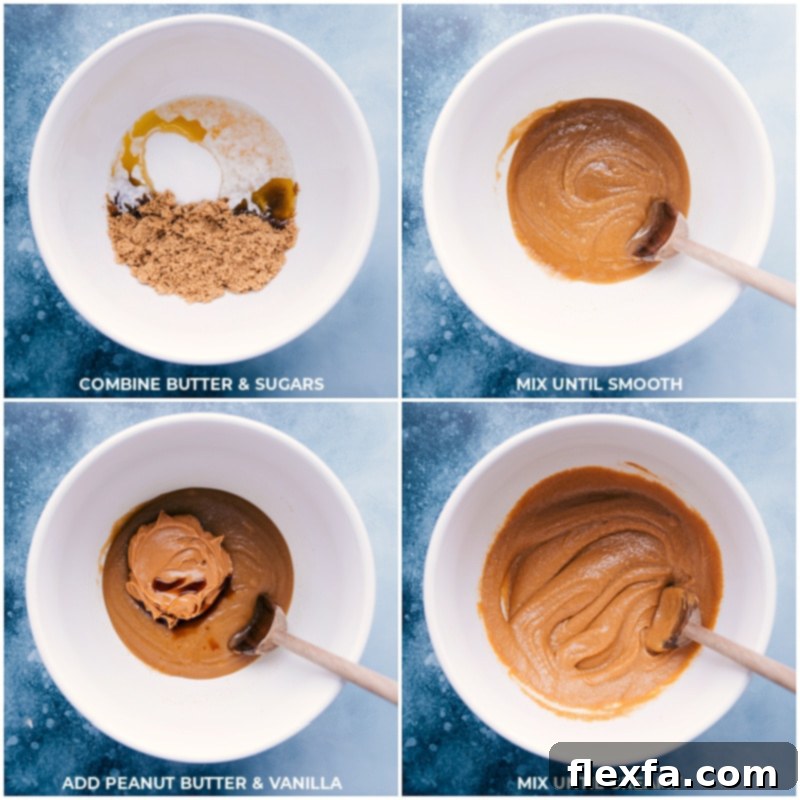
In a microwave-safe bowl, gently melt the butter. Allow the melted butter to cool completely to room temperature before proceeding. This step is crucial; hot butter will melt the sugars too quickly and unevenly, potentially leading to greasy cookies. Once cooled, use a spatula to scrape every bit of butter into a large mixing bowl. Add both brown sugar and granulated sugar. Whisk or mix with a sturdy wooden spoon until the mixture is smooth and creamy, which should take about 1 minute.
-
Incorporate the creamy peanut butter and vanilla extract, mixing until just combined and smooth. Next, add the eggs one at a time. Mix thoroughly after each egg until it is fully incorporated into the mixture before adding the next. This ensures proper emulsification of fats and liquids. Stir in the baking soda and salt until they are just integrated. Finally, gently add the flour, mixing only until it is just incorporated and no dry streaks remain. Be careful not to overmix the dough, as this can lead to tough cookies. Finish by folding in the chocolate chips until evenly distributed.
-
Cover the cookie dough and chill it in the refrigerator for 30 minutes to 1 hour (refer to note 5 for options if you need to chill longer). While the dough chills, preheat your oven to 325°F (162°C). Scoop the dough and roll it into large balls, aiming for approximately 2 packed tablespoons (40 grams) each (see note 6 for ideal size). Roll the balls to be taller rather than wider. Arrange the dough balls on your lined sheet pan, placing no more than 6 cookies per sheet, ensuring ample space (at least 2 inches) between each cookie to prevent them from merging during baking. If the dough has become too warm from handling, you can place the tray of cookies in the freezer for 10 minutes before baking to help them hold their shape.
-
Bake for 8–14 minutes. The key to truly soft and chewy cookies is to ever-so-slightly underbake them. The cookies will appear soft in the center when you remove them from the oven, but they will continue to set on the hot sheet pan from residual heat. Be vigilant and avoid overbaking, as this will result in a dry, crisp, and less desirable cookie (see note 7 for troubleshooting common issues during baking).
-
Once baked, remove the cookies from the oven. If desired, you can gently press a few extra chocolate chips onto the tops of the warm cookies for an appealing, bakery-style finish. Allow the cookies to cool on the sheet pan for 5 minutes before carefully transferring them to a wire cooling rack to cool completely. This crucial cooling time on the hot pan helps them firm up without overbaking.
Recipe Notes
Note 2: Peanut Butter Choice: For the best and most consistent results in these cookies, we highly recommend using a creamy peanut butter such as Skippy® Creamy Peanut Butter (this is not sponsored, just a preference based on consistent baking outcomes). We do not recommend using a natural peanut butter that separates and requires stirring, as its varying oil content can negatively affect the cookie’s texture and spread.
Note 3: Baking Soda Check: Ensure your baking soda is fresh and active, as expired or inactive baking soda won’t provide the necessary lift and chewiness. You can perform a quick test to verify its potency. If your baking soda is at all clumpy, press it through a fine-mesh sieve before adding it to the mixture to ensure even distribution and proper activation.
Note 4: Accurate Flour Measurement: Inconsistent flour measurement is a critically common reason cookies don’t turn out as expected, often leading to dry or crumbly results. We strongly advise using a food scale for precise accuracy instead of volume-based measuring cups. For this recipe, **310 grams of all-purpose flour** is the perfect amount to achieve the desired thick, soft, and chewy texture.
Note 5: Chilling the Dough: The dough yields the best results when chilled for 30 minutes to 1 hour. Beyond this timeframe, it may begin to dry out and become crumbly, making it difficult to roll into uniform balls. If you need to chill the dough for a longer period (up to 24 hours), roll out all the cookie dough balls first and place them on a parchment paper-covered plate. Cover the plate tightly with plastic wrap before chilling to prevent drying.
Note 6: Cookie Dough Ball Size: These cookies are designed to be substantial and thick, working best when each dough ball measures approximately 2 packed tablespoons (40 grams). While smaller or larger cookies are certainly possible, understand that altering the size will change the final texture and baking time. The “sweet spot” for that perfect thick and chewy center is precisely this recommended size.
Note 7: Troubleshooting Common Baking Issues:
- If cookies aren’t spreading adequately: This is often due to too much flour being added (always refer to Note 4 for accurate measurement) or the dough being over-chilled. If you notice this during baking, gently pull the tray from the oven and bang it on the counter a few times to encourage the cookies to spread out a bit more.
- If cookies are spreading too much: This can indicate too little flour, old or inactive baking agents (double-check your baking soda per Note 3), or insufficient dough chilling. If cookies spread excessively right out of the oven, quickly use the back of a metal spatula to gently press the edges inwards, reshaping them into a more desirable circular form.
Storage for Baked Cookies: Baked cookies remain wonderfully fresh for 3–4 days when stored at room temperature in an airtight container. **Freezing Raw Dough:** To freeze raw dough, form individual balls, arrange them on a sheet pan, and freeze until solid. Once frozen, transfer to an airtight container or freezer bag for up to 3 months. Bake from frozen, adding a couple of minutes to the usual bake time until edges are set and center is soft.
Nutrition
Nutrition information is automatically calculated and is an approximation. It should only be used as a general guide.