

Irresistible Andes Mint Cookies: Your Ultimate Chocolate Mint Indulgence
Discover the secret to making thick, chewy Andes Mint Cookies with a rich, fudgy chocolate base crowned with a smooth, refreshing mint chocolate topping. Surprisingly simple to create, all that iconic minty flavor comes from just one magical ingredient: an Andes mint! Perfect for any occasion, these cookies are a true crowd-pleaser that will have everyone asking for the recipe.
If you’re a fan of the delightful combination of chocolate and mint, you’ll love exploring these other delectable treats:
- Mint Brownies
- Mint Oreo Truffles
- Mint Brownie Cookies

Why You’ll Love These Easy Andes Mint Cookies
These Andes Mint Cookies are a revelation in the world of simple yet sophisticated desserts. They boast a striking visual appeal that suggests hours of intricate baking, yet they are incredibly straightforward to prepare. But don’t let their ease fool you – the taste is truly exceptional! Each bite offers a harmonious blend of textures and flavors: a soft, perfectly chewy, and deeply fudgy chocolate cookie base, beautifully complemented by the creamy, melt-in-your-mouth goodness of the mint chocolate topping. The refreshing burst of mint combined with rich chocolate makes these cookies an unforgettable experience, whether you’re a seasoned baker or just starting your culinary journey.
The genius of this recipe lies in its simplicity and the impressive outcome. It’s a fantastic choice for those moments when you want to impress guests or treat yourself to something extraordinary without the fuss. The straightforward process means less time in the kitchen and more time enjoying these delightful creations. They are also highly versatile, fitting seamlessly into any occasion from casual gatherings to elegant dessert tables, or even as a thoughtful homemade gift. Once you try these Andes Mint Cookies, they are sure to become a cherished addition to your recipe repertoire.
The Magic Behind the Mint: How Andes Mints Transform Cookies
The inspiration for these irresistible cookies came from a viral trend that took social media by storm, particularly on platforms like TikTok. The concept is remarkably simple yet ingeniously effective: you bake your favorite chocolate cookies until they’re perfectly done, then, immediately after removing them from the oven, you press an unwrapped Andes mint onto the top of each warm cookie. The residual heat from the freshly baked cookie works wonders, gently softening the mint chocolate to a luscious, spreadable consistency.
As the Andes mint melts, it transforms into the ideal creamy topping. With a gentle spread using a butter knife or a small spatula, you can evenly coat the top of each cookie with that signature minty chocolate layer. This method eliminates the need for complicated frosting recipes, multiple bowls, or extensive decorating skills. Once the chocolate topping cools and sets, it creates a smooth, firm, yet wonderfully creamy layer that adheres perfectly to the fudgy cookie base. The result is a stunning cookie that looks professionally made, tastes incredibly decadent, and offers that iconic mint chocolate flavor in every bite. It’s a unique and delicious addition to any cookie exchange, holiday platter, or simply a sweet everyday indulgence.

Essential Ingredients for Perfect Andes Mint Cookies
Crafting these delectable Andes Mint Cookies requires just two primary components, making them incredibly accessible and easy to prepare. The quality of these ingredients will directly influence the final taste and texture of your cookies.
- Chocolate Cookie Dough: The foundation of these cookies is a rich, fudgy chocolate cookie. You have several excellent options to choose from:
- Homemade Chocolate Cookies: For the most control over flavor and texture, use a tried-and-true recipe for rich chocolate cookies. Look for recipes that promise a soft, chewy, and deeply fudgy result, as this complements the mint topping beautifully. A robust chocolate flavor will stand up to the refreshing mint.
- Brownie Cookies from a Mix: For a convenient shortcut without sacrificing quality, consider using a brownie cookie recipe that starts with a pre-made mix. This significantly cuts down on prep time while still delivering that desired fudgy texture. It’s a fantastic option when you’re short on time but still want a homemade feel.
- Store-Bought Chocolate Cookie Dough: For the ultimate time-saver, you can purchase pre-made chocolate cookie dough from your local grocery store. Many brands offer high-quality doughs that bake up perfectly, providing a quick and easy base for your Andes Mint Cookies. This option makes these cookies achievable for even the busiest schedules.
The key is to select a chocolate cookie that is inherently soft and chewy, providing a delightful contrast to the smooth, firm mint topping.
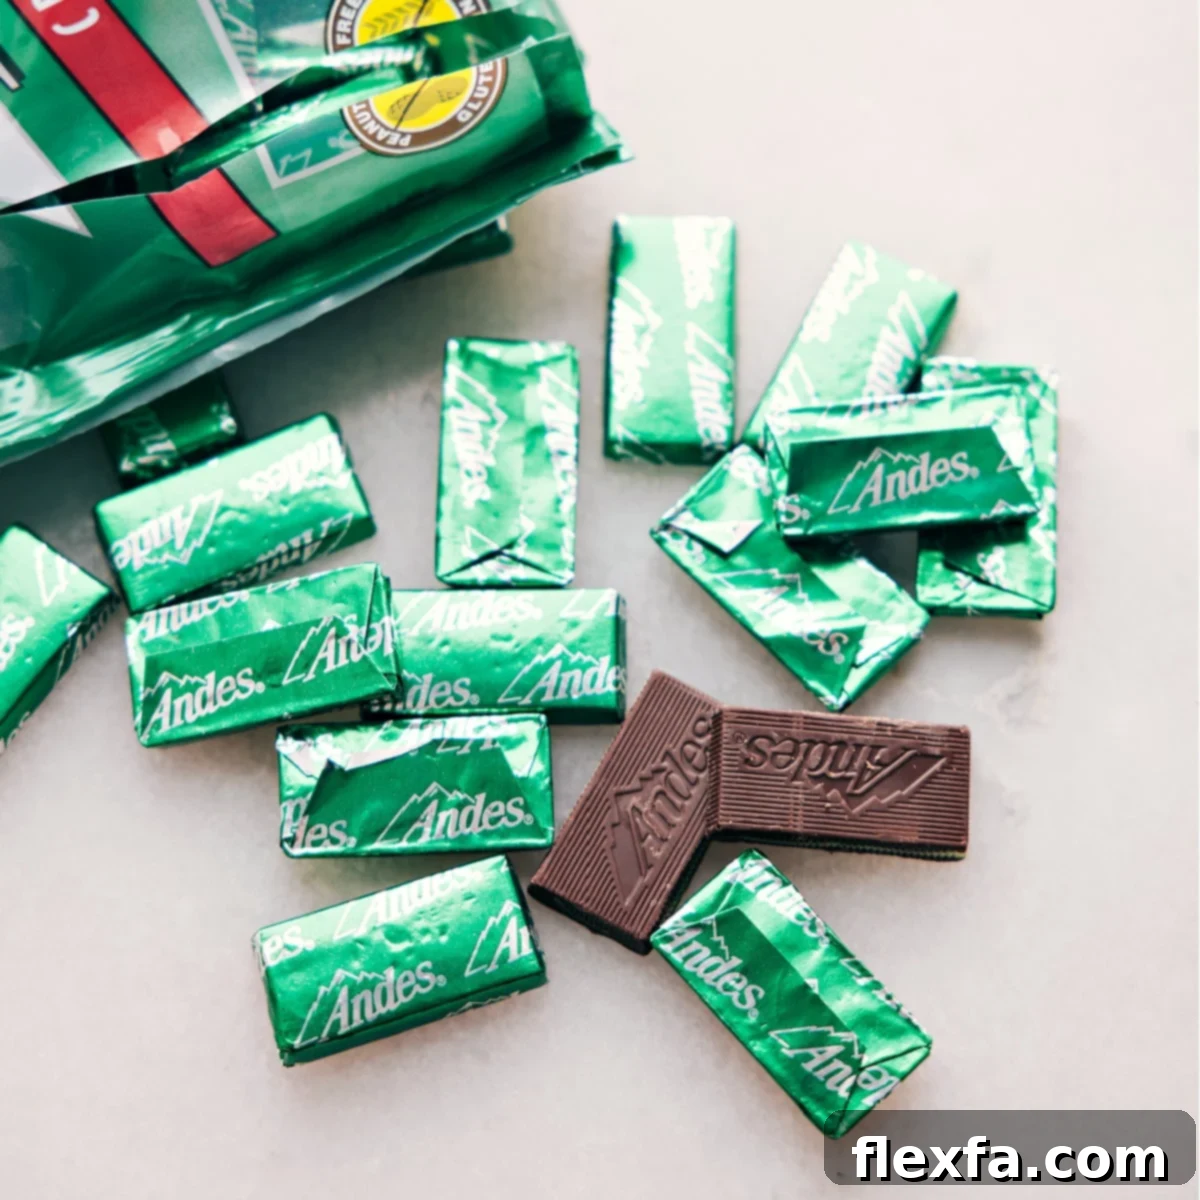
- Andes Mints: These iconic candies are the star of the show and provide all the signature minty flavor. Specifically, Andes Crème de Menthe Thin Mints are ideal for this recipe due to their perfect size and how beautifully they melt.
- Availability: Andes mints are widely available in most grocery stores, especially in the candy aisle. They tend to be particularly prominent during the holiday season, making these cookies a popular choice for festive baking.
- Flavor Profile: Their distinct blend of smooth milk chocolate and refreshing mint crème is what gives these cookies their irresistible taste. The thin shape ensures they melt evenly and spread easily over the warm cookies.
Tools to Simplify Your Andes Mint Cookie Baking
While the process of making Andes Mint Cookies is wonderfully simple, having the right tools on hand can make the experience even smoother and ensure the best results. You likely already own most of these kitchen essentials.
- Butter Knife: This is your primary tool for spreading the melted Andes mints evenly over the warm cookies. Its blunt edge is perfect for gently gliding across the softened chocolate without tearing the delicate cookie underneath. A small offset spatula can also work for this task, offering a bit more leverage, but a standard butter knife is often all you need for precision.
- Silicone Baking Mat (or Parchment Paper): For consistently baked cookies and easy cleanup, a silicone baking mat is invaluable. It ensures even heat distribution, preventing the bottoms of your cookies from burning while the tops cook perfectly. If you don’t have a silicone mat, parchment paper is an excellent alternative, offering similar non-stick benefits and making cookie removal a breeze. Both options prevent sticking and help maintain the cookies’ shape.
- Cooling Rack: Once your cookies are topped with melted mint chocolate, transferring them to a cooling rack is crucial. A cooling rack allows air to circulate underneath the cookies, preventing them from becoming soggy from trapped steam. This also helps the mint chocolate topping set evenly and quickly, resulting in a smooth, firm, and beautiful finish.
- Sheet Pan (15″ x 10″): A sturdy baking sheet is essential for baking your cookies. The 15″ x 10″ size is a common and versatile option, providing ample space for a batch of cookies without overcrowding, which is important for even baking. Using a good quality sheet pan will contribute to consistent heat transfer and perfectly baked cookies.

Mastering Andes Mint Cookies: Step-by-Step Guide & Expert Tips
Achieving bakery-quality Andes Mint Cookies at home is simpler than you might think, especially with these helpful tips to guide you through each step of the process. Follow these guidelines for perfect, fudgy, and minty treats every time.
- Chill Dough for Best Shape: If you’re using homemade chocolate cookie dough, don’t skip the chilling step. Refrigerating the dough for at least 30 minutes (or as specified in your recipe) helps solidify the fats, preventing the cookies from spreading too much in the oven. This ensures your cookies maintain a nice, thick, and uniform shape, which is ideal for holding the melted Andes mints.
- Avoid Over-baking for Chewy Perfection: The key to a soft and chewy cookie is to remove them from the oven just as their edges are set and the centers still look slightly soft. They will continue to bake and firm up slightly as they cool on the hot baking sheet. Over-baking can lead to dry, crumbly cookies, detracting from that desirable fudgy texture.
- Place Mints Quickly and Precisely: Timing is crucial for the Andes mints to melt perfectly. About one minute after you take the cookies out of the oven, gently place one unwrapped Andes mint on top of each warm cookie. The residual heat is precisely what’s needed to soften the chocolate without burning it. If you wait too long, the cookies will cool, and the mints won’t melt as effectively.
- Spread Gently to Preserve Cookie Integrity: Allow the Andes mints to sit on the warm cookies for about 5 minutes until they are noticeably soft and melted. Then, using a butter knife or small offset spatula, gently spread the softened mint chocolate over the surface of each cookie. Be careful not to press too hard or rush this step, as the cookies are still warm and delicate and could break apart if handled roughly. A smooth, even layer is the goal.
- Cool on Baking Sheet Initially: After spreading the mint, let the cookies remain on the hot baking sheet for a few more minutes. This allows them to finish setting up and become a bit sturdier before you attempt to move them. Moving them too soon could cause them to fall apart.
- Let Chocolate Set Completely at Room Temperature: For the best results, transfer the cookies to a cooling rack and allow the chocolate topping to cool and harden completely at room temperature. This typically takes about an hour, but can vary depending on your kitchen’s temperature. Setting at room temperature ensures the chocolate maintains a beautifully smooth, glossy texture and preserves its full flavor. Placing them in the refrigerator can cause condensation, dull the chocolate’s sheen, and sometimes alter the texture of the cookie, making it less chewy. Patience here will yield the most professional-looking and tasting cookies.

Frequently Asked Questions About Andes Mint Cookies
Here are some common questions about making and enjoying Andes Mint Cookies, along with helpful answers to ensure your baking success.
Can I use a different type of mint chocolate?
While Andes Mints are specifically recommended for their perfect melting consistency and classic flavor, you could experiment with other thin mint chocolate candies. However, results may vary. Ensure whatever you choose is thin enough to melt evenly and cover the cookie without being too thick or heavy.
Can I freeze Andes Mint Cookies?
Yes, these cookies freeze beautifully! Once the chocolate topping is completely set, place the cookies in an airtight container with parchment paper between layers to prevent sticking. They can be frozen for up to 2-3 months. Thaw them at room temperature for a few hours before serving for the best texture and flavor.
What if my Andes mints aren’t melting?
This usually happens if your cookies have cooled too much before you place the mints. Make sure to put the mints on within a minute of removing the cookies from the oven. If they’re still not melting after 5 minutes, you can carefully place the baking sheet back in the warm (but turned off) oven for another minute or two, keeping a close eye on them to prevent burning.
Can I make the cookie dough ahead of time?
Absolutely! If you’re using homemade cookie dough, you can prepare it a day or two in advance and store it in the refrigerator. This is a great way to break up the baking process. Just make sure to bring it closer to room temperature before baking, or adjust baking time slightly if it’s still very cold.
Storing Your Delicious Andes Mint Cookies
To keep your Andes Mint Cookies fresh, soft, and delicious, proper storage is key. Once the chocolate topping has fully set and the cookies have completely cooled, transfer them to an airtight container. Store the container at room temperature for up to 3-4 days. Storing them in an airtight container prevents them from drying out and helps maintain their wonderfully chewy texture and vibrant mint flavor. Avoid refrigerating them if possible, as it can sometimes alter the cookie’s texture and cause condensation on the chocolate.
Explore More Irresistible Cookie Recipes
If you’ve enjoyed these Andes Mint Cookies, be sure to explore more delightful cookie recipes from our collection. There’s always a perfect cookie for every craving and occasion!
- Coconut Oil Chocolate Chip Cookies
- Fudge-Striped Cookies
- Peppermint Cookies
- Swig Sugar Cookies
- No Bake Cookies

Andes Mint Cookies Recipe
By Chelsea Lords
Thick and chewy Andes Mint Cookies feature a rich chocolate base and a smooth mint chocolate topping, with the minty flavor coming from just one ingredient—Andes mints! These cookies are incredibly easy to make yet yield an impressive, professional-looking dessert perfect for any occasion.
25 minutes
12 minutes
1 hour
1 hour 37 minutes
24 cookies
Equipment
- Sheet pan (15″ x 10″) and silicone liner or parchment paper
- Butter knife or small offset spatula
- Cooling rack
Ingredients
- Chocolate cookies (see Note 1 below for suggestions)
- Andes Crème de Menthe Thin Mints (one per cookie, unwrapped)
Instructions
- Follow the specific directions of your chosen chocolate cookie recipe. Bake the cookies as instructed, being careful not to overbake them to ensure a soft, chewy texture.
- After removing the baked cookies from the oven, allow them to stand on the baking sheet for exactly 1 minute. This brief resting period allows the cookies to set slightly while remaining hot enough to melt the mints.
- Gently place one unwrapped Andes mint on top of each warm cookie. Ensure the mint is centered for an even spread.
- Let the Andes mints sit on the cookies for approximately 5 minutes. The radiant heat from the cookies will cause the mints to soften and melt into a smooth, glossy consistency.
- Once melted, use a butter knife or a small offset spatula to gently spread the softened mint chocolate over the entire surface of each cookie. Work carefully to avoid damaging the still-warm cookie.
- Allow the cookies to cool completely at room temperature until the chocolate topping is fully set and firm (see Note 2 below for important details on setting). Once cooled, your delightful Andes Mint Cookies are ready to be enjoyed!
Recipe Notes
Note 1: Chocolate Cookie Base Options: You can use your favorite chocolate cookie recipe or select one from these highly recommended options: Homemade Chocolate Cookies for a rich, from-scratch taste; Brownie Cookies, which often start from a mix for quick preparation; or even Chocolate Caramel Cookies (just remember to omit the caramel component for this recipe). For ultimate convenience, quality store-bought chocolate cookie dough, such as Ruby Snap’s Maris dough, works perfectly.
Note 2: Optimal Chocolate Setting: It is crucial to allow the chocolate topping to harden completely at room temperature. This method ensures the chocolate maintains its intended smooth, glossy texture and preserves the delicate balance of flavors. Furthermore, setting at room temperature prevents moisture-related issues like “sugar bloom” (a white, powdery film) and avoids condensation that can occur if cookies are cooled rapidly in the refrigerator, which can also make the cookies less chewy.
Storage: To maintain their freshness and delightful texture, store the cooled Andes Mint Cookies in an airtight container at room temperature for up to 3 to 4 days.
Nutrition
Serving: 1 cookie |
Calories: 285 kcal |
Carbohydrates: 41.7g |
Protein: 2.4g |
Fat: 12.2g |
Cholesterol: 1.6mg |
Sodium: 207.2mg |
Fiber: 0.2g |
Sugar: 24.7g
Nutrition information is automatically calculated and should only be used as an approximation.
Love this recipe? Leave a comment below and share your experience!