
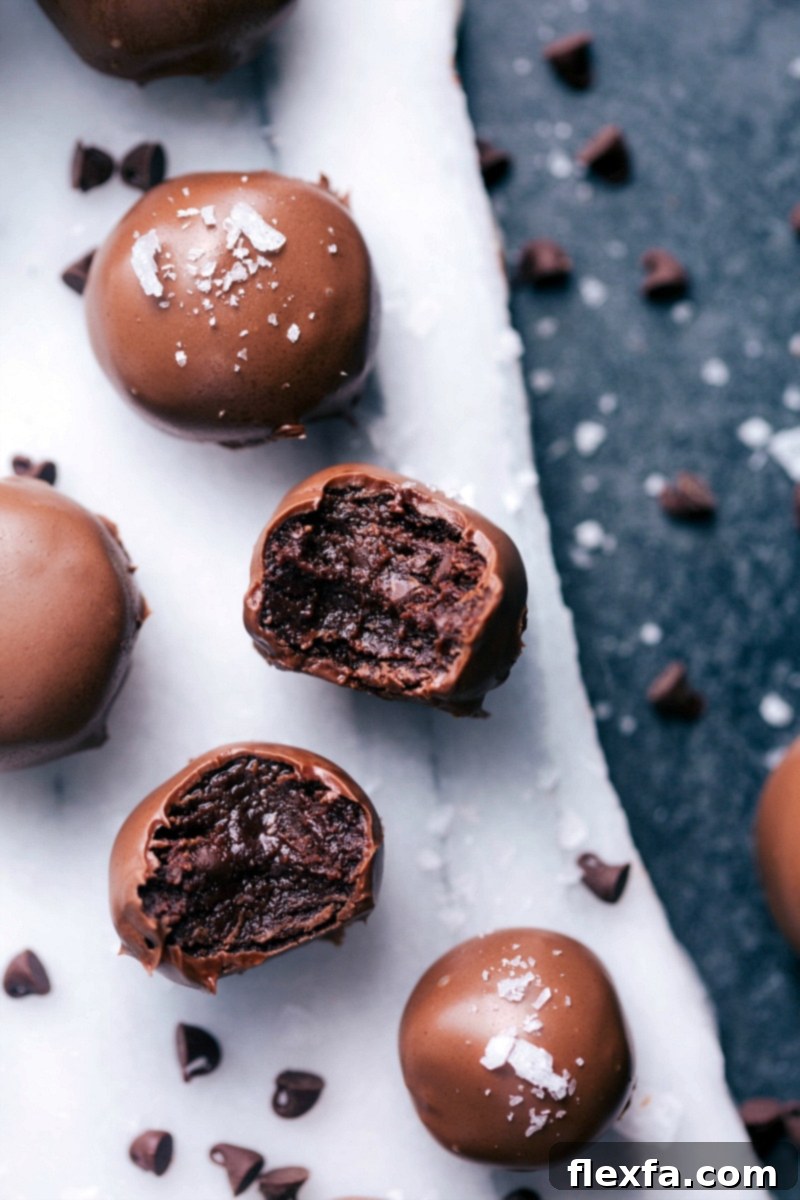
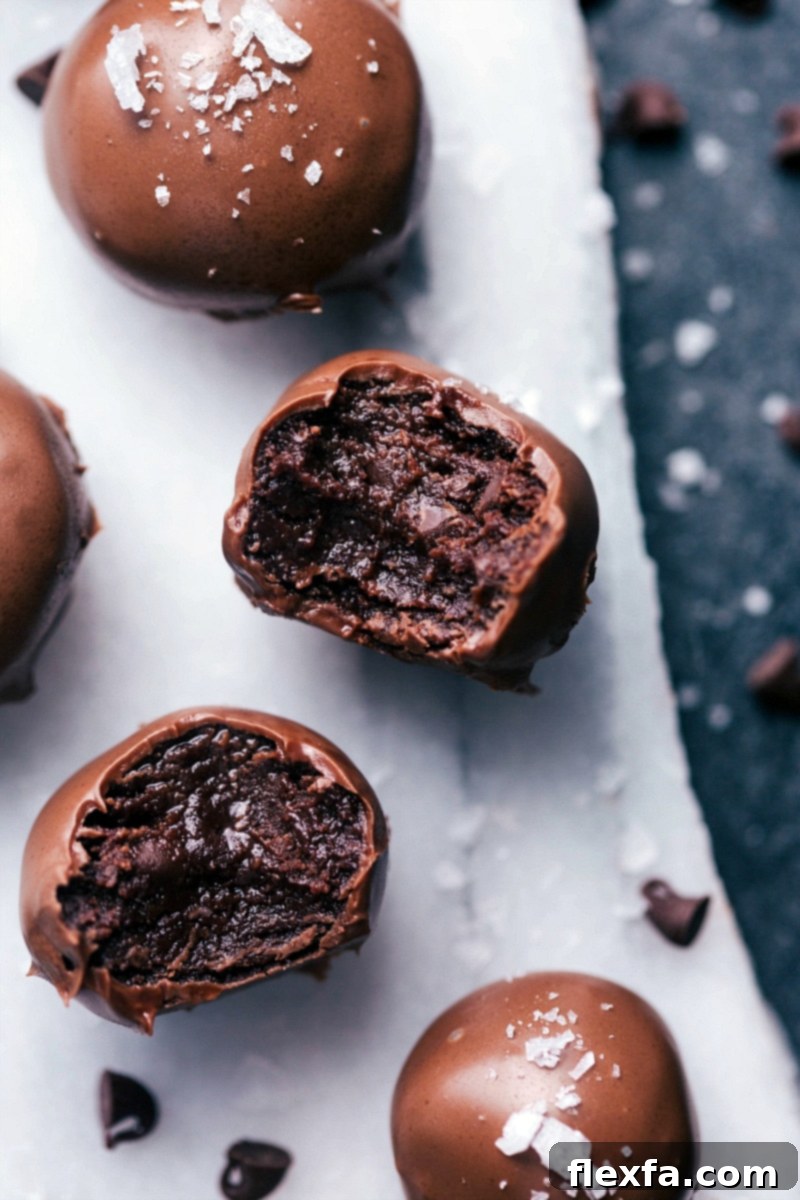
These No Bake Brownie Bites are a dream come true for any chocolate lover! Rich, deeply fudgy, and utterly indulgent, their soft, truffle-like filling is generously dipped in melted chocolate and can be finished with a delicate sprinkle of sea salt for that irresistible salty-sweet kick. Get ready to satisfy your chocolate cravings with this incredibly easy recipe!
If you’re as passionate about brownies as we are, you’ll love exploring more of our delightful recipes. After mastering these no-bake wonders, why not try our Classic Homemade Brownie Recipe for a traditional baked treat, indulge in our Mini Peanut Butter Cup Brownie Bites, or cool down with our amazing Brownie Oreo Ice Cream Bars? There’s truly a brownie for every occasion and every sweet tooth!
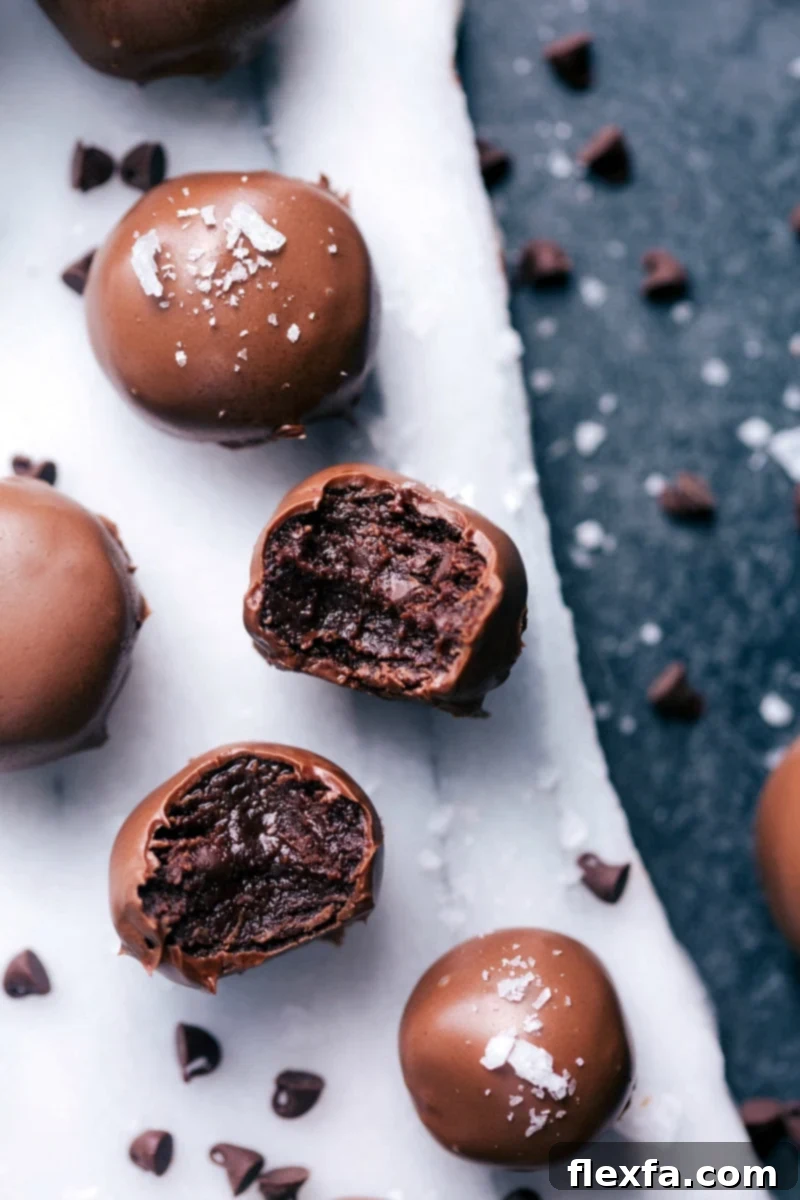
Indulgent No-Bake Brownie Bites: Your New Favorite Fudgy Treat!
There’s something uniquely comforting and utterly satisfying about a good brownie. Growing up, my mom was a master of baking brownies, and I often found myself sneaking spoonfuls of the raw batter before it even made it to the oven. While those clandestine moments were pure bliss, the thought of raw flour and uncooked eggs always lingered in the back of my mind, reminding me of potential health risks.
Fast forward to today, and I’m thrilled to share a recipe that captures all the rich, fudgy essence of that beloved brownie batter – but in a completely safe, no-risk, and incredibly easy format. These No-Bake Brownie Bites are completely egg-free, and with our simple guide to heat-treating flour, you can enjoy every decadent bite without a single worry about foodborne illness. It’s the best of both worlds: the irresistible taste of raw brownie dough, made perfectly safe for everyone to enjoy!
These exquisite little nuggets are truly a brownie lover’s dream come true. They’re ridiculously rich, perfectly fudgy, and delightfully sweet, making them the ultimate indulgence for any time you crave a chocolate fix. Whether you’re short on time, don’t want to heat up your kitchen, or simply prefer the convenience of no-bake desserts, these bites are guaranteed to hit the spot. They’re a fantastic addition to any dessert spread, quick enough for a weeknight craving, and elegant enough for entertaining.
Why Choose No-Bake Brownie Bites? The Ultimate Convenience and Safety
No-bake desserts are a revelation, especially for busy schedules or when the weather is too warm for baking. These brownie bites stand out from the crowd for several compelling reasons:
- Effortless Preparation: Say goodbye to turning on the oven! This recipe requires minimal kitchen equipment and straightforward steps, making it perfect for novice bakers, kids who love to help in the kitchen, or anyone short on time. The process is simple, mess-free, and yields impressive results.
- Instant Gratification (Almost!): While they do need a little chill time to firm up and allow the chocolate coating to set, the hands-on preparation is incredibly fast. You’ll be enjoying these fudgy treats sooner than you think, making them ideal for last-minute dessert needs.
- Perfect for Any Occasion: From casual family gatherings, birthday parties, and potlucks to elegant dinner parties or holiday celebrations, these bite-sized delights are always a hit. They’re also fantastic for school lunches, as a quick afternoon pick-me-up, or a satisfying midnight snack.
- Food Safety First: By incorporating the crucial step of heat-treating the flour, we eliminate concerns about raw ingredients and potential bacteria, offering a delicious and worry-free experience for everyone. This peace of mind allows you to fully indulge in the nostalgic taste of brownie batter.
- Incredibly Customizable: These No-Bake Brownie Bites serve as a wonderful base for customization. Easily adapt the recipe with various chocolate types (milk, dark, white), sprinkles for a festive touch, finely chopped nuts (pecans, walnuts), or even a swirl of caramel or peanut butter to suit your unique taste preferences.
- Ideal for Hot Weather: When the temperatures soar, the last thing you want to do is fire up your oven. No-bake desserts are your best friend during warmer months, allowing you to enjoy rich, satisfying treats without adding extra heat to your home.
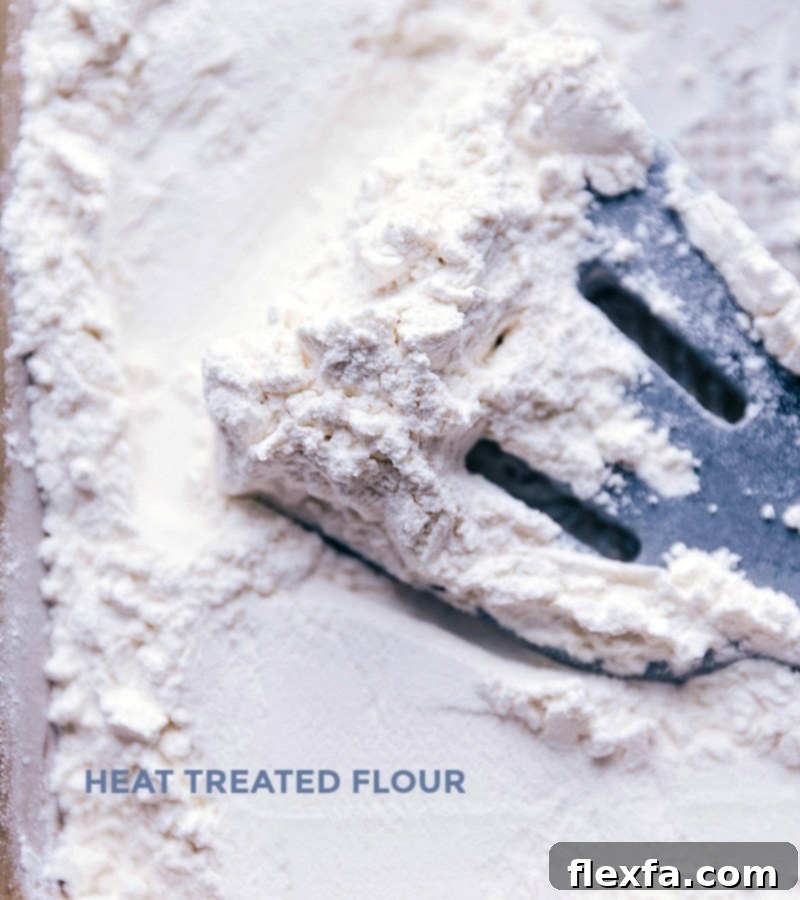
Essential Ingredients for Your Perfect Fudgy No-Bake Brownie Bites
Crafting these delectable brownie bites starts with selecting the right ingredients. Each component plays a vital role in achieving that signature rich, fudgy, and irresistible texture that makes these treats so addictive:
- Chocolate Chips & Unsalted Butter: These two powerhouse ingredients form the luxurious, deeply fudgy core of your brownie bites. Melting them together creates a smooth, glossy, and intensely chocolatey base that sets the stage for ultimate indulgence. While semi-sweet chocolate chips are my go-to for their balanced sweetness, offering a classic brownie flavor, feel free to experiment with your favorite kind—dark chocolate for a more intense cocoa experience or milk chocolate for extra sweetness. Using unsalted butter allows you to precisely control the overall saltiness of your bites.
- Granulated Sugar & Light Brown Sugar: A thoughtfully chosen combination of sugars is key to both achieving the perfect level of sweetness and contributing to that wonderfully fudgy, slightly chewy texture. Granulated sugar provides a touch of crispness, while light brown sugar adds essential moisture, a hint of caramel-like depth, and ensures the bites remain soft and tender. Remember to pack the brown sugar firmly into your measuring cup for an accurate measurement.
- Heat-Treated All-Purpose Flour: This is a crucial ingredient for ensuring the safety of your no-bake treats. Flour, in its raw state, can potentially contain harmful bacteria. By heat-treating it, we eliminate this risk, making the flour completely safe for consumption without baking. It’s imperative that the heat-treated flour cools down entirely before mixing it into your wet ingredients to prevent it from clumping or prematurely melting your chocolate mixture. We’ll detail how to perform this essential step safely below.
- Dutch-Process Cocoa Powder: For that truly rich, dark, and smooth brownie flavor, Dutch-process cocoa powder is highly recommended. Unlike natural cocoa, Dutch-process cocoa has been alkalized, which gives it a milder, less bitter taste and a significantly darker color. This process contributes immensely to the decadent, intense “brownie” essence of these bites, creating a more sophisticated chocolate profile. Hershey’s “Special Dark” is an excellent and easily accessible Dutch-process option found in most grocery stores.
- Salt: Never underestimate the power of a tiny pinch of salt! It plays a critical role in balancing the sweetness of the chocolate and sugars, enhancing the overall chocolate flavor, and bringing all the ingredients into delicious harmony. A small amount goes a long way in elevating the taste profile.
- Heavy Cream & Vanilla Extract: These ingredients are vital for adding luxurious moisture, creating a smooth consistency, and deepening the flavor profile of your brownie bites. Heavy cream helps bind the mixture together, resulting in a richer, more truffle-like texture. Pure vanilla extract is a non-negotiable flavor enhancer, elevating the chocolate notes and adding a warm, aromatic finish that complements the cocoa beautifully.
- Mini Chocolate Chips: These delightful little morsels are folded directly into the brownie dough, ensuring delightful bursts of chocolatey goodness in every single bite. Their small size is perfect for an even distribution, providing consistent texture and flavor without making the bites too chunky or difficult to roll.
- Milk Chocolate Chips & Coconut Oil (for Dipping): For the ultimate irresistible finish, these no-bake brownie bites are enrobed in a smooth, glossy melted chocolate coating. Milk chocolate chips create a sweeter, classic chocolate shell, but semi-sweet or dark chocolate chips work equally wonderfully if you prefer a richer or less sugary exterior. Coconut oil is an essential addition here; it’s used for thinning the melted chocolate, giving it a perfect, fluid consistency for dipping and ensuring a beautiful, shiny sheen once the coating sets. Shortening can be used as a suitable alternative to coconut oil.
How to Safely Heat Treat Flour for Worry-Free No-Bake Desserts
Ensuring your no-bake treats are safe to eat is paramount. Raw flour can harbor harmful bacteria like E. coli, so heat-treating it is a simple but absolutely essential step to eliminate this risk. Here are three effective methods to prepare your flour safely:
- Purchase Pre-Treated Flour: This is by far the easiest and most convenient option. Many brands now offer flour that has already undergone a heat treatment process, making it safe for raw consumption. Look for packaging explicitly stating “heat-treated,” “safe for raw consumption,” or similar wording. It’s becoming increasingly available in grocery stores.
- Microwave Method (Quick & Easy):
- Place your desired amount of all-purpose flour (it’s always a good idea to heat treat slightly more than the recipe calls for, perhaps an extra ½ to 1 cup, just in case some gets overcooked or discolored) in a large, microwave-safe bowl. Spread it out as much as possible for even heating.
- Microwave the flour on high power in 30-second intervals. After each interval, remove the bowl and stir the flour thoroughly with a spoon or whisk. This crucial step prevents hot spots and ensures the heat is distributed evenly throughout the flour.
- Continue microwaving and stirring until the flour reaches an internal temperature of 165°F (74°C) throughout. Use an instant-read thermometer to check the temperature in several different spots in the bowl. If it hasn’t reached the target temperature, microwave for another 30 seconds and repeat stirring and checking.
- Once it consistently reaches 165°F, it’s safe. Immediately transfer the flour to a clean, shallow plate or baking sheet to help it cool faster. Allow the flour to cool completely to room temperature before using it in your recipe. Hot flour can affect the consistency of your brownie mixture.
- Oven Method (Reliable & Consistent):
- Preheat your oven to 300°F (150°C).
- Spread your all-purpose flour (again, consider treating an extra ½ to 1 cup) in an even, thin layer on a large rimmed baking sheet lined with parchment paper or a silicone baking mat. The thin layer helps it heat evenly.
- Bake the flour in the preheated oven, removing it to stir thoroughly every 1.5 to 2 minutes. Stirring is key to ensure all parts of the flour are exposed to the heat and to prevent burning.
- Use an instant-read thermometer to check the internal temperature each time you stir. Once the flour consistently reaches 165°F (74°C) across the entire sheet, it is safe for consumption.
- Remove the baking sheet from the oven and let the flour cool completely to room temperature before incorporating it into your brownie bite mixture. You can spread it out on the sheet or transfer it to another cool surface to accelerate cooling.
Quick Tip for Flour Safety
While I strongly recommend heat-treating flour for food safety, especially as our understanding of foodborne illness evolves and ingredients are sourced globally, the recipe will technically “work” without it. However, for complete peace of mind and to ensure the safest possible treat for yourself and your loved ones, please make the effort to follow these heat-treatment guidelines. Your health and enjoyment are absolutely worth this important extra step!
Important Considerations for Heat-Treated Flour
To ensure the best possible results and delicious taste for your No-Bake Brownie Bites, pay close attention to these crucial details regarding heat-treated flour:
- Cooling is Key for Consistency: After heat-treating, it is absolutely essential to allow the flour to cool completely to room temperature before incorporating it into your brownie mixture. Hot flour can negatively affect the consistency of your dough, potentially melting the butter and chocolate prematurely or causing the mixture to clump up. If you’re short on time, you can spread the hot flour in a thin layer on a clean, cool surface (like a marble slab or another metal baking sheet) or even place it in the refrigerator or freezer for a few minutes to speed up the cooling process.
- Address Any Clumps: It’s quite common for flour to form small, soft clumps after undergoing heat treatment. Gently break these apart with your fingers or a whisk before adding them to your recipe. Any clumps that are hard, stubborn, or refuse to break apart easily should be discarded. These might indicate areas where the flour was overcooked, which can negatively impact the texture and flavor of your bites.
- Discard Discolored Flour: Carefully examine your heat-treated flour. It should remain light, fluffy, and white, looking just like regular raw flour. If you notice any discolored flour – particularly brown or light brown areas – those portions must be discarded. Discoloration usually signifies that the flour has burned, even slightly, which will impart an unpleasant, burnt taste to your brownie batter. Only use the perfectly white, fluffy flour to ensure the best texture and flavor in your finished bites.
- Prepare Extra Flour: Since some flour may inadvertently get overcooked, discolored, or stick to the pan during the heat treatment process, it’s a smart practice to heat treat about ½ to 1 cup more flour than the recipe specifically requires. This ensures you have plenty of perfectly treated flour for your recipe. Any perfectly heat-treated leftovers can be stored in an airtight container at room temperature and safely used for other delightful edible dough recipes, such as edible cookie dough or edible peanut butter cookie dough.
Step-by-Step: How to Make Irresistible No-Bake Brownie Bites
Creating these rich, fudgy treats is surprisingly simple and requires no baking! Follow these detailed steps for perfect, mouth-watering results every time:
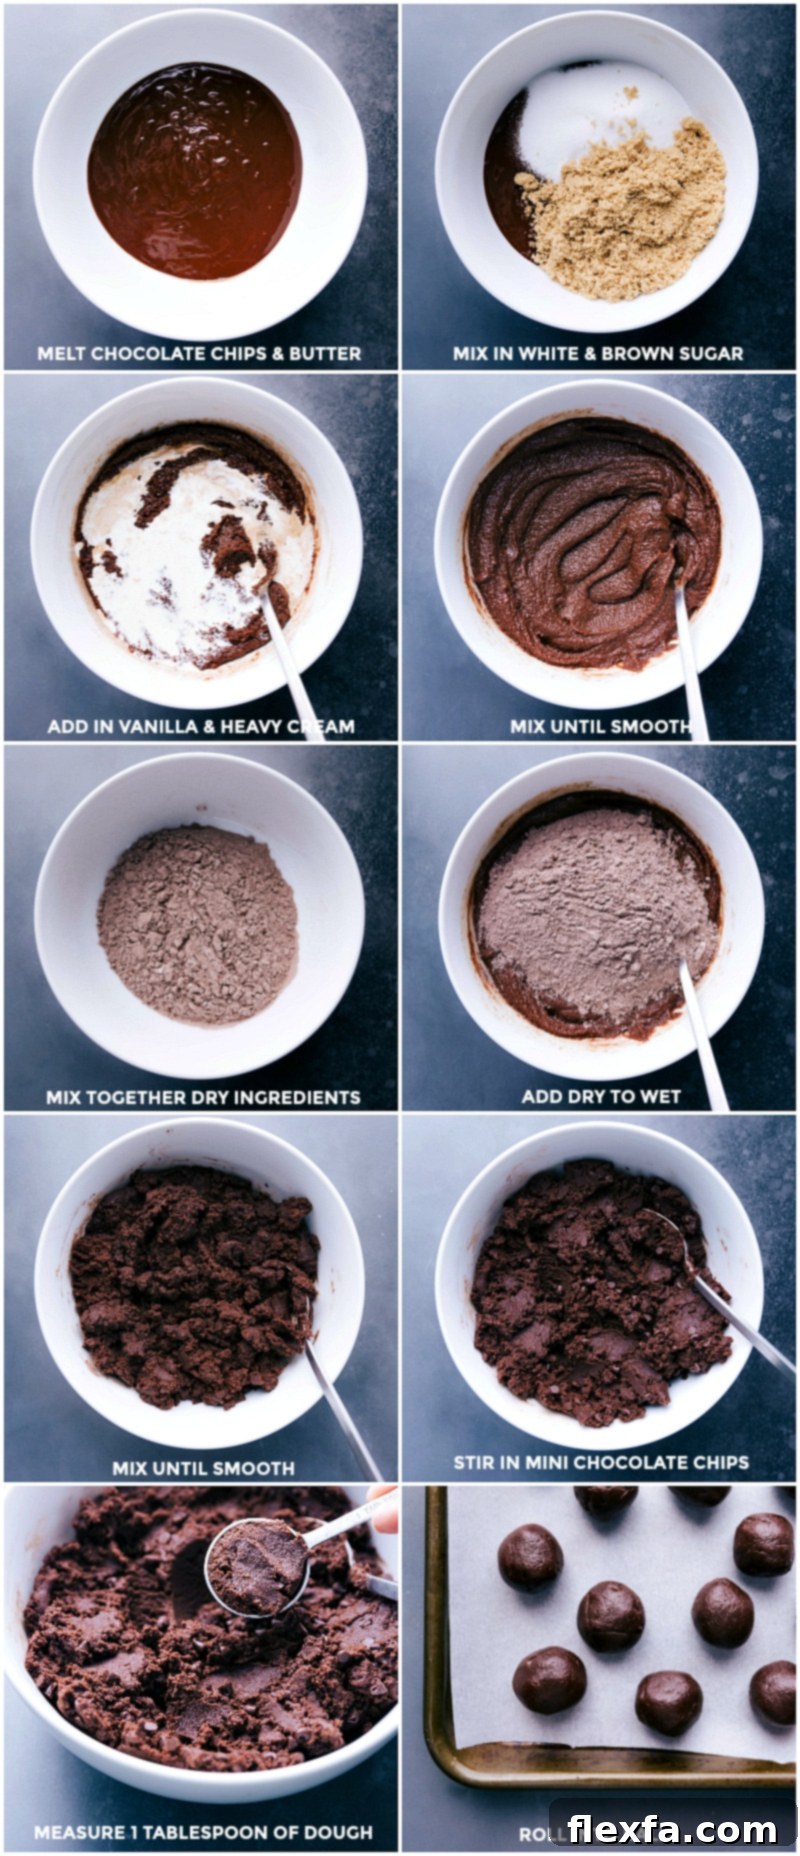
- Prepare Your Heat-Treated Flour: First and foremost, prepare your all-purpose flour by heat-treating it using either the microwave or oven method as thoroughly described in the “How to Safely Heat Treat Flour” section above. It is absolutely crucial that the flour reaches an internal temperature of 165°F (74°C) to ensure it’s safe for raw consumption. Once treated, allow the flour to cool completely to room temperature. When measuring, lightly spoon the cooled flour into your measuring cup until it overflows, then use the flat side of a knife or a straight edge to level it off; avoid packing it down.
- Combine Dry Ingredients: In a medium-sized mixing bowl, whisk together the measured, cooled heat-treated flour, Dutch-process cocoa powder, and salt. Stir these dry ingredients together thoroughly to ensure they are fully combined and there are no lumps. Set this bowl aside for later.
- Melt Chocolate & Butter: In a microwave-safe bowl (preferably a sturdy glass or ceramic one), combine the semi-sweet chocolate chips and the unsalted butter (cut into small, roughly 1-tablespoon pieces for faster and more even melting). Microwave this mixture in short bursts of 30 seconds. After each burst, remove the bowl and stir the contents thoroughly for about 15-20 seconds. Continue this process until the mixture is completely smooth, glossy, and fully melted. This typically takes a total of 1.5 to 2 minutes, depending on your microwave’s power.
- Mix Wet Ingredients: Transfer the smooth, melted chocolate-butter mixture to the bowl of a stand mixer fitted with a paddle attachment (a powerful hand mixer will also work effectively). Add both the granulated sugar and the light brown sugar to the bowl. Beat the mixture on medium speed for approximately 2 minutes until it is beautifully smooth, well combined, and the sugars have begun to dissolve into the chocolate. Next, add the heavy cream and vanilla extract, continuing to beat for another 1-2 minutes until the mixture becomes slightly lighter in color and consistently smooth.
- Incorporate Dry Ingredients & Mini Chocolate Chips: With the mixer on low speed, gradually add the reserved dry flour mixture to the wet ingredients in the bowl. Beat until the dry ingredients are just combined with the wet, being careful not to overmix the batter. Use a spatula to scrape down the sides and bottom of the bowl as needed, ensuring all ingredients are thoroughly incorporated. Finally, remove the bowl from the mixer and gently fold in the mini chocolate chips using your spatula. Consistency Check: At this point, the dough should be pliable but not overly sticky. If your dough feels too wet or sticky, add 1-2 more tablespoons of heat-treated flour, mixing just until combined. If it seems too dry or crumbly, add 1-2 more tablespoons of heavy cream until the desired consistency is reached.
- Form & Chill the Bites: Using a 1-tablespoon measuring spoon (or a small cookie scoop), portion out uniform balls of the brownie batter. Roll each portion between your palms into a smooth, even-sized ball. You should yield approximately 35 delicious no-bake brownie bites. Arrange these formed balls on a plate or a parchment-lined baking sheet, cover them loosely with plastic wrap, and chill them in the refrigerator for at least 15 minutes. This chilling step is essential as it helps the bites firm up, making them much easier to handle and dip.
- Prepare for Dipping: While your brownie bites are chilling, prepare your dipping station. Line a large baking sheet with parchment paper or a silicone baking mat; this will provide a non-stick surface for the coated bites to set. In a separate sturdy, microwave-safe bowl (again, glass or ceramic is best), combine your milk chocolate chips and the coconut oil.
- Melt Dipping Chocolate: Heat the dipping chocolate mixture in short, controlled bursts of 20 seconds in the microwave. After each burst, remove the bowl and stir the chocolate vigorously for a full 30 seconds. This methodical approach is critical: chocolate retains heat, and a lot of melting occurs from residual heat outside the microwave. Thorough stirring prevents overheating and burning, which can cause the chocolate to seize or become grainy. Continue until the chocolate is perfectly melted and silky smooth.
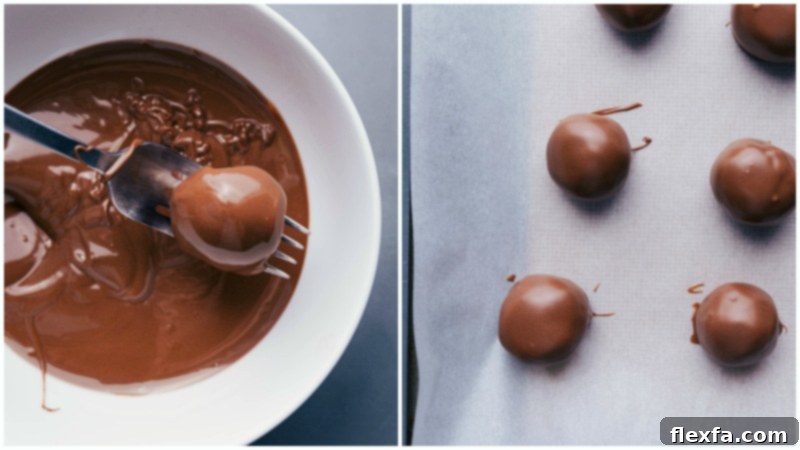
- Dip the Brownie Bites: Once the dipping chocolate is perfectly melted and smooth, it’s time to coat your chilled brownie truffles. For the best, cleanest coating, carefully place one chilled brownie bite on a fork. Using a spoon, generously drizzle the melted chocolate over the entire truffle, ensuring it’s fully coated. Gently tap the fork against the edge of the bowl a few times to allow any excess chocolate to drip back into the bowl. This helps create a thin, even layer of chocolate. Then, using a small table knife or a second fork, carefully slide the coated truffle off the fork and onto your prepared lined baking sheet. Repeat this process for all the remaining brownie bites. Dipping Consistency Tip: If at any point the chocolate coating seems too thick or difficult to work with, add a tiny amount (e.g., ¼ to ½ teaspoon) of additional coconut oil and stir well until it reaches the desired fluid, dippable consistency. Be cautious not to add too much, as excessive oil can prevent the coating from setting properly.
- Allow to Set & Enjoy: Let the chocolate-coated truffles set completely. You can do this at room temperature (which may take an hour or two depending on your environment) or speed up the process by placing them in the refrigerator for about 20-30 minutes. Once the chocolate coating is firm to the touch, they are ready to be savored! These delightful bites are at their absolute best when enjoyed the same day, especially if slightly chilled – they become incredibly fudgy straight from the fridge! Store any leftover No-Bake Brownie Bites in an airtight container at room temperature for up to 3 days, or in the refrigerator for up to 1 week. (Note: If you plan to freeze them, it is best to freeze the uncoated brownie bites and then dip them in chocolate after thawing, as the chocolate coating can sometimes become less appealing after freezing and thawing.)
Pro Tips for No-Bake Brownie Bite Perfection
Elevate your No-Bake Brownie Bites from good to absolutely amazing with these expert tips and tricks:
- Dutch-Process Cocoa is Your Secret Weapon: For the deepest, richest chocolate flavor and a beautifully dark color that truly evokes a classic brownie, always opt for Dutch-process cocoa powder over natural or plain cocoa. Dutch-process cocoa is less acidic, resulting in a smoother, more mellow chocolate taste that truly shines in these no-bake treats. Regular cocoa can sometimes make the batter taste harsher and drier. Brands like Hershey’s® “Special Dark” are excellent and widely available, making this tip easy to implement.
- Beat for Ultimate Smoothness: Don’t skimp on the beating! When combining the melted chocolate, butter, and sugars, use a stand mixer or a powerful hand mixer and beat thoroughly for the recommended time. This essential step helps dissolve the sugar crystals, significantly reducing any potential graininess in your brownie batter and leading to a smoother, more luxurious, truffle-like texture. Chilling the rolled brownie bites also plays a key role in achieving that desired smooth, fudgy consistency.
- Measure Flour Accurately (Even for No-Bake): Precision in measuring flour is crucial, even in a no-bake recipe. Too much flour can make your brownie bites dry, dense, and less flavorful, while too little might make them too soft or sticky. To measure accurately, gently spoon the heat-treated flour into your measuring cup until it overflows, then use the flat side of a knife or a straight edge to level it off, removing any excess. Avoid scooping directly from the bag, as this can compact the flour and result in inadvertently using more than needed.
- Chill for Easier Handling: While these are no-bake, strategic chilling steps will make your life much easier and improve the final product. Chilling the dough before rolling helps it firm up and become less sticky, allowing for perfectly shaped balls. Chilling the rolled bites again before dipping ensures they hold their shape and helps the chocolate coating set faster and more smoothly. Don’t rush these chilling times!
- Experiment with Creative Toppings: A delicate sprinkle of flaky sea salt is a classic and highly recommended topping that beautifully enhances the chocolate flavor. However, feel free to get creative! Consider other garnishes like finely chopped nuts (pecans, walnuts, almonds), festive sprinkles for a pop of color, a drizzle of contrasting white chocolate, or even a dusting of extra cocoa powder for a sophisticated touch.
Mastering the Chocolate Dip for a Perfect, Glossy Coating
The glossy, smooth chocolate coating is what takes these brownie bites to the next level, transforming them into elegant truffles. Here’s how to achieve a professional-looking finish every time:
- Quality Chocolate Chips Make a Difference: The type and quality of chocolate chips you choose for dipping significantly impact the final texture and taste of your coating. High-quality chocolate chips, such as those from Ghirardelli® or Guittard®, melt more smoothly, have a richer flavor, and provide a better-looking, more even coating that sets nicely. While milk chocolate offers a sweeter, more classic shell, semi-sweet or dark chocolate chips are excellent alternatives if you prefer a richer, less sugary exterior or a bolder chocolate experience.
- Choose the Right Melting Bowl: Always melt chocolate in sturdy, microwave-safe bowls made of glass or ceramic. These materials heat more evenly than plastic. Avoid using plastic or melamine bowls, as they can retain heat unevenly, which increases the risk of scorching or seizing your chocolate, making it unusable for dipping.
- Slow and Steady Melting is Key: Patience is your best friend when melting chocolate. Microwave the chocolate chips in short bursts of 20-30 seconds on medium power. Crucially, stir the chocolate thoroughly for a full 30 seconds after *each* burst, even if it doesn’t appear fully melted. Chocolate retains heat incredibly well and continues to melt from residual heat outside the microwave. This methodical technique is vital to prevent overheating and burning, which can cause the chocolate to seize (become thick and clumpy) and ruin its smooth consistency for dipping.
- Achieving the Right Consistency with Coconut Oil: If your melted chocolate is too thick for smooth, even dipping, it’s time to add a small amount of coconut oil (or shortening). Start with a tiny increment, such as ¼ to ½ teaspoon, stir it thoroughly until fully incorporated, and then assess the consistency. Continue adding very small amounts until the chocolate is fluid enough to coat the brownie bites evenly but not so thin that it drips off excessively or fails to set properly. The goal is a smooth, pourable consistency that adheres beautifully.
- Efficient Dipping Technique for Clean Bites: For a clean, professional-looking coating, place a chilled brownie bite on a fork (a candy dipping tool also works wonders if you have one). Using a spoon, carefully drizzle the melted chocolate over the entire truffle, ensuring full coverage. Then, gently tap the fork against the rim of the melting bowl. This action allows any excess chocolate to drip back into the bowl, ensuring a thin, even layer and preventing pooling at the base of the bite. Finally, use a small table knife or a second fork to carefully slide the coated bite onto your parchment-lined baking sheet to set.
Craving More Brownie Bliss? Explore These Delicious Treats!
If you’ve fallen in love with these easy and fudgy No-Bake Brownie Bites, you’re in for a treat! Our extensive collection of brownie-inspired desserts offers a variety of flavors, textures, and styles to satisfy every chocolate craving. Dive into these other delightful recipes and discover new favorites:
- Decadent Brownie Trifle: A stunning layered dessert featuring rich brownie pieces, creamy vanilla custard, and fresh, vibrant berries – perfect for special occasions.
- Cool and Refreshing Mint Brownies: Indulge in fudgy brownies topped with a bright, refreshing mint frosting and a smooth, glossy chocolate ganache.
- Nostalgic Cosmic Brownies: Recreate the magic of this beloved classic lunchbox treat with our homemade recipe, featuring super fudgy brownies adorned with colorful candy sprinkles.
- Miniature Fudgy Molten Lava Brookie Cups: Experience the best of both worlds with these hybrid treats – a perfect combination of a cookie and a brownie, featuring a luscious, warm molten interior.
- Mini Brownie Bites with Rolos: Delight in these bite-sized brownies that hide a sweet surprise – a soft, gooey caramel Rolo candy melted right in the center!

Print Recipe
No Bake Brownie Bites
Video
A video tutorial for these No Bake Brownie Bites can be found here. (Please note: The interactive video player from the original content has been removed for static HTML; clicking the link will open the video directly.)

Equipment
- Stand mixer or hand mixer
- Large sheet pan (15″ x 21″)
- Silicone baking mat or parchment paper
- Instant-read thermometer (essential for heat-treating flour)
- Microwave-safe bowls (glass or ceramic)
- Spatula
- Measuring spoons and cups
Ingredients
- 1 cup all-purpose flour (heat-treated — see Note 1 in recipe notes below)
- 1/4 cup Dutch process cocoa powder (see Note 2)
- 1/2 teaspoon salt
- 1 cup semi-sweet chocolate chips
- 6 tablespoons unsalted butter
- 1/2 cup granulated sugar
- 3/4 cup light brown sugar
- 1/4 cup heavy cream
- 1 teaspoon vanilla extract
- 1/2 cup mini chocolate chips
For Dipping:
- 2 cups milk chocolate chips (or semi-sweet or dark, see Note 3)
- 2 teaspoons coconut oil (or shortening)
Instructions
- Heat Treat Flour: Follow the instructions in Note 1 (below in Recipe Notes) for heat-treating your all-purpose flour using either the microwave or oven method. Ensure the flour reaches a safe temperature of 165°F (74°C) throughout. Allow the heat-treated flour to cool completely to room temperature before proceeding. Discard any flour that appears burnt, discolored, or hard-clumpy. When measuring, gently spoon the cooled flour into a measuring cup and level it off — do not pack it down.
- Combine Dry Ingredients: In a medium bowl, whisk together the measured, cooled heat-treated flour, Dutch-process cocoa powder, and salt until thoroughly combined. Set this bowl aside.
- Melt Chocolate and Butter: In a microwave-safe bowl, combine the semi-sweet chocolate chips and the unsalted butter (cut into 1-tablespoon pieces). Microwave in 30-second bursts, stirring for 15-20 seconds after each burst, until the mixture is fully melted and smooth. This usually takes about 1.5 to 2 minutes.
- Mix Wet Ingredients: In a stand mixer fitted with a paddle attachment (or using a hand mixer), combine the melted chocolate-butter mixture, granulated sugar, and light brown sugar. Beat on medium speed for 2 minutes until completely smooth. Add the heavy cream and vanilla extract, then beat for another 1-2 minutes until the mixture is lighter and smooth.
- Combine All Ingredients: Add the dry flour mixture to the wet ingredients in the mixer bowl. Beat on low speed until just combined, being careful not to overmix. Scrape down the sides of the bowl with a spatula as needed. Gently fold in the mini chocolate chips with the spatula. If the dough is too wet, add 1-2 tablespoons of additional heat-treated flour; if too dry, add 1-2 tablespoons of heavy cream until the desired consistency.
- Form and Chill Bites: Using a 1-tablespoon measuring spoon, scoop out portions of the brownie batter. Roll each portion into a uniform, smooth ball (you should get about 35 bites). Place the formed balls on a plate or baking sheet, cover, and chill in the refrigerator for at least 15 minutes to firm them up.
- Prepare Dipping Chocolate: Line a large baking sheet with parchment paper or a silicone liner. In a separate sturdy, microwave-safe bowl, combine the milk chocolate chips and coconut oil.
- Melt Dipping Chocolate: Heat the dipping chocolate mixture in 20-second bursts in the microwave. Stir thoroughly for 30 seconds after each burst, allowing residual heat to continue melting the chocolate. This prevents burning and ensures a smooth, uniform consistency.
- Dip Brownie Bites: Once the chocolate is completely melted and smooth, dip the chilled brownie truffles. Place a truffle on a fork, and use a spoon to pour melted chocolate over it, ensuring it’s fully coated. Gently tap the fork against the edge of the bowl to remove excess chocolate. Carefully slide the coated truffle off the fork onto the prepared lined baking sheet using a table knife. If the dipping chocolate becomes too thick, add a tiny amount (e.g., ¼ teaspoon) of coconut oil and stir until the desired consistency is achieved.
- Set and Serve: Allow the chocolate-coated truffles to set completely at room temperature or in the refrigerator. These are best enjoyed the same day, but they will keep well for 3-4 days in an airtight container at room temperature, or up to 1 week in the fridge. For an extra fudgy experience, try them chilled straight from the refrigerator! (Note: Uncoated brownie bites freeze better if you wish to prepare them in advance and dip later.)
Recipe Notes
Note 1: Heat Treating Flour (Detailed Instructions)
Microwave Method: Place 1.5 to 2 cups of all-purpose flour (slightly more than needed for the recipe) in a microwave-safe bowl. Microwave on high in 30-second increments, stirring well after each burst. Use an instant-read thermometer to check multiple spots; once it consistently reaches 165°F (74°C), it’s safe. Transfer to a cool surface and let cool completely before use.
Oven Method: Preheat oven to 300°F (150°C). Spread 1.5 to 2 cups of flour in a thin, even layer on a parchment-lined rimmed baking sheet. Bake, stirring every 1.5 minutes and checking with a thermometer until it reaches 165°F (74°C). Remove from oven and let cool completely before use.
Important: Discard any brown, burnt, or hard-clumped flour. Only use light, fluffy, white flour for the best flavor and texture in your brownie bites.
Note 2: Dutch-Process Cocoa Powder Recommendation
Always use Dutch-process cocoa powder for this recipe. It provides a richer, darker color and a smoother, less bitter chocolate flavor compared to natural or plain cocoa powder. Natural cocoa can make the brownie batter drier and less flavorful. Hershey’s Special Dark cocoa powder is an excellent and readily available Dutch-process option in most grocery stores.
Note 3: Choosing Your Dipping Chocolate Preference
While milk chocolate chips create a sweeter coating (which is a personal favorite for many), you can absolutely use semi-sweet, dark, or even white chocolate chips for dipping, depending on your preference for sweetness and flavor intensity. Using higher-quality chocolate chips tends to result in a smoother melt and an easier dipping process, contributing to a more professional and delicious finish.
Storage Instructions: Store any leftover No-Bake Brownie Bites in an airtight container at room temperature for up to 3 days, or in the refrigerator for up to 1 week. If you plan to freeze them, it is best to freeze the *uncoated* brownie bites. Once thawed, you can then dip them in chocolate, as the chocolate coating can sometimes become less appealing in texture after freezing and thawing.
Nutrition
Calories: 177 kcal |
Carbohydrates: 25 g |
Protein: 2 g |
Fat: 8 g |
Saturated Fat: 5 g |
Polyunsaturated Fat: 1 g |
Monounsaturated Fat: 2 g |
Trans Fat: 1 g |
Cholesterol: 11 mg |
Sodium: 41 mg |
Potassium: 80 mg |
Fiber: 1 g |
Sugar: 17 g |
Vitamin A: 99 IU |
Vitamin C: 1 mg |
Calcium: 17 mg |
Iron: 1 mg
Nutrition information is automatically calculated and should be used as an approximation.
Love this recipe? Share your thoughts and questions in the comments below!