
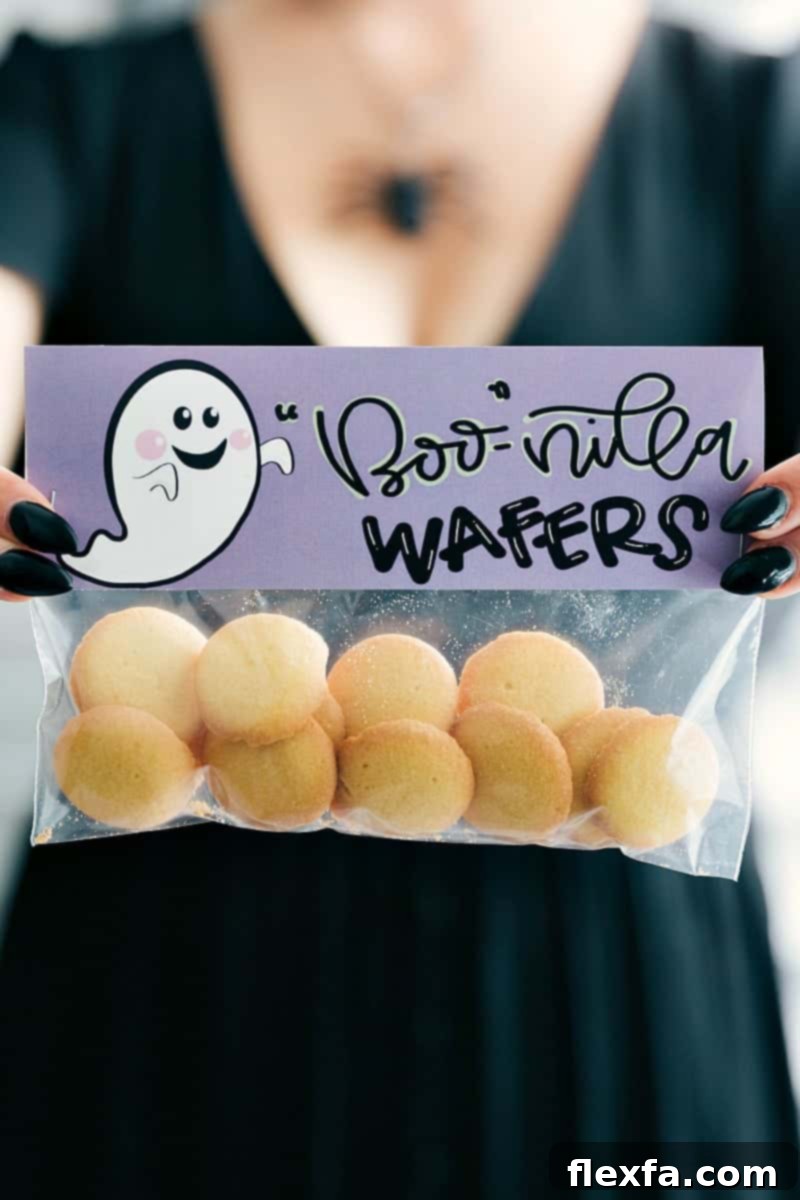
Spooktacularly Simple: DIY Free Halloween Treat Bag Toppers for Unforgettable Party Favors
Transform ordinary candy into extraordinary Halloween delights with our **Free Halloween Treat Bag Toppers**! This guide makes crafting fun and festive treat bags incredibly easy. Simply fill snack-size ziplock bags with your favorite candies or homemade goodies, then staple on these charming, FREE printable toppers to give them a professional, personalized touch. Whether you’re preparing for trick-or-treaters, a school party, or a spooky gathering, these DIY Halloween treats are sure to impress both kids and adults alike, making your Halloween celebrations truly memorable.
Looking for even more creative options? Explore our second enchanting collection of Free Halloween Bag Toppers here, offering additional designs to spark your imagination and expand your treat-making repertoire.
Why DIY Halloween Treat Bags Are a Must for Your Spooky Season
Halloween is all about creativity, fun, and a little bit of magic. What better way to embody this spirit than with homemade Halloween treat bags? Opting for DIY party favors allows for unparalleled personalization, ensuring each recipient feels special. Beyond the personal touch, making your own treat bags can be a cost-effective alternative to pre-packaged options, especially when you’re preparing for a large group of trick-or-treaters. It’s also a fantastic activity for families, turning treat preparation into a delightful crafting session that builds excitement for the holiday. These unique, handcrafted bags stand out, leaving a lasting impression long after the candy is gone.
Essential Tips for Crafting Your Perfect Halloween Treat Bags
To ensure your homemade Halloween treat bags look as professional and enchanting as possible, follow these practical tips. From printing quality to assembly techniques, these notes will help you achieve flawless results for all your spooky creations.
-
Print Only What You Need: Efficiency at Its Best
Each treat bag design comes on its own printable page. This thoughtful layout means you only print the specific designs you desire, saving ink and paper. It also allows you to mix and match different themes without wasting resources, ensuring your Halloween party favors are exactly as you envision them.
-
Achieve Professional Quality: Printing Recommendations
For the best possible appearance and durability, we highly recommend printing your Halloween treat bag toppers on **glossy cardstock**. This material provides a vibrant finish that makes colors pop and gives the toppers a substantial feel. For truly professional results, consider emailing the printable PDFs to local print shops like **Staples or Office Max**. Their commercial printers and high-quality paper options can elevate your free Halloween treat toppers, making them look store-bought without the hefty price tag.
-
Precision is Key: Tools for Cutting and Folding
While scissors will work, a **paper cutter** will provide clean, straight edges for a polished finish, saving you time and effort, especially if you’re making many bags. Additionally, a **scoring board** (or even a ruler and blunt object) will help you create crisp, precise folds, ensuring your toppers sit neatly over the treat bags without creases or wrinkles.
-
Choosing the Right Treat Bags: Size and Quality
For optimal presentation and to perfectly fit the toppers, **Zip-loc** snack-size bags are often praised for their superior quality and reliable seal. However, any brand of snack-sized resealable plastic bags will work wonderfully. The key is to use bags that are roughly the same width as your printable toppers for a cohesive look.
-
Important Download and Printing Protocols
To avoid any printing issues, it is **important to save the printable file to your computer before attempting to print**. Do not print directly from the website, as this can sometimes lead to formatting errors or incomplete prints. If you encounter any problems during the download or printing process, try using a different web browser or feel free to reach out for assistance!
-
Concierge Service: Printed, Cut, and Shipped
If you’re short on time or prefer to have the work done for you, you can have these delightful toppers professionally printed, precisely cut, accurately scored, and conveniently shipped directly to your door. **Click here to shop** for this convenient service and receive ready-to-use toppers.
Dive into Our Delightful Halloween Treat Bag Ideas
Now that you’re equipped with the best tips, let’s explore some fantastic and easy-to-assemble Halloween treat bag ideas. Each concept combines a simple treat with a themed printable topper, promising smiles and screams of delight!
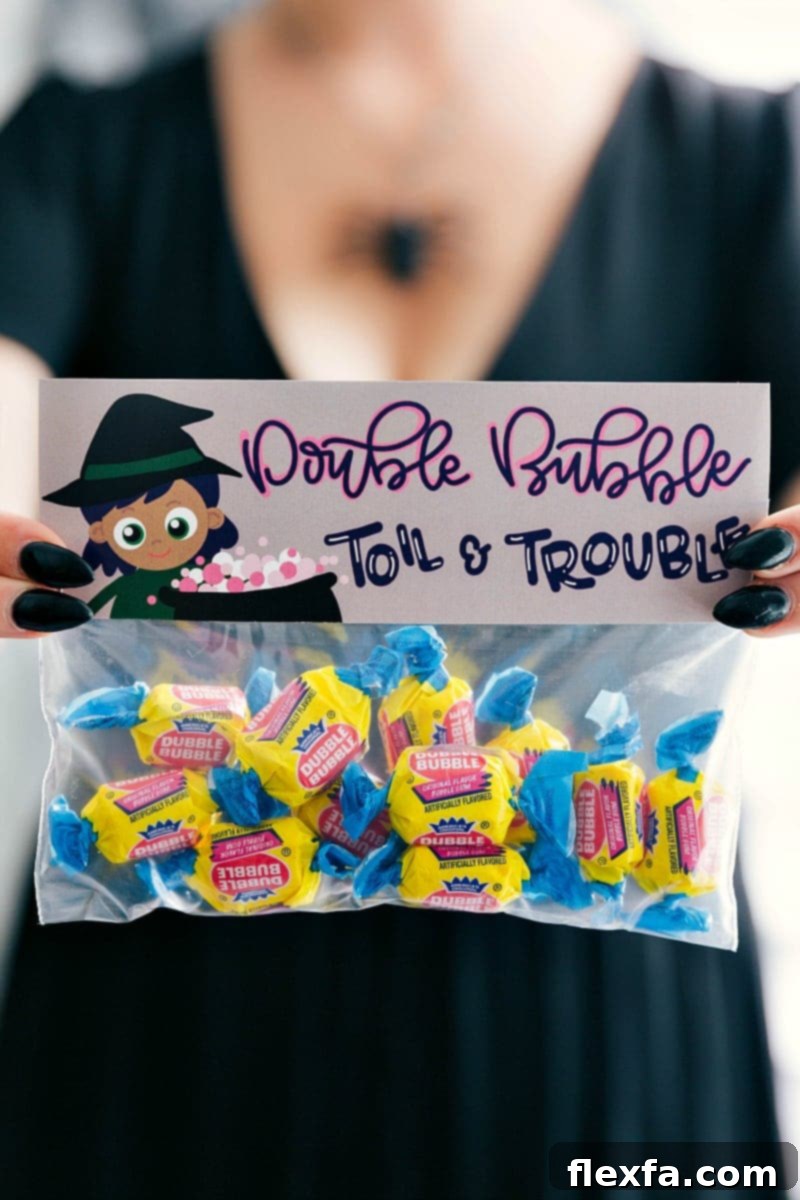
1. “Double Bubble Toil And Trouble”: A Gummy Delight
Conjure up some bubbly fun with these “Double Bubble Toil and Trouble” treat bags! Perfect for young witches and wizards, these bags are filled with classic Double Bubble gum, promising a burst of flavor and a touch of magic. The vibrant colors of the gum combined with the enchanting topper make for an irresistible Halloween offering.
Supplies:
- Snack Sized Ziplock Bag
- Free Printable Topper: Click Here to get your free Halloween treat bag topper.
- Stapler
- Double Bubble Gum
Instructions:
Carefully fill each snack-sized bag with several pieces of Double Bubble gum, then securely seal the bag. Next, cut out your “Double Bubble Toil And Trouble” printable topper, score it along the fold line, and neatly fold it over the top of the candy-filled bag. Finally, staple each side of the topper to the bag, and these bewitching treats are ready to gift!
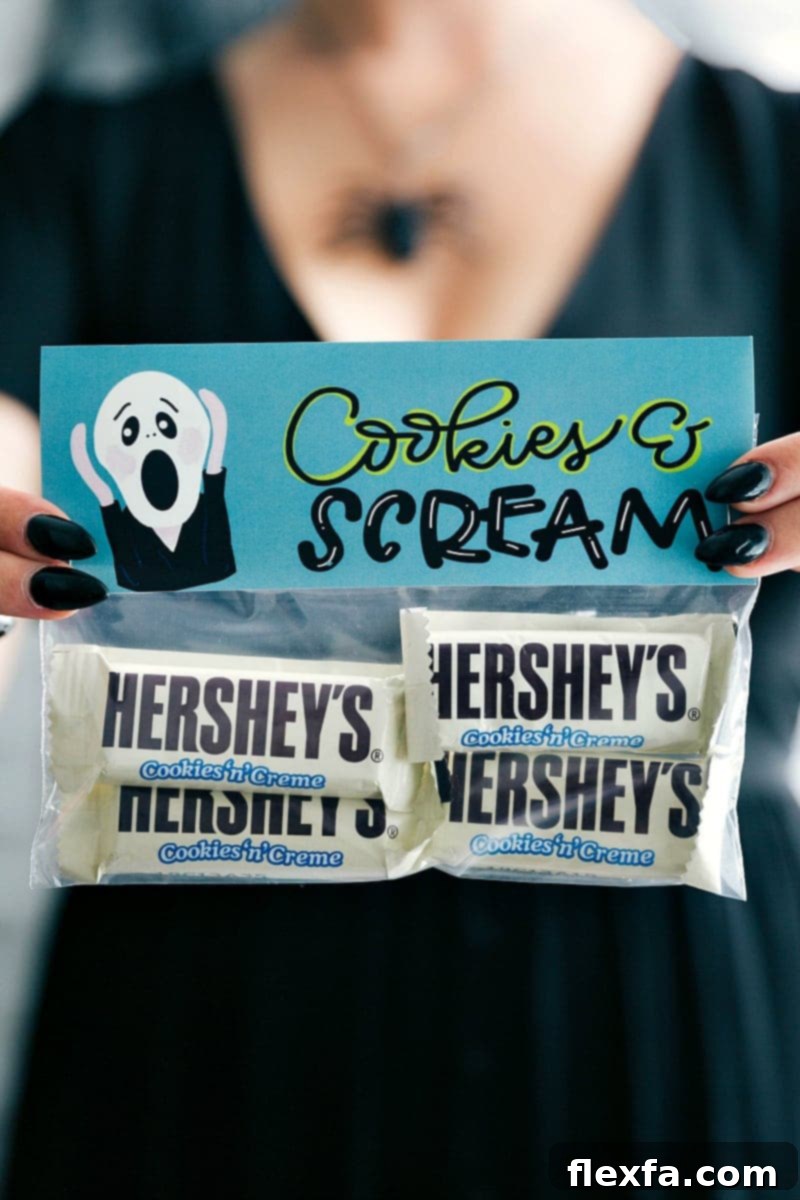
2. “Cookies And Scream”: A Sweetly Spooky Classic
Indulge in a classic combo with a spooky twist! These “Cookies And Scream” treat bags are an ode to everyone’s favorite cookie-and-cream flavor, packed with delicious fun-size candy bars. They’re a guaranteed crowd-pleaser and incredibly simple to assemble, making them ideal for quick Halloween preparations.
Supplies:
- Snack Sized Ziplock Bag
- Free Printable Topper: Click Here
- Stapler
- Cookies ‘n’ Creme Fun Size Bars
Instructions:
Place 3-4 fun-sized Cookies ‘n’ Creme bars into each snack-sized ziplock bag and seal it tightly. Carefully cut out the “Cookies And Scream” printable, score it, and fold it over the top of the candy-filled bag. Secure each side with a staple, and your sweetly spooky treats are perfectly packaged and ready for distribution!
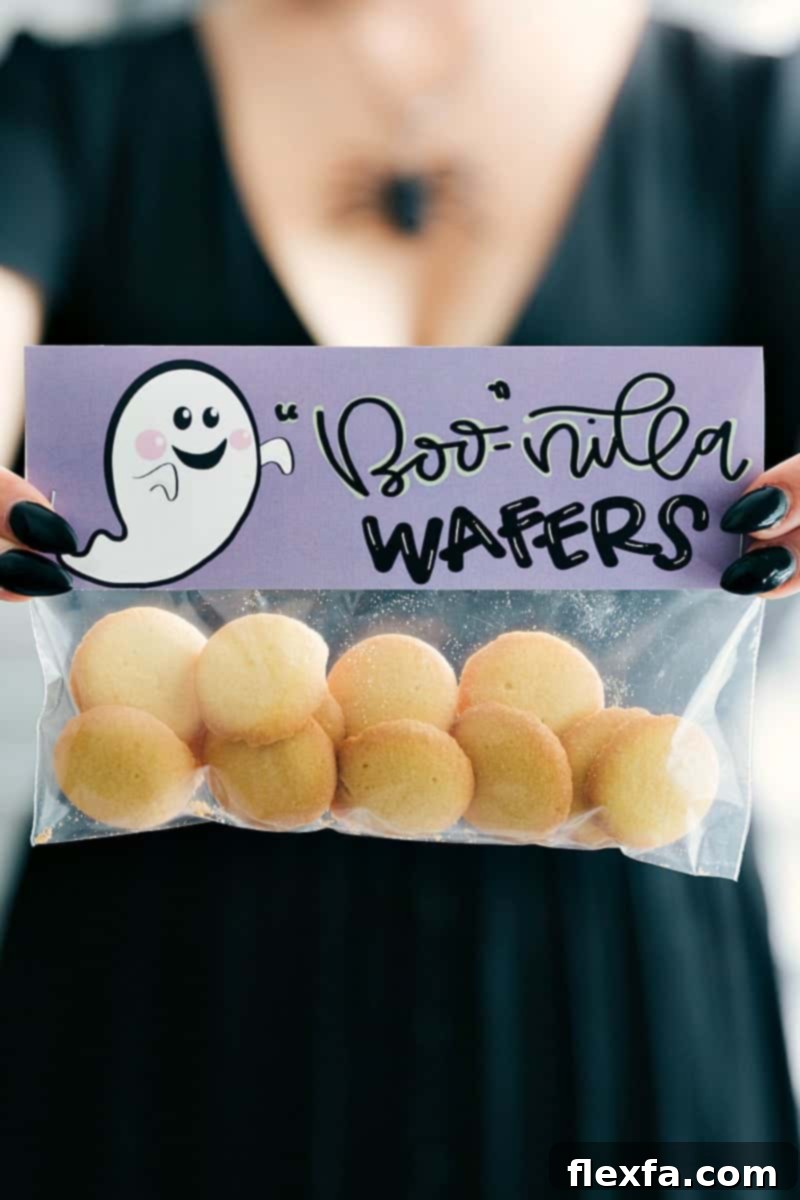
3. “Boonilla Wafers”: A Ghoulishly Good Snack
For a lighter, yet equally delightful Halloween snack, look no further than “Boonilla Wafers.” These bags, filled with miniature vanilla wafers, offer a comforting and classic flavor, making them a gentle alternative to heavier chocolates. The cute “Boonilla” topper adds just the right amount of Halloween charm.
Supplies:
- Snack Sized Ziplock Bag
- Free Printable Topper: Click Here
- Stapler
- Miniature Vanilla Wafers
Instructions:
Fill the snack-sized ziplock bags with a generous portion of miniature vanilla wafers and seal. Cut out, score, and fold the “Boonilla Wafers” printable over the filled bag. Staple each side, and these charming bags are ready to be gifted! *Even though the bag is sealed, for maximum freshness and crispness of the wafers, it’s best not to package these more than 1-2 days before gifting.
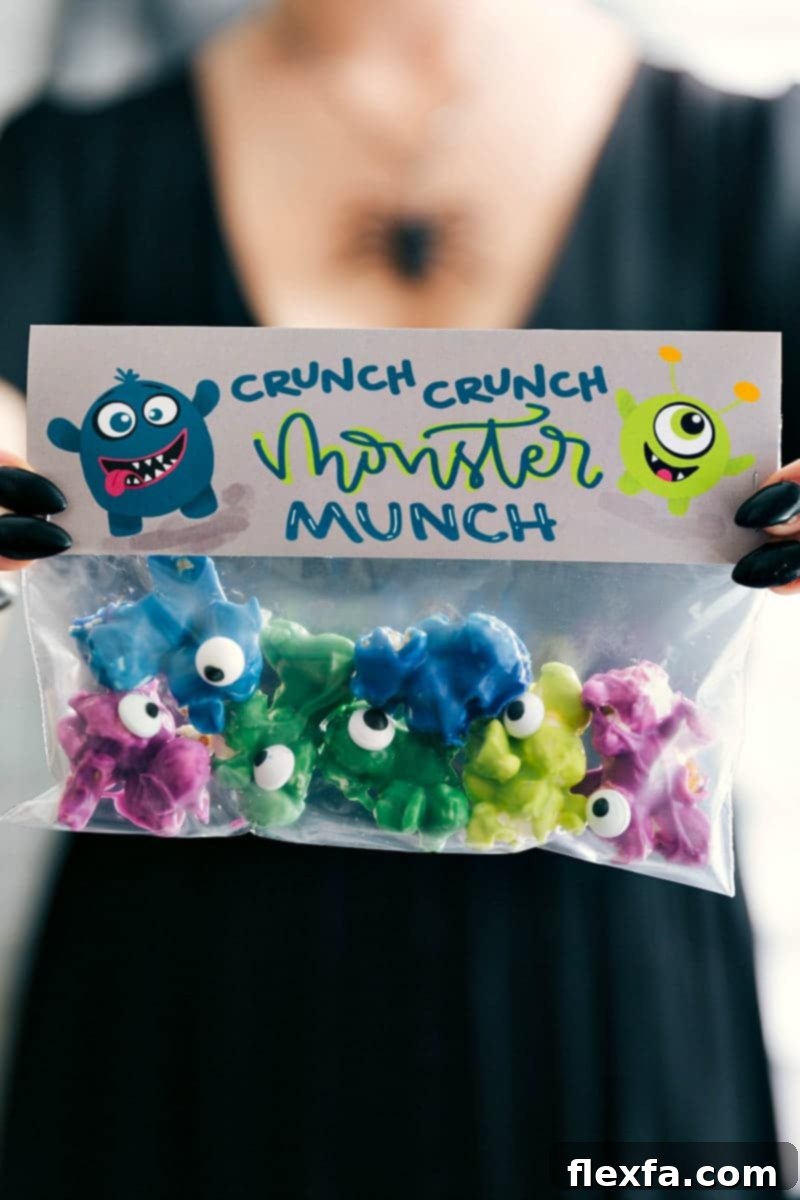
4. “Crunch, Crunch Monster Munch”: A Homemade Halloween Sensation
Unleash your inner monster chef with our “Crunch, Crunch Monster Munch” treat bags! These feature a delightful homemade snack mix, combining colorful candy melts, popcorn, and spooky candy eyeballs. It’s a fantastic option for those who enjoy crafting their treats from scratch and want to offer something truly unique this Halloween. The recipe for this eerie-sistible munch is provided below.
Supplies:
- Snack Sized Ziplock Bag
- Free Printable Topper: Click Here
- Stapler
- Monster Munch (recipe below)
Instructions:
Once your “Monster Munch” is prepared and cooled, fill the snack-sized bags with the delicious mix. Cut out the printable topper, score, and fold it over the candy-filled bag. Secure each side with a staple, and these monstrously good treats are ready for gifting!
Print Recipe
Crunch Crunch Monster Munch
Chelsea Lords
5 minutes
15 minutes
20 minutes
12 servings
Equipment
-
Sheet pan (15″ x 10″)
-
Parchment paper
-
Resealable plastic bag (snack-sized)
Ingredients
- 3/4 cup purple candy melts
- 3/4 cup blue candy melts
- 3/4 cup dark green candy melts
- 3/4 cup light green candy melts (or as many colors as desired)
- 4 teaspoons shortening (or vegetable oil, divided)
- 5 cups popped popcorn (no butter added; just air popped)
- 1/2 teaspoon salt
- 1/4 cup candy eyeballs
Instructions
- Place each color of candy melts in separate microwave-safe bowls and add 1 teaspoon shortening into each bowl. Microwave in bursts of 20 seconds, stirring between each burst for 15 seconds, until candy melts are completely melted and smooth. Be patient to avoid burning the chocolate.
- Separate popped popcorn into 4 different bowls. Pour each color of melted candy melts into one of the bowls. Stir quickly until popcorn is completely coated. Pour the candy coated popcorn separated onto parchment-lined sheet pan(s). Spread popcorn out evenly, then evenly press in candy eyeballs.
- Let stand 5–10 minutes or until chocolate has hardened. Break up into small pieces, then place in snack-sized bags.
Recipe Notes
Nutrition
Calories: 248kcal |
Carbohydrates: 32g |
Protein: 0.5g |
Fat: 12g |
Saturated Fat: 11g |
Sodium: 197mg |
Potassium: 14mg |
Fiber: 0.5g |
Sugar: 30g |
Calcium: 1mg |
Iron: 0.1mg
Nutrition information is automatically calculated, so should only be used as an approximation.
More Halloween Inspiration Awaits!
These free printable Halloween treat bag toppers offer an incredible opportunity to infuse your spooky season with creativity and personal charm. Whether you choose a classic candy-filled option or embark on making the delightful Monster Munch, each treat bag becomes a small piece of Halloween magic. They are perfect for delighting trick-or-treaters, distributing at school events, or simply sharing with friends and family. Embrace the spirit of DIY and make this Halloween your most creatively festive yet!
Loved these ideas? Leave a comment below!