
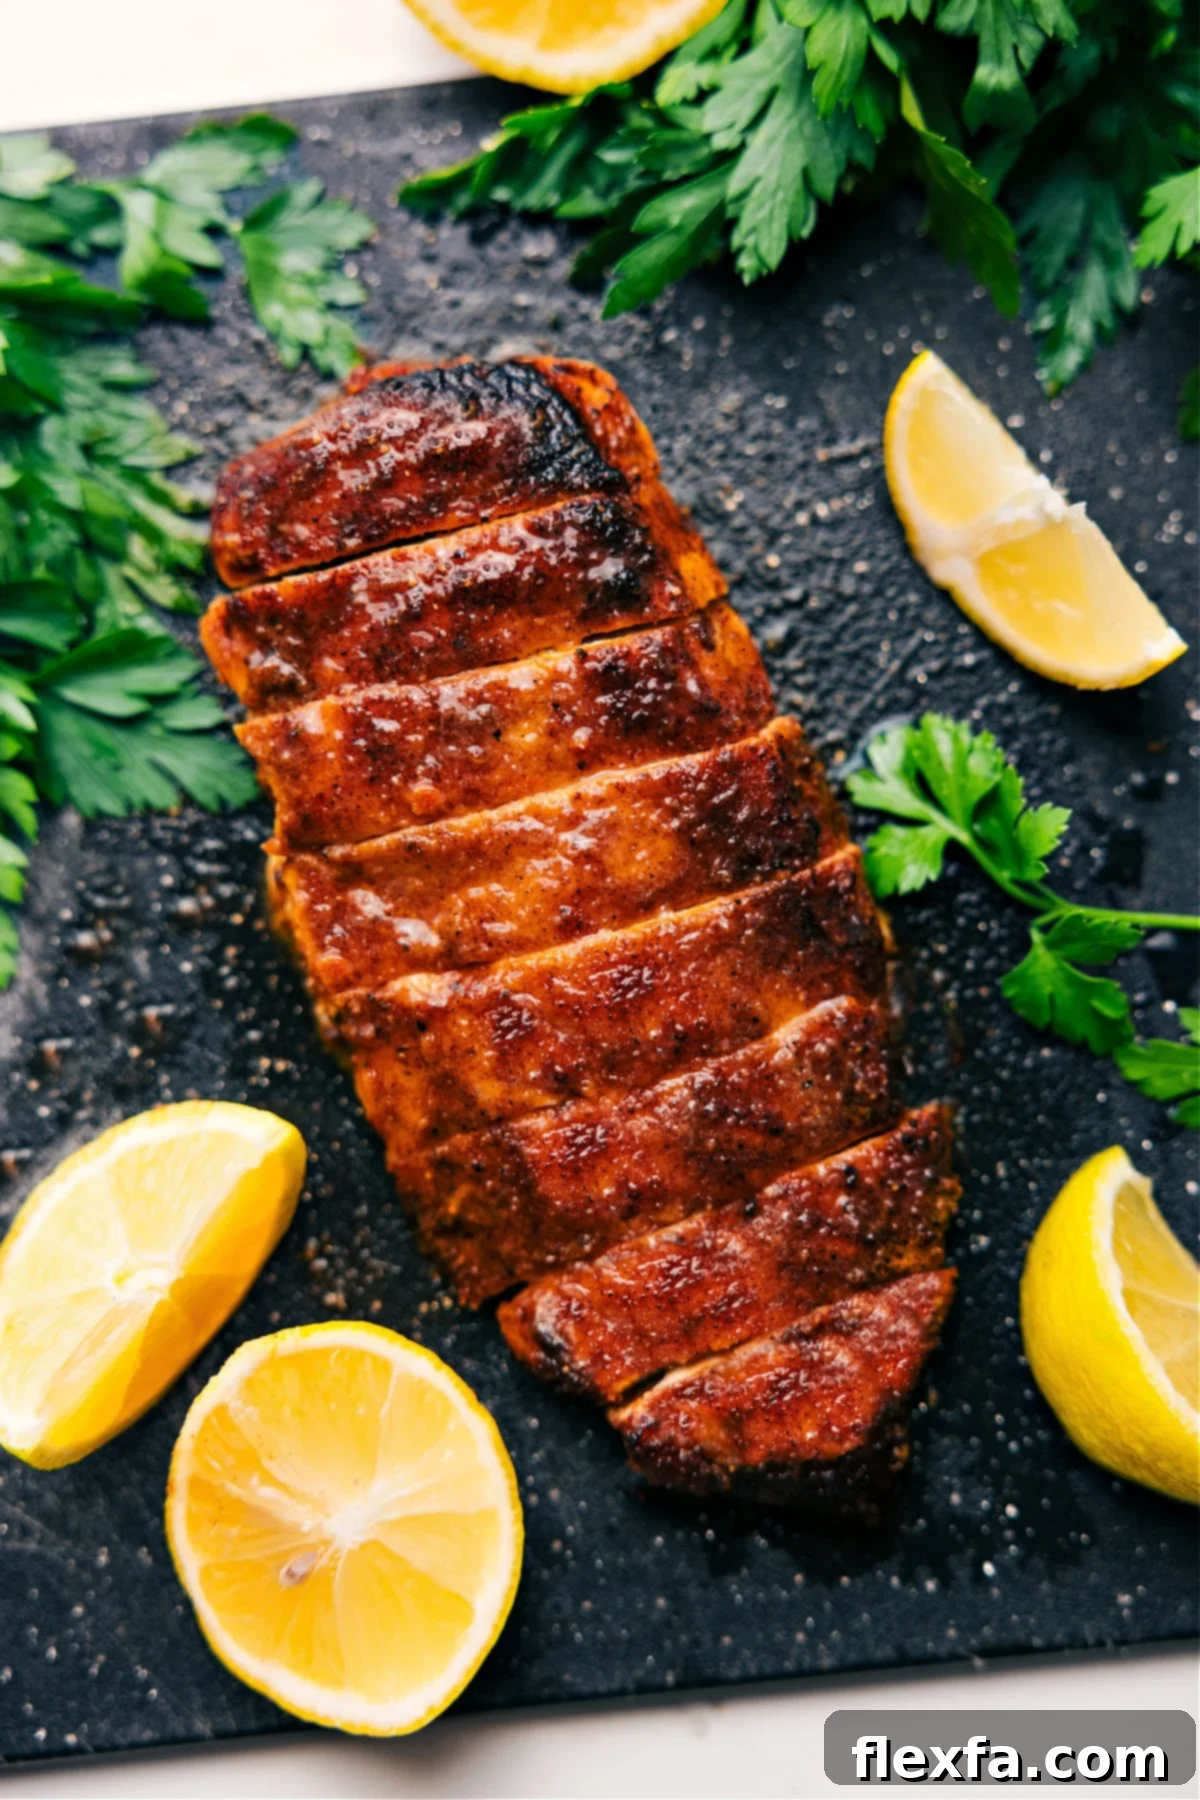
Ultimate Guide to Perfectly Juicy & Flavorful Baked Chicken Breast: Your Go-To Weeknight Meal & Meal Prep Hero
Transform simple boneless, skinless chicken breasts into a truly magnificent meal with this incredibly easy and mouthwatering recipe. Designed for maximum flavor and juiciness, this baked chicken breast is not only perfect for a quick and healthy weeknight dinner but also serves as an indispensable component for your weekly meal prep. Enjoy it fresh out of the oven, or easily shred, chop, or dice it to elevate a myriad of other dishes throughout the week. Say goodbye to dry, bland chicken and hello to consistently delicious results!
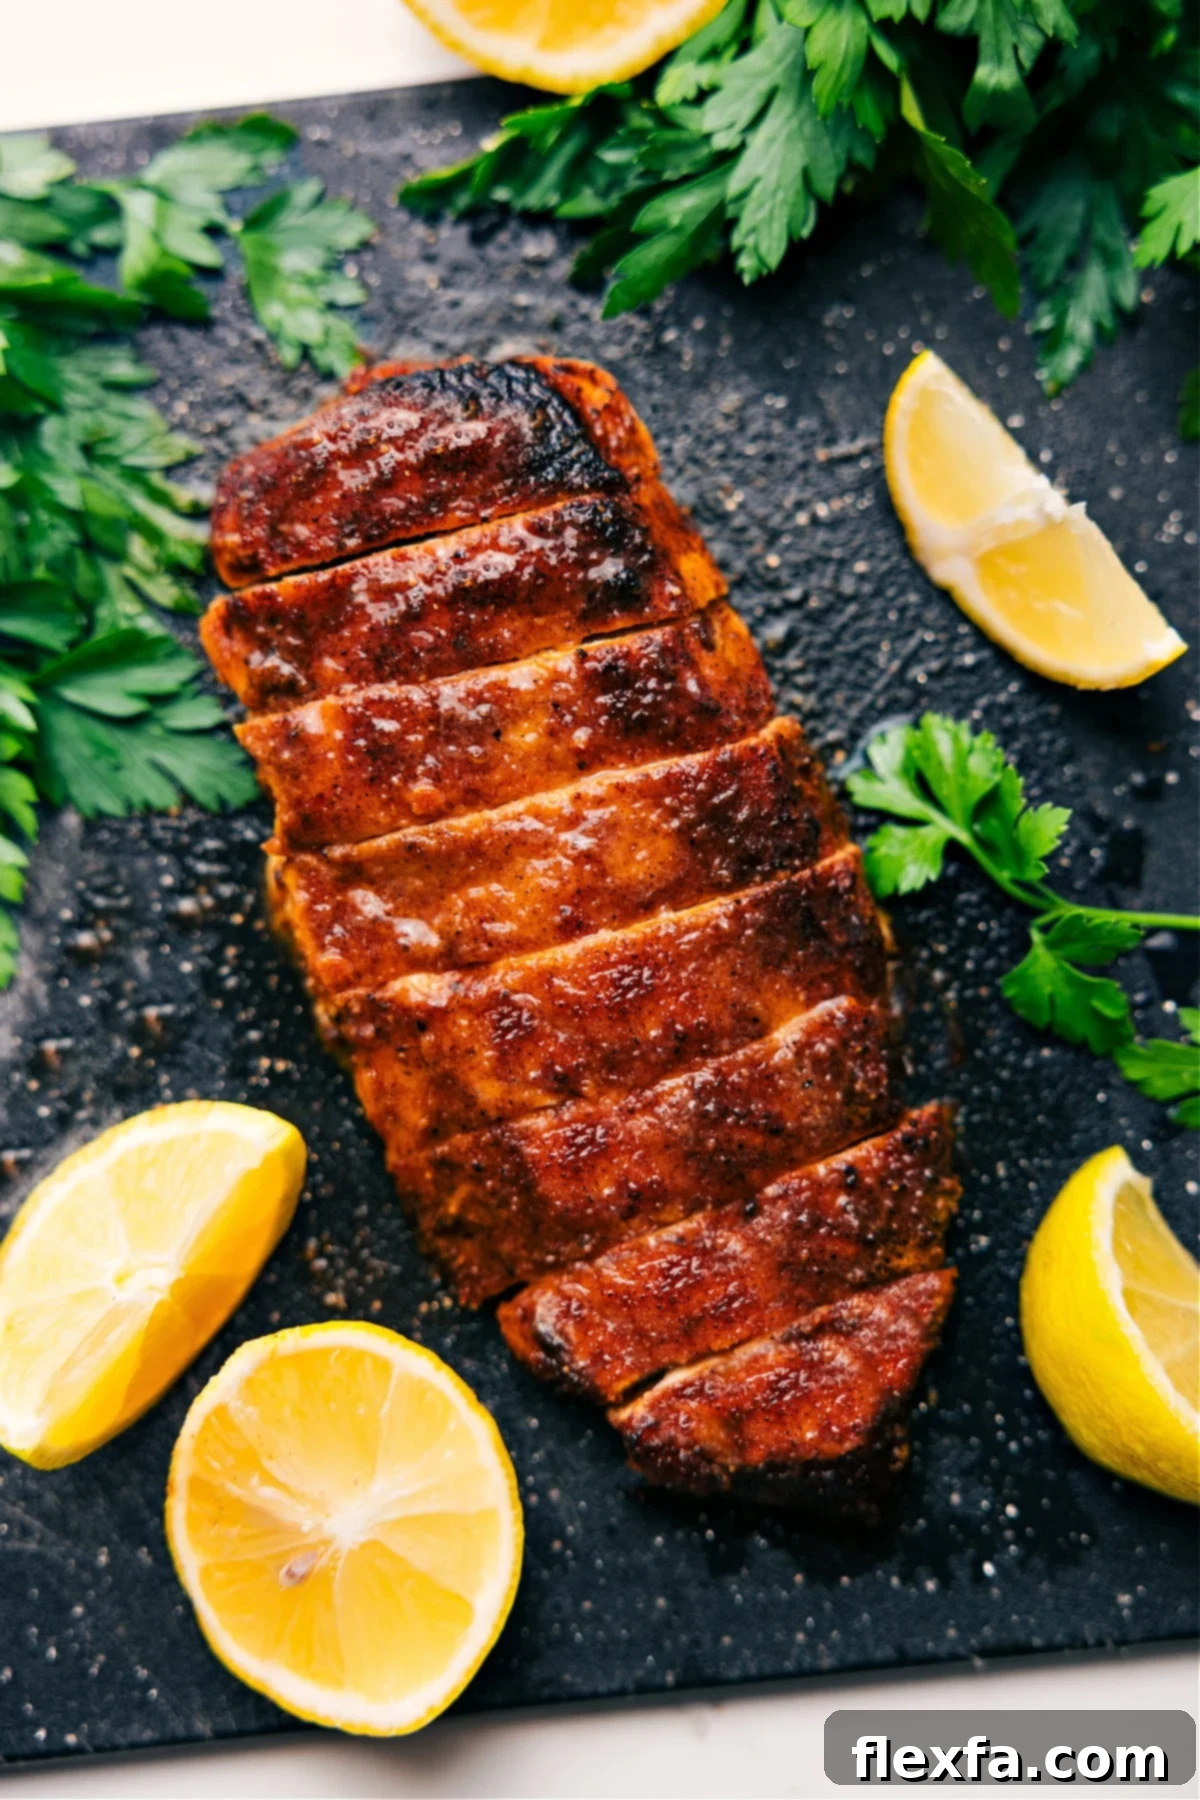
Why You’ll Love This Easy Baked Chicken Breast Recipe
This isn’t just another chicken recipe; it’s a game-changer for anyone seeking a blend of convenience, health, and flavor. Here’s why this baked chicken breast will become a staple in your kitchen:
- Effortlessly Delicious: With minimal prep and everyday seasonings, you’ll achieve restaurant-quality results that burst with savory goodness.
- Consistently Juicy: Our proven method ensures your chicken stays moist and tender, never dry or rubbery. The secret lies in a quick sear and precise baking.
- Incredibly Versatile: From standalone meals to salads, sandwiches, pasta, and more, this chicken is a culinary chameleon, ready to adapt to any dish.
- Perfect for Meal Prep: Cook a batch once and have delicious, high-protein chicken ready for multiple meals throughout your busy week.
- Healthy & Wholesome: Lean protein combined with simple, natural ingredients makes this a nutritious choice for the whole family.
- Quick & Easy Cleanup: Utilizing a single oven-safe skillet means less mess and more time to enjoy your meal.
Mastering the Art of Baked Chicken Breasts
Creating succulent baked chicken breast is far simpler than you might imagine. The key lies in a few strategic steps that lock in moisture and build incredible flavor. We start by seasoning the chicken with a balanced blend of common pantry spices, giving it a delightful aroma and taste profile. Next, a crucial searing step in a hot skillet creates a beautiful golden crust, enhancing its overall texture and depth of flavor. Finally, it’s transferred to the oven to finish cooking perfectly, ensuring it’s tender and juicy from edge to edge. This process guarantees a meal that’s both satisfying and easy to prepare, making it a go-to for busy individuals and families alike.
Beyond the Main Dish: Creative Uses for Your Baked Chicken
While fantastic as a standalone main course with vibrant roasted vegetables or a crisp garden salad, the true magic of this baked chicken breast lies in its adaptability. It’s my absolute favorite base for quick dinners and essential for effective meal prepping. Think beyond the plate! This versatile protein can be transformed into countless dishes throughout your week. Shred it for tacos, chop it for a hearty Cobb salad, dice it for a creamy pasta sauce, or slice it thin for gourmet sandwiches. The possibilities are endless, making sure no delicious bite goes to waste.
Essential Tools for Baking the Perfect Chicken Breast
Achieving consistently tender and juicy baked chicken every time is easier with the right kitchen tools. These aren’t just gadgets; they are key to precision and perfection, helping you avoid common pitfalls like uneven cooking or dry chicken.
- Food Scale: This often-overlooked tool is incredibly valuable. Chicken breasts can vary significantly in size and thickness, leading to uneven cooking. A food scale helps you select or prepare pieces of similar weight, ensuring they cook uniformly. This means no more guessing games about cooking times for different-sized fillets, ultimately contributing to a perfectly cooked batch every time.
- Meat Mallet: The secret weapon for juicy chicken! Pounding the thicker parts of the chicken breast to an even thickness (around 1/2 to 3/4 inch) drastically improves cooking consistency. When the chicken is uniformly thick, all parts cook at the same rate, preventing the thinner edges from drying out while the thicker parts finish cooking. This simple step makes a huge difference in the final texture and tenderness.
- Cast-Iron Skillet: A true workhorse in the kitchen. Searing chicken in a hot cast-iron pan creates a beautiful, flavorful crust that locks in juices, adding an extra layer of deliciousness. The best part? Cast-iron skillets are oven-safe, allowing you to seamlessly transition from stovetop searing to oven baking in the same pan. This not only enhances flavor but also simplifies cleanup, making your cooking process much more efficient.
- Meat Thermometer: Your ultimate guide to perfectly cooked, safe, and juicy chicken. Relying solely on visual cues can lead to overcooked (and dry) or undercooked (and unsafe) chicken. A good meat thermometer removes all guesswork, allowing you to precisely monitor the internal temperature. For chicken, aiming for 160°F (it will rise to 165°F as it rests) guarantees it’s cooked through yet wonderfully juicy. It’s an indispensable tool for any aspiring home cook.
How To Prepare and Bake the Juiciest Chicken Breast: Step-by-Step
Follow these simple steps to ensure your chicken breasts are flavorful, tender, and perfectly cooked every time:
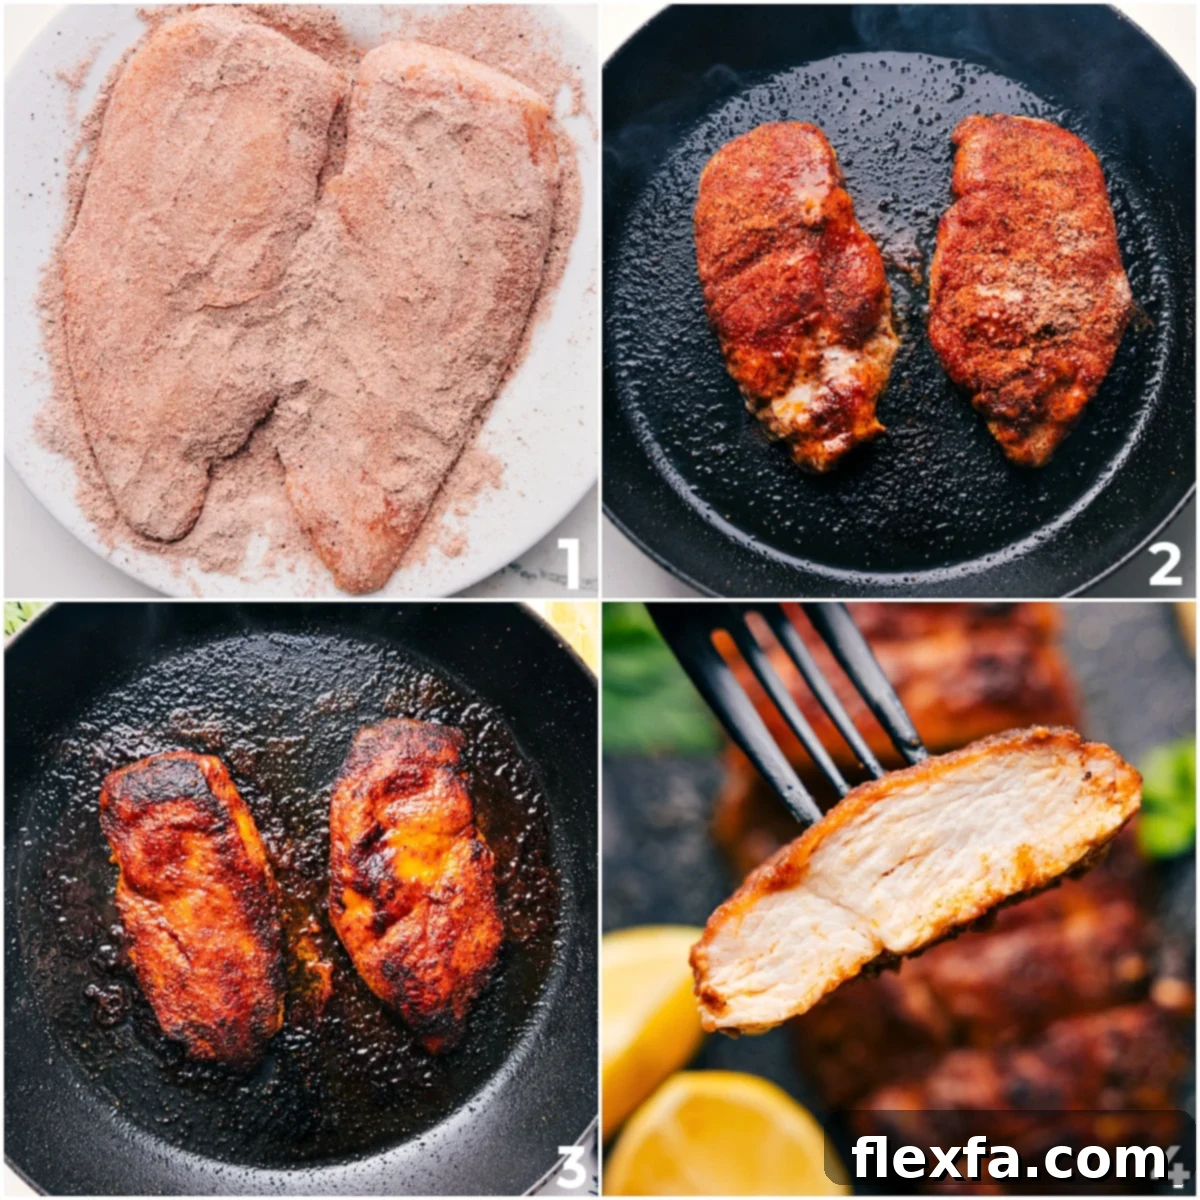
- Prepare Chicken to Even Thickness: Lay your boneless, skinless chicken breasts on a cutting board. Place a piece of plastic wrap or parchment paper over the chicken. Using a meat mallet (or the flat side of a heavy pan), gently pound the thickest part of each chicken breast until the entire piece is of an even thickness, typically around 1/2 to 3/4 inch. This crucial step ensures uniform cooking and maximum juiciness. Pat the chicken dry thoroughly with paper towels to promote better searing.
- Season & Sear for Flavor: In a small bowl, combine your chosen seasonings (brown sugar, paprika, onion powder, garlic powder, dried oregano, salt, and pepper). Drizzle half of the olive oil onto one side of the pounded chicken breasts and rub the seasonings gently into the chicken. Heat your cast-iron skillet over medium-high heat for about a minute. Carefully place the seasoned side of the chicken down into the hot skillet. Immediately drizzle the remaining olive oil and sprinkle the rest of the seasoning onto the unseasoned side. Sear for exactly 5 minutes, allowing a beautiful golden crust to form, which locks in moisture and deepens the flavor.
- Bake to Perfection: After searing, flip the chicken breasts in the skillet. Transfer the skillet directly to your preheated oven (425°F). Bake for approximately 9-15 minutes. The precise cooking time will depend on the thickness of your chicken. The most accurate way to determine doneness is with a meat thermometer: aim for an internal temperature of 160°F. The chicken will continue to cook slightly as it rests, reaching the safe internal temperature of 165°F.
- Rest Before Serving: Once the chicken reaches 160°F, remove the skillet from the oven and immediately transfer the chicken to a clean cutting board. It’s vital to let the chicken rest for at least 5 minutes. This allows the juices to redistribute throughout the meat, ensuring every bite is incredibly tender and flavorful. After resting, slice, shred, or dice as desired and serve.
Meal Prep & Storage Tips
Efficiently store your delicious baked chicken breasts to enjoy throughout the week or for future meals:
- Cool Completely: Always allow the chicken to cool down to room temperature before storing. This prevents condensation from forming, which can lead to soggy chicken and promotes bacterial growth.
- Airtight Container: Store cooled chicken in an airtight container to maintain freshness and prevent it from absorbing other odors in the refrigerator.
- Pre-Prep for Convenience: If you plan to use the chicken in salads, sandwiches, or other recipes, it’s best to slice or shred it before storing. This makes meal assembly much quicker when you’re ready to eat.
- Fridge Storage: Properly stored, baked chicken breasts will remain fresh and delicious in the refrigerator for up to 4 days.
- Freezer Storage: For longer storage, freeze your chicken for 2–3 months. Wrap individual portions tightly in plastic wrap or foil, then place them in a freezer-safe bag or container to prevent freezer burn.
- Reheating Advice: To keep your chicken juicy when reheating, avoid high heat in the microwave, which can dry it out. Instead, gently reheat on the stovetop with a splash of broth or in the oven at a lower temperature (around 300°F) until warmed through.
Versatile Baked Chicken Breast: The Recipe Card

Baked Chicken Breast
This incredibly easy Baked Chicken Breast recipe guarantees juicy, flavorful chicken every single time—perfect for any night of the week. Whether you’re making it for a quick dinner or for efficient meal prep, this recipe is a reliable choice. It works wonderfully in any dish that calls for already cooked chicken!
Recipe adapted from @sammypur on TikTok!
Equipment
- Food scale
- Meat thermometer
- Large cast-iron pan
- Meat mallet
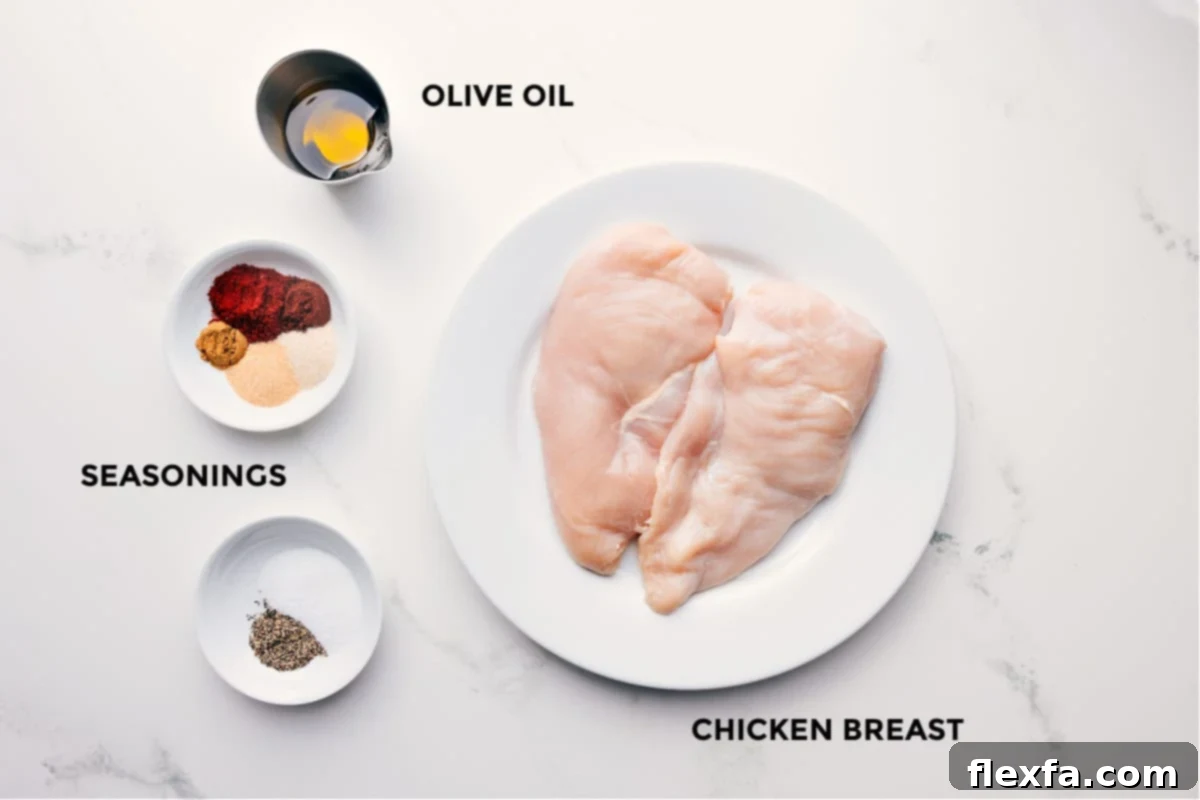
Ingredients
- 1 pound boneless, skinless chicken breasts (look for evenly sized fillets; see note below for cutting larger pieces)
- 3 teaspoons olive oil, divided
- 4 teaspoons light brown sugar
- 1 teaspoon paprika
- 1/2 teaspoon onion powder
- 1/2 teaspoon garlic powder
- 1/2 teaspoon dried oregano
- Salt and pepper, to taste
Instructions
- Preheat Oven & Seasonings: Preheat your oven to 425°F (220°C) and position an oven rack in the center. In a small bowl, thoroughly mix together the brown sugar, paprika, onion powder, garlic powder, dried oregano, and 1/2 teaspoon each of salt and pepper.
- Pound Chicken: Place chicken breasts between two sheets of plastic wrap or parchment paper. Use a meat mallet (or the bottom of a heavy frying pan) to pound the thickest part of each chicken breast until it is uniformly about 1/2 to 3/4 inch thick. This ensures even cooking. Pat the chicken fillets completely dry with paper towels.
- Oil & Season First Side: Drizzle 1-1/2 teaspoons of olive oil evenly over one side of the chicken breasts. Gently rub the oil over the surface. Sprinkle half of the prepared seasoning mix onto the oiled side, pressing it lightly to adhere.
- Sear on Stovetop: If using an oven-safe pan (like cast iron), place it empty on the stove over medium-high heat for 1 minute to get hot. Using tongs, carefully place the seasoned chicken breasts into the hot pan, seasoned-side down. Immediately drizzle the remaining 1-1/2 teaspoons of olive oil and sprinkle the rest of the seasoning mix onto the unseasoned side of the chicken. Sear the chicken for exactly 5 minutes without moving it, allowing a crust to form.
- Bake in Oven: After searing, flip the chicken breasts to the other side. Transfer the entire pan with the chicken into the preheated oven. Bake for 9–15 minutes, or until the internal temperature reaches 160°F (71°C) when measured with a meat thermometer at the thickest part of the breast. (Carryover heat will bring it to the safe 165°F/74°C during resting).
- Rest & Serve: Once cooked, immediately remove the chicken from the oven and transfer it from the hot pan to a clean cutting board to prevent overcooking. Let the chicken rest for 5 minutes before slicing, shredding, or serving. This allows the juices to redistribute, resulting in incredibly moist chicken.
Recipe Notes & Tips
- Even Cooking is Key: For large chicken breasts (e.g., over 8 ounces), consider slicing them in half horizontally to create thinner cutlets. This helps maintain a more even cooking surface and consistent results. Four 6-ounce fillets will typically cook for 5 minutes on the stovetop and about 10 minutes in the oven, but always use a meat thermometer for precise accuracy.
- No Oven-Safe Skillet? No Problem!: If you don’t have a cast-iron or other oven-safe skillet, you can still make delicious baked chicken. Skip the searing step. Instead, rub each side of the chicken breasts with 1-1/2 teaspoons of olive oil and season evenly with the spice mix. Place them on a parchment-lined baking tray and bake in a preheated oven at 375°F (190°C) for 15–20 minutes, or until the internal temperature reaches 160°F (71°C). Remember to transfer the chicken from the hot tray and let it rest for 5 minutes before serving to ensure maximum juiciness.
- Temperature Check: Always use a meat thermometer! Chicken is safe to eat when it reaches an internal temperature of 165°F (74°C). By removing it at 160°F and letting it rest, the temperature will naturally rise to the perfect point, keeping it incredibly juicy.
Nutrition Information (Approximate per serving)
Calories: 173 kcal |
Carbohydrates: 4g |
Protein: 24g |
Fat: 6g |
Saturated Fat: 1g |
Polyunsaturated Fat: 1g |
Monounsaturated Fat: 3g |
Trans Fat: 0.01g |
Cholesterol: 73mg |
Sodium: 133mg |
Potassium: 434mg |
Fiber: 0.1g |
Sugar: 4g |
Vitamin A: 73IU |
Vitamin C: 3mg |
Calcium: 11mg |
Iron: 0.5mg
Nutrition information is automatically calculated and should be used as an approximation.
Flavorful Variations: Fun Ideas to Change Things Up
This basic baked chicken breast recipe is a fantastic canvas for endless flavor combinations. Here are some exciting ways to customize your chicken to suit any craving or meal theme:
- Zesty Lemon Herb Chicken: Brighten things up by adding fresh lemon zest and a generous blend of dried herbs like thyme, rosemary, and parsley to your seasoning mix. Serve with extra lemon wedges for squeezing and a sprinkle of fresh chopped herbs for a vibrant, aromatic meal. This pairs beautifully with light salads or quinoa.
- Spicy Cajun-Style Chicken: For a kick, incorporate a bold Cajun seasoning blend and a pinch of cayenne pepper into your spice rub. Adjust the heat to your preference. This robust flavor profile is perfect served alongside fluffy rice, black beans, or corn on the cob for a comforting, spicy meal.
- Sweet & Tangy Honey Mustard Chicken: Once the chicken is baked and rested, brush it generously with a homemade or quality store-bought Honey Mustard Dressing. The warm chicken will absorb the sauce beautifully, creating a sticky, sweet, and tangy glaze. Excellent with roasted root vegetables or a simple side salad.
- Mediterranean Pesto Chicken: Elevate your chicken with Mediterranean flair. Roast cherry tomatoes alongside your chicken in the oven. After baking, top the warm chicken with fresh mozzarella slices, then quickly broil for about 30 seconds until the cheese is bubbly and melted. Finish with a dollop of vibrant pesto and a sprinkle of fresh basil.
- Themed Seasoning Switches: Easily transform the chicken for different cuisines by swapping out the seasoning mix. Try a vibrant Taco Seasoning for fajitas or taco bowls, or a savory Fajita Seasoning for wraps and burritos. You could also experiment with Italian herbs, Indian curry powder, or Asian-inspired spice blends to match your dinner theme.
Discover More Delicious Chicken Recipes
If you loved this simple yet flavorful baked chicken breast, you’re in for a treat! This versatile protein is a staple in so many fantastic dishes. Explore some of our other favorite chicken recipes that are quick, easy, and bursting with flavor, perfect for expanding your culinary repertoire:
- Quick Chicken Pozole: Enjoy a hearty and flavorful Chicken Pozole ready in just 30 minutes, perfect for a comforting meal.
- Homemade Cashew Chicken: Recreate your favorite takeout with this easy Cashew Chicken recipe, complete with a quick and delicious stir-fry sauce.
- Comforting Chicken Noodle Casserole: A classic family favorite, this Chicken Noodle Casserole features a creamy base and a delightful crunchy topping.
- Fresh Teriyaki Chicken Salad: Light and refreshing, this Teriyaki Chicken Salad comes together quickly with a simple three-ingredient dressing.
- Hearty Chicken Curry Rice Soup: A warming and wholesome Chicken Curry Rice Soup packed with nourishing vegetables, perfect for chilly evenings.
Frequently Asked Questions About Baked Chicken Breast
Q: Can I use frozen chicken breasts for this recipe?
A: While fresh chicken breasts are always recommended for the best texture and juiciness, you can use frozen chicken. However, make sure to thaw them completely in the refrigerator overnight before proceeding with the recipe. Attempting to cook chicken from frozen will drastically alter cooking times and may result in uneven cooking or a dry texture.
Q: How can I tell if my chicken is fully cooked without a thermometer?
A: A meat thermometer is highly recommended for accuracy and food safety. Without one, you can make an educated guess by cutting into the thickest part of the chicken breast. The juices should run clear, and the meat should be opaque white throughout, with no pink remaining. However, this method can release juices and potentially dry out the chicken, so a thermometer is always the superior choice.
Q: My chicken always turns out dry. What am I doing wrong?
A: Dry chicken is a common complaint, often due to overcooking or uneven cooking. Key tips to avoid this include: 1) Pounding chicken to an even thickness; 2) Not skipping the sear, which locks in moisture; 3) Using a meat thermometer to pull the chicken off the heat at precisely 160°F; and 4) Allowing the chicken to rest for 5-10 minutes after cooking to reabsorb juices.
Q: Can I prepare the chicken ahead of time?
A: Yes! You can pound and season the chicken breasts up to 24 hours in advance. Store them covered in the refrigerator. This can be a great time-saver for busy weeknights, allowing you to simply sear and bake when you’re ready to cook.
Loved this recipe or have your own tips for juicy baked chicken? We’d love to hear from you!
Leave a comment below and share your thoughts!